Create a React Native Image Recognition App with Google Vision API
February 13th, 2019 | By Aman Mittal | 8 min read

Google Vision API is a machine learning tool that can classify details from an image provided as input into thousands of different categories with pre-trained API models. It offers these pre-trained models through an API, and the categories are detected as individual objects within the image.
In this tutorial, you are going to learn how to integrate Google Cloud Vision API in a React Native application and make use of real-time APIs. You can find the complete code inside this GitHub repo.
Installing Expo
If you are not familiar with Expo, this tutorial can be a good start. Expo provides tools to create and publish React Native applications with minimal effort.
Earlier, React Native had something called create-react-native-app, which is now merged with Expo-Cli and is an official way to build a React Native app.
To create your React Native app, install Expo as a global npm module.
npm install -g expo-cli
Once the command line interface for Expo is installed in your local development environment, you must run the following command to generate a project.
expo-cli init google-vision-rn-demo
It will ask you which template to use; choose the option blank template rather than tabs template.
We only need a single screen in our application for demonstration purposes. Finally, you will be prompted to write the project name. Type it and hit enter. Then, it will start installing dependencies.
Once the project is created, traverse into the project directory. If you need help with this setup, refer to the Expo documentation.
Setting Up Firebase
In this section, we will set up a new Firebase project. It will provide us with the database and backend service, and we do not have to write our backend for this tutorial, hence saving time and focusing on what we need to learn.
For simplicity, we will make the Firebase project data public for demonstration purposes.
Visit Firebase and sign in with your Google ID. Once signed in, click on a new project and enter a name. Lastly, hit the Create Project button.
The next step is to ensure the setup of Firebase database rules to allow us to upload image files through the app. From the left-hand side menu in the Firebase console, open the Database tab, choose Rules, and modify them:
service cloud.firestore {
 match /databases/{database}/documents {
   match /{document=**} {
     allow read, write;
   }
 }
}
We need to install the Firebase SDK in our React Native app. Run the following command from your terminal.
npm install -S firebase
Create a folder called config. Inside it, create a new file called environment.js. This file will contain all the keys to bootstrap and hook Firebase with our application.
//environment.js
var environments = {
  staging: {
    FIREBASE_API_KEY: 'XXXX',
    FIREBASE_AUTH_DOMAIN: 'XXXX',
    FIREBASE_DATABASE_URL: 'XXXX',
    FIREBASE_PROJECT_ID: 'XXXX',
    FIREBASE_STORAGE_BUCKET: 'XXXX',
    FIREBASE_MESSAGING_SENDER_ID: 'XXXX',
    GOOGLE_CLOUD_VISION_API_KEY: 'XXXX'
  },
  production: {
    // Warning: This file still gets included in your native binary and is not a secure way to store secrets if you build for the app stores. Details: https://github.com/expo/expo/issues/83
  }
};

function getReleaseChannel() {
  let releaseChannel = Expo.Constants.manifest.releaseChannel;
  if (releaseChannel === undefined) {
    return 'staging';
  } else if (releaseChannel === 'staging') {
    return 'staging';
  } else {
    return 'staging';
  }
}
function getEnvironment(env) {
  console.log('Release Channel: ', getReleaseChannel());
  return environments[env];
}
var Environment = getEnvironment(getReleaseChannel());
export default Environment;
The Xs are the values of each key you have to fill in.
Ignore the value for Key GOOGLE_CLOUD_VISION_API_KEY, as we will get back to it in the next section. Other values for their corresponding keys can be attained at the Firebase console.
You can get these values by visiting the Firebase console. Click the gear icon next to Project Overview in the left-hand side menu bar and go to the Project settings section. There are ways in Expo where you do not have to publish your secret keys when deploying the app or uploading the codebase on a site like GitHub.
The initial step we recommend is to add this file inside .gitignore.
Create another file called firebase.js inside the config directory. We will use this file in the main application to send requests to upload an image to the Firebase storage. Also, note that we are importing environment.js in it to access Firebase keys.
// firebase.js
import * as firebase from 'firebase';

firebase.initializeApp({
  apiKey: Environment['FIREBASE_API_KEY'],
  authDomain: Environment['FIREBASE_AUTH_DOMAIN'],
  databaseURL: Environment['FIREBASE_DATABASE_URL'],
  projectId: Environment['FIREBASE_PROJECT_ID'],
  storageBucket: Environment['FIREBASE_STORAGE_BUCKET'],
  messagingSenderId: Environment['FIREBASE_MESSAGING_SENDER_ID']
});

export default firebase;
Getting Google Cloud Vision API Key
To use a Google Cloud Platform service, you need a Gmail account. Once you are signed in from your Gmail ID, you can visit the Google Cloud Console. The next step is to create a new project.
Click select a project from the drop-down menu and then click new project. Enter the name of your project and then click Create. Once you’ve created the project, we are placed back into the main console page again and then need to select our newly created project.
The next step in this process is to get your API key. This you can get by clicking on the console and moving over to the Dashboard section and under that choose Enable APIs and Services.
Then type vision in the search as shown below and then click Vision API.
Lastly, click Enable like below: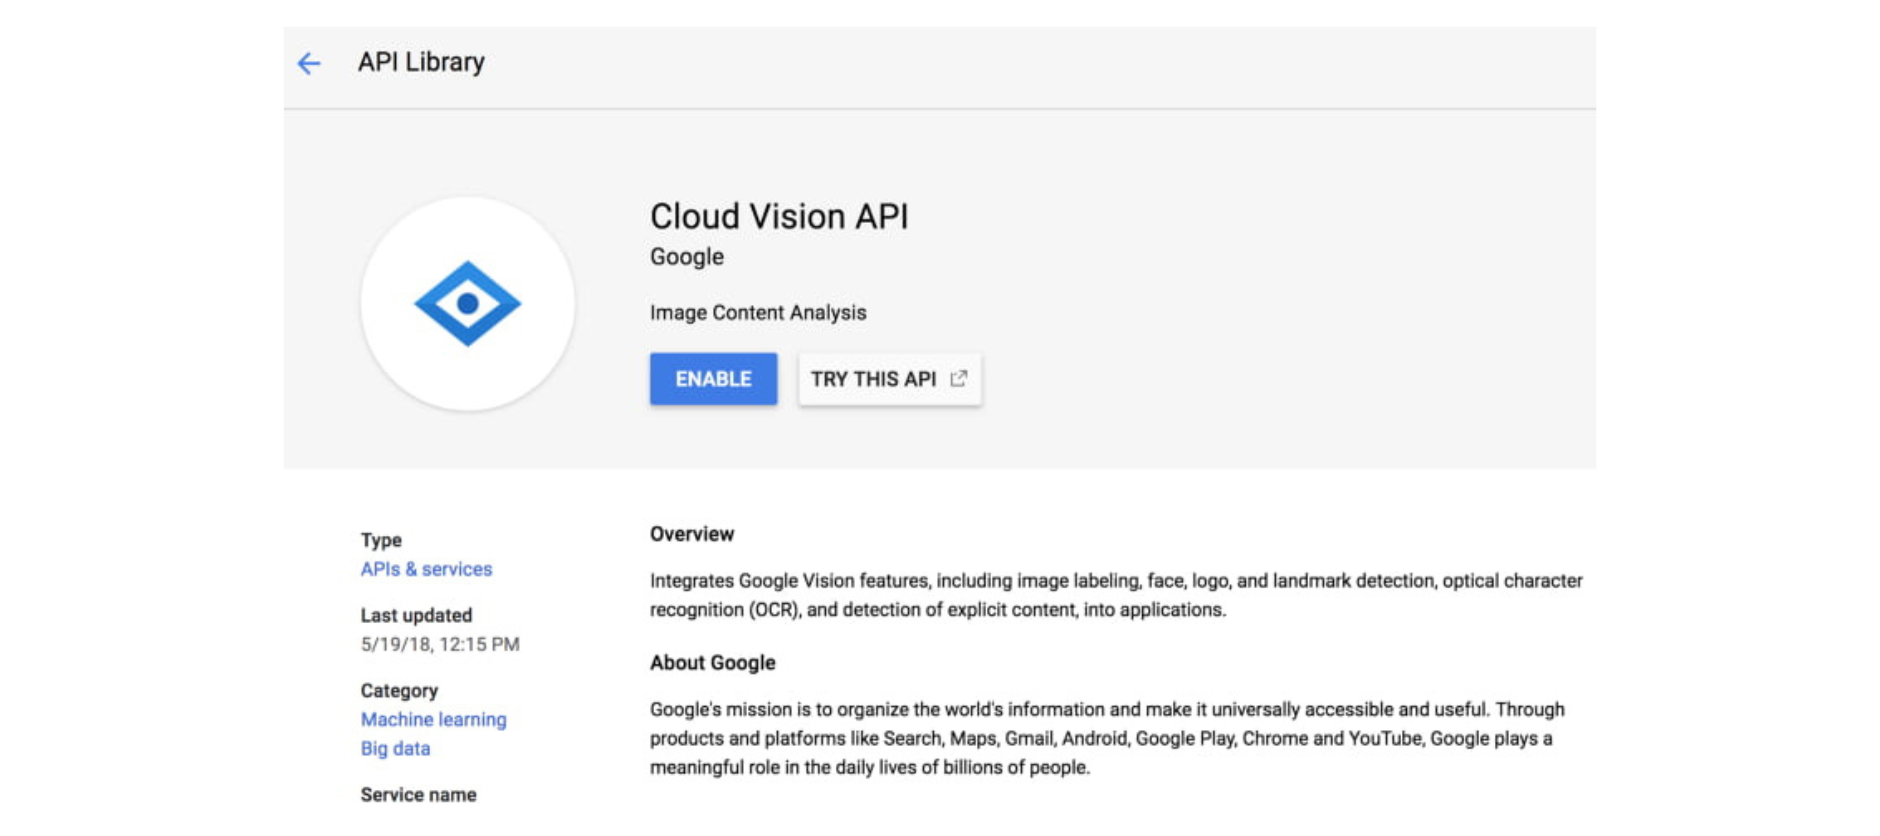
In order to complete this process of enabling Vision API services, you are required to add billing information (if you haven't done so already) to your Google Cloud Platform account.
Your URL in the dashboard will look like this: /APIs/dashboard?project=FIREBASE-PROJECT-ID&folder&organizationId.
Once you are at the below screen, click on the Credentials section from the left-hand side menu and create a new API key if there isn't any click on the button Create Credentials and then API Key.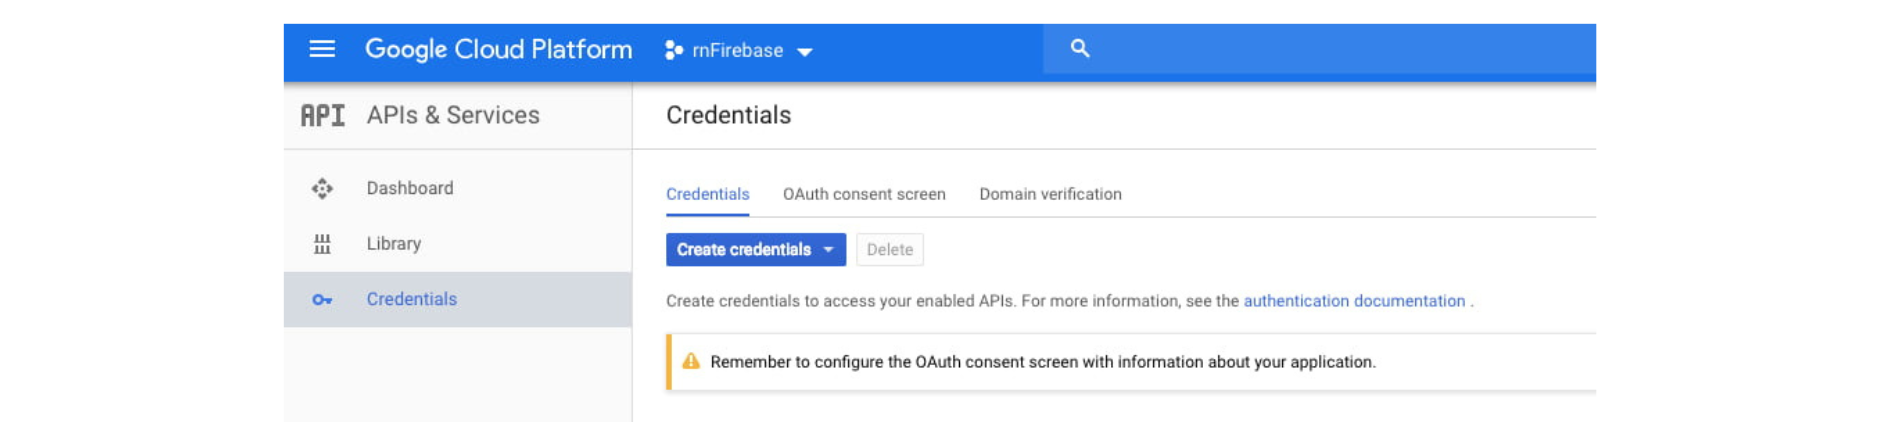
Once you have created your API key, it is time to add it in the file environment.js for the key GOOGLE_CLOUD_VISION_API_KEY.
That's it. Setting up the APIs is complete. We can now move on to work on the app itself.
Building The App
To get started, we need to install an npm package called uuid to create a unique blob for the image that is going to be uploaded on the Firebase storage service.
Run the command npm install --save uuid. Next, open App.js and paste the code.
Note that most of the source code for accessing and uploading to Firebase is taken from an example of using Expo with Firebase. We are going to explain below the bits that are essential to connect and run Firebase. First, let us start by understanding what uploadImageAsync is doing.
async function uploadImageAsync(uri) {
  const blob = await new Promise((resolve, reject) => {
    const xhr = new XMLHttpRequest();
    xhr.onload = function() {
      resolve(xhr.response);
    };
    xhr.onerror = function(e) {
      console.log(e);
      reject(new TypeError('Network request failed'));
    };
    xhr.responseType = 'blob';
    xhr.open('GET', uri, true);
    xhr.send(null);
  });

  const ref = firebase
    .storage()
    .ref()
    .child(uuid.v4());
  const snapshot = await ref.put(blob);

  blob.close();

  return await snapshot.ref.getDownloadURL();
}
As shown in the above snippet, the uploadImageAsync function uploads the image by creating a unique image ID or blob with the help of uuid. It also uses XHR to send a request to the Firebase storage to upload the image.
We are also defining a default state in the App component and asking for User Permissions for both using the camera roll or gallery or taking a photo from the device's camera as shown in the code snippet below.
state = {
    image: null,
    uploading: false,
    googleResponse: null
  };

  async componentDidMount() {
    await Permissions.askAsync(Permissions.CAMERA_ROLL);
    await Permissions.askAsync(Permissions.CAMERA);
 }
The Button in our App component publishes the image to Google's Cloud Vision API.
<Button
  style={{ marginBottom: 10 }}
  onPress={() => this.submitToGoogle()}
  title="Analyze!"
/>
The submitToGoogle method is what sends requests and communicates with the API to fetch the result when the button Analyze is pressed by the user.
submitToGoogle = async () => {
   try {
     this.setState({ uploading: true });
     let { image } = this.state;
     let body = JSON.stringify({
       requests: [
         {
           features: [
             { type: "LABEL_DETECTION", maxResults: 10 },
             { type: "LANDMARK_DETECTION", maxResults: 5 },
             { type: "FACE_DETECTION", maxResults: 5 },
             { type: "LOGO_DETECTION", maxResults: 5 },
             { type: "TEXT_DETECTION", maxResults: 5 },
             { type: "DOCUMENT_TEXT_DETECTION", maxResults: 5 },
             { type: "SAFE_SEARCH_DETECTION", maxResults: 5 },
             { type: "IMAGE_PROPERTIES", maxResults: 5 },
             { type: "CROP_HINTS", maxResults: 5 },
             { type: "WEB_DETECTION", maxResults: 5 }
           ],
           image: {
             source: {
               imageUri: image
             }
           }
         }
       ]
     });
     let response = await fetch(
       "https://vision.googleapis.com/v1/images:annotate?key=" +
         Environment["GOOGLE_CLOUD_VISION_API_KEY"],
       {
         headers: {
           Accept: "application/json",
           "Content-Type": "application/json"
         },
         method: "POST",
         body: body
       }
     );
     let responseJson = await response.json();
     console.log(responseJson);
     this.setState({
       googleResponse: responseJson,
       uploading: false
     });
   } catch (error) {
     console.log(error);
   }
 };
}
The Vision API uses HTTP Post request as a REST API endpoint to perform data analysis on images you send in the request. This is done via t/v1/images:annotate.
To authenticate each request, we need the API key. The body of this POST request is in JSON format. For example:
{
  "requests": [
    {
      "image": {
        "content": "/9j/7QBEUGhvdG9...image contents...eYxxxzj/Coa6Bax//Z"
      },
      "features": [
        {
          "type": "LABEL_DETECTION",
          "maxResults": 1
        }
      ]
    }
  ]
}
You can change the value of maxResults for every category. The response from the Vision API is also in JSON format.
"labelAnnotations": Array [
 Object {
   "description": "water",
   "mid": "/m/0838f",
   "score": 0.97380537,
   "topicality": 0.97380537,
 },
 Object {
   "description": "waterfall",
   "mid": "/m/0j2kx",
   "score": 0.97099465,
   "topicality": 0.97099465,
 },
 Object {
   "description": "nature",
   "mid": "/m/05h0n",
   "score": 0.9594912,
   "topicality": 0.9594912,
 }
]
The above result can be viewed in the terminal from Expo logs.
If you visit the storage section in Firebase, you can notice that each image is stored with a name of base64 binary string.
If you have a real device, just download the Expo client, scan the QR code, and then you can try the Take a Photo feature inside the application.
Conclusion
In this tutorial, we’ve shown you how to integrate Firebase storage services and use a machine learning API such as Google's Vision API with a React Native and Expo application.
If you're building React Native apps with sensitive logic, be sure to protect them against code theft and reverse engineering.
Jscrambler
The leader in client-side Web security. With Jscrambler, JavaScript applications become self-defensive and capable of detecting and blocking client-side attacks like Magecart.
View All ArticlesMust read next
Communicating Between Vue 2 Components and Google Maps
Vue.js is a powerful JavaScript framework. Learn how to display a Google Map which asynchronously updates across different parts of the page with Vue.
September 21, 2018 | By Connor Lech | 9 min read
Creating a Sales Dashboard Using Angular and Google Charts
The Google Charts service enables you to create dynamic dashboards in your own apps. Learn how to create a sales dashboard using Angular 7!
May 8, 2019 | By Jay Raj | 9 min read
