How To Use WebViews in a React Native App
August 1st, 2019 | By Aman Mittal | 9 min read

WebViews are often used to embed or redirect a web application or page inside a React Native app. This need might appear to React Native developers.
A community-maintained module, WebViews in React Native is the only way to let the user visit external links within an iOS or Android application. The WebView component in React Native core first became available in React Native version 0.57.x.
In this tutorial, you will learn how to utilize a primary WebView component using react-native-webview, the official cross-platform module to attain the functionality.
After understanding how a simple WebView component works, you will leverage react-navigation to showcase a pragmatic approach that can be useful in real-time React Native applications.
You will find the complete code for this tutorial in this GitHub repository.
Requirements
To follow this tutorial, make sure you have the following installed:
Nodejs >=8.x.x with npm or yarn installed as a package manager
Getting Started
To start, you first have to initialize a new React Native project.
Run the following command to create a new project and then navigate inside the generated directory. Note that, by default, react-native-cli uses yarn as the package manager.
# to generate a project directory
react-native-cli init RNWebviewsDemo

# navigate inside the project directory
cd RNWebViewsDemo
To use a WebView component, you have to install the react-native-webview package. Also, make sure you link the native bindings with the newly installed dependency.
# to install
yarn add react-native-webview

# to link
react-native link react-native-webview
An iOS application does not require any further steps to make this work. For Android platforms version 6.x.x and above, you also have to open android/gradle.properties and add the following two lines.
android.useAndroidX=true
android.enableJetifier=true
Once the dependency installation is done, let us run the application. We are going to use an iOS simulator for this tutorial. If you are on Windows or Linux-based operating systems, you can use Android Studio.
Run the command as stated below to open the boilerplate application that comes with react-native-cli.
# for Mac users
react-native run-ios

# for Windows/Linux users
react-native run-android
The following screen will welcome you: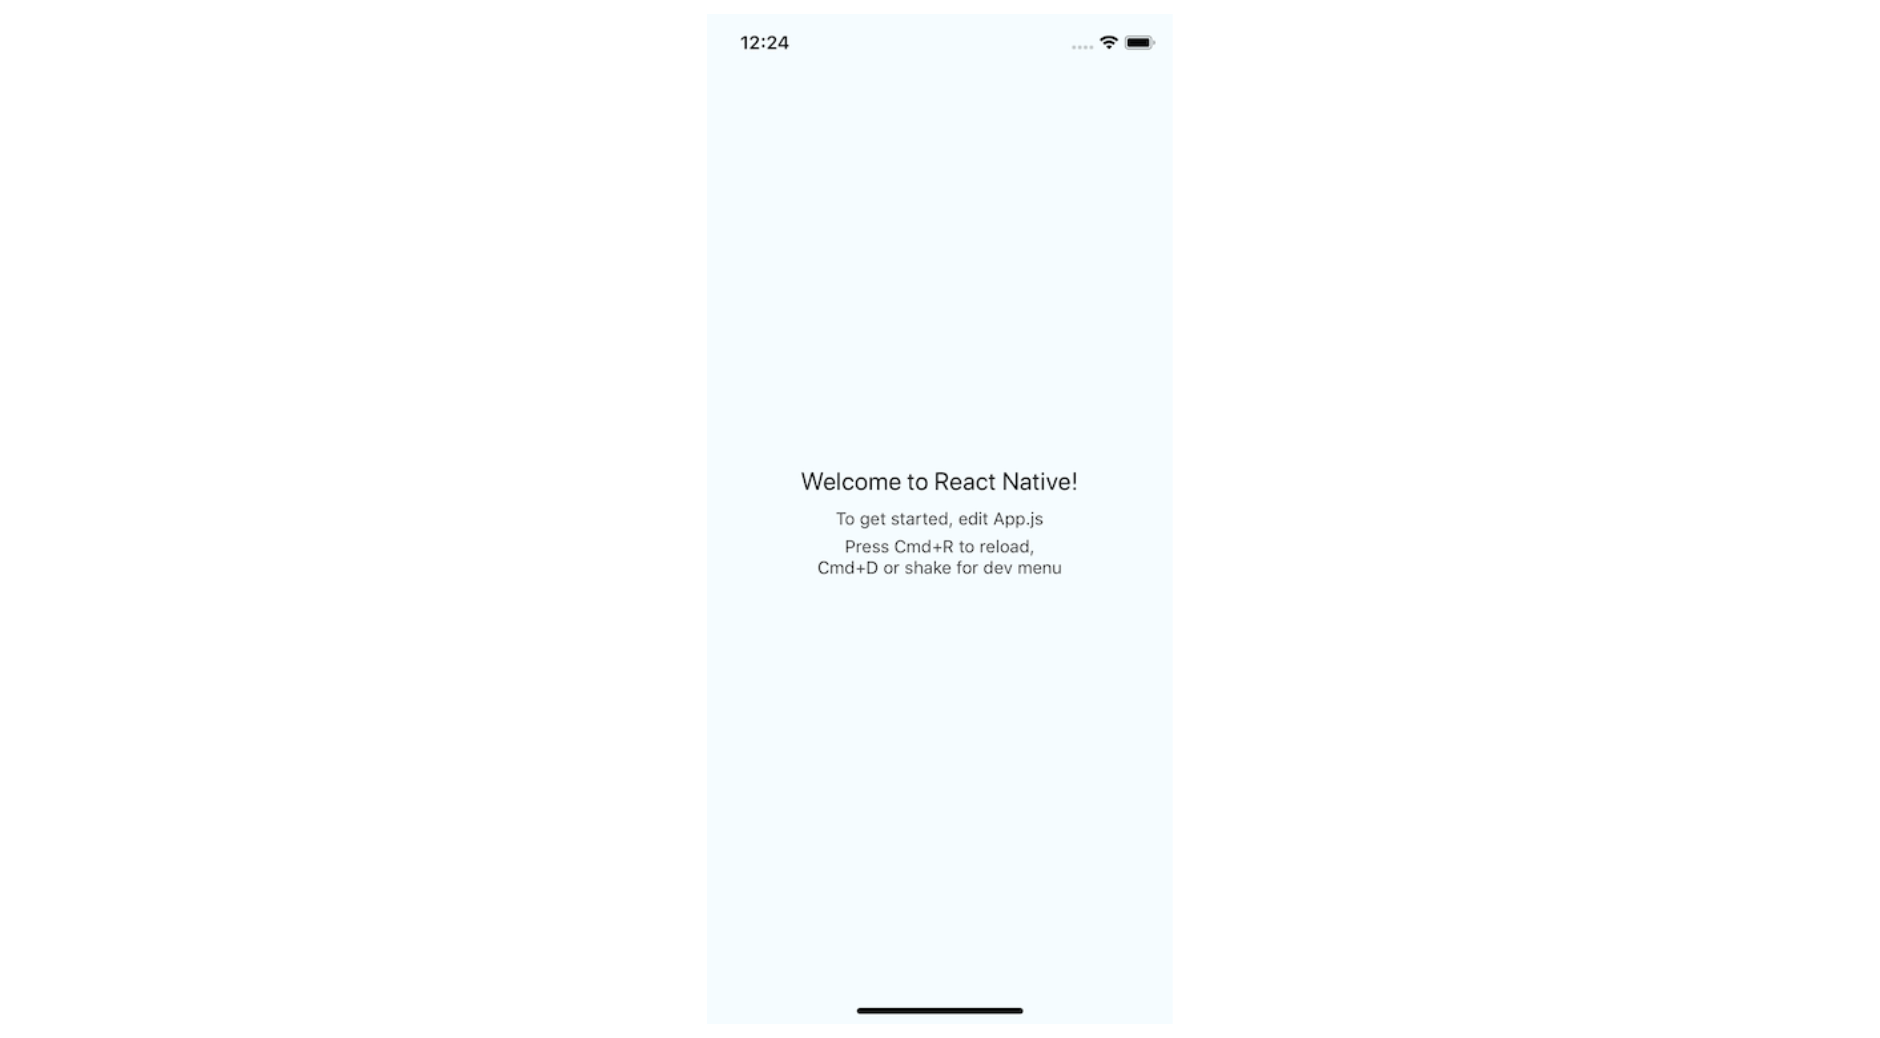
A Simple WebView
Let us start by opening and modifying the App.js file. In this file, import the WebView component from react-native-webview.
import React, { Component } from 'react'
import WebView from 'react-native-webview'

export default class App extends Component {
  render() {
    return <WebView source={{ uri: 'https://blog.jscrambler.com' }} style={{ marginTop: 20 }} />
  }
}
The WebView component requires a source prop. This prop loads the static HTML or a URI (which is the current case if you look closely at the above snippet).
A URI is a remote location for a web page to exist. A static HTML will be an internal HTML file that embeds some content to display. The style prop is basic React Native inline styling that allows you to customize a WebView.
If your simulator is still running, you will get the following result.
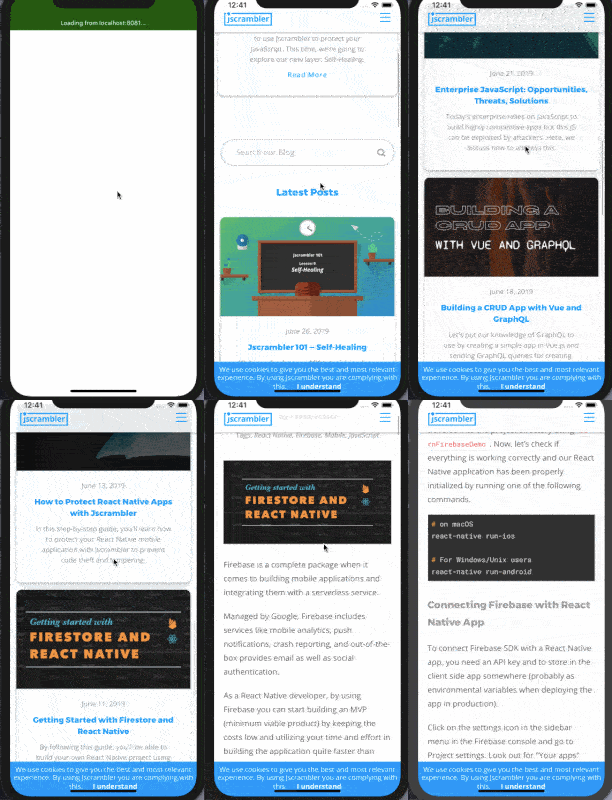
In the above demo, you can see that the simplest WebView component you wrote earlier works. It loads the complete website, but there are some flaws.
First, it does not have a navigation button to navigate back to the application.
Second, it does not have a loading indicator that demonstrates that the web page is still loading.
From the next section onwards, you are going to add these two functionalities.
Setting up react-navigation
To add a navigator to the current React Native application, you have to install the following dependencies and link them.
# to install
yarn add react-navigation react-native-gesture-handler

# to link
react-native link react-native-gesture-handler
Again, no further steps are required to make the react-navigation library work with iOS; but with Android, you have to make the following modifications inside the file android/app/src/main/java/com/rnwebviewsdemo/MainActivity.java.
After other import statements, add the following snippet.
import com.facebook.react.ReactActivityDelegate;
import com.facebook.react.ReactRootView;
import com.swmansion.gesturehandler.react.RNGestureHandlerEnabledRootView;
Then, in the same file, inside the class MainActivity add the following snippet.
@Override
 protected ReactActivityDelegate createReactActivityDelegate() {
   return new ReactActivityDelegate(this, getMainComponentName()) {
     @Override
     protected ReactRootView createRootView() {
     return new RNGestureHandlerEnabledRootView(MainActivity.this);
     }
   };
 }
That's it for setting up the react-navigation library.
Create a StackNavigator
Now, at the root of the project directory, create a folder called navigation. Inside this folder, create a new file called AppNavigator.js. This file is going to be responsible for initializing screens and creating Stack Navigator.
Add the import statements that are going to help construct a stack navigator.
import React from 'react'
import { createStackNavigator, createAppContainer } from 'react-navigation'
import Home from '../screens/Home'

const HomeStack = createStackNavigator({
  Home: {
    screen: Home,
    navigationOptions: ({ navigation }) => ({
      title: 'Home',
      headerTintColor: 'blue'
    })
  }
})

const AppContainer = createAppContainer(HomeStack)

export default AppContainer
In the above snippet, you are using the createStackNavigator function to create a stack-based navigation flow. This function takes a route configuration object and an options object and returns a React component.
Right now, it has only one screen that will display some buttons to navigate to a specific web view. You are going to add the business logic behind HomeScreen in the next section.
Stack Navigation provides a way to transit between screens. This mechanism works quite similarly to how a web application works in a web browser. A web app either pushes (next page) or pops (go back) when navigating between different web pages in the browser. Similarly, different screens can be used to either push or pop between in a React Native application.
Each route is expected to have a screen name. For example, in the above snippet, there is a Home route with the same screen name. This screen name is provided using the attribute title that is coming from navigationOptions. To modify the presentation of a screen in the react-navigation library, options like these are used.
To understand this better, note the two attributes you are currently providing in the above snippet: title and headerTintColor for the Home screen. Later, you will have to define the screen to display Web View. You will have similar options for that second screen but with different properties.
Lastly, open the App.js file to add the AppContainer. The App component in any React Native application is always the entry point. To make navigation work, you have to modify the file, as shown below.
import React from 'react'
import AppContainer from './navigation/AppNavigator'

export default function App() {
  return <AppContainer />
}
Adding a Home Screen
Create a new directory called screens with a file name Home.js. This file will represent the first or initial screen whenever the application starts.
import React, { Component } from 'react'
import { View, Text, StyleSheet } from 'react-native'

class Home extends Component {
  render() {
    return (
      <View style={styles.container}>
        <Text style={styles.text}>Home Screen</Text>
      </View>
    )
  }
}

const styles = StyleSheet.create({
  container: {
    flex: 1,
    backgroundColor: '#fff',
    alignItems: 'center',
    justifyContent: 'center'
  },
  text: {
    color: '#333',
    textAlign: 'center'
  }
})

export default Home
So far, it is a simple React Native component that displays a text field. Go to the simulator to check it.
Now, as the Home screen component is working, you can start working on the main application. Start by defining a state object that contains some URLs in the form of an array inside the Home component.
state = {
  links: [
    { title: 'Jscrambler Blog', link: 'https://blog.jscrambler.com' },
    { title: 'My Portfolio', link: 'https://amanhimself.dev' }
  ]
}
Each URL has a title that will be displayed. The next step is to map this array to display different buttons. These buttons will then point to the correct URL, and that URL will be rendered through a WebView component. Here is the complete code for the Home component.
class Home extends Component {
  state = {
    links: [
      { title: 'JScrambler Blog', link: 'https://blog.jscrambler.com' },
      { title: 'My Portfolio', link: 'https://amanhimself.dev' }
    ]
  }

  handleButtonPress(item) {
    const { title, link } = item
    this.props.navigation.navigate('Browser', { title, link })
  }

  render() {
    return (
      <View style={styles.container}>
        <View style={styles.list}>
          {this.state.links.map((item, index) => (
            <TouchableOpacity
              key={index}
              onPress={() => this.handleButtonPress(item)}
              style={styles.button}
            >
              <Text style={styles.text}>{item.title}</Text>
            </TouchableOpacity>
          ))}
        </View>
      </View>
    )
  }
}

const styles = StyleSheet.create({
  container: {
    flex: 1,
    backgroundColor: '#fff',
    alignItems: 'center',
    justifyContent: 'center'
  },
  buttonList: {
    flex: 1,
    justifyContent: 'center'
  },
  button: {
    margin: 10,
    backgroundColor: '#356bca',
    borderRadius: 5,
    padding: 10
  },
  text: {
    color: '#fff',
    textAlign: 'center'
  }
})

export default Home
The handleButtonPress event takes each object from the state and uses props.navigation.navigate it figures out that when the button is pressed, the app user has to be navigated to the next screen or route called Browser. This is where react-navigation comes into use.
When navigating to the next screen, you are also passing the link and the title of each web view from the state. These values can be easily obtained in the Browser screen using navigation parameters.
You will get the following result in the simulator running the application.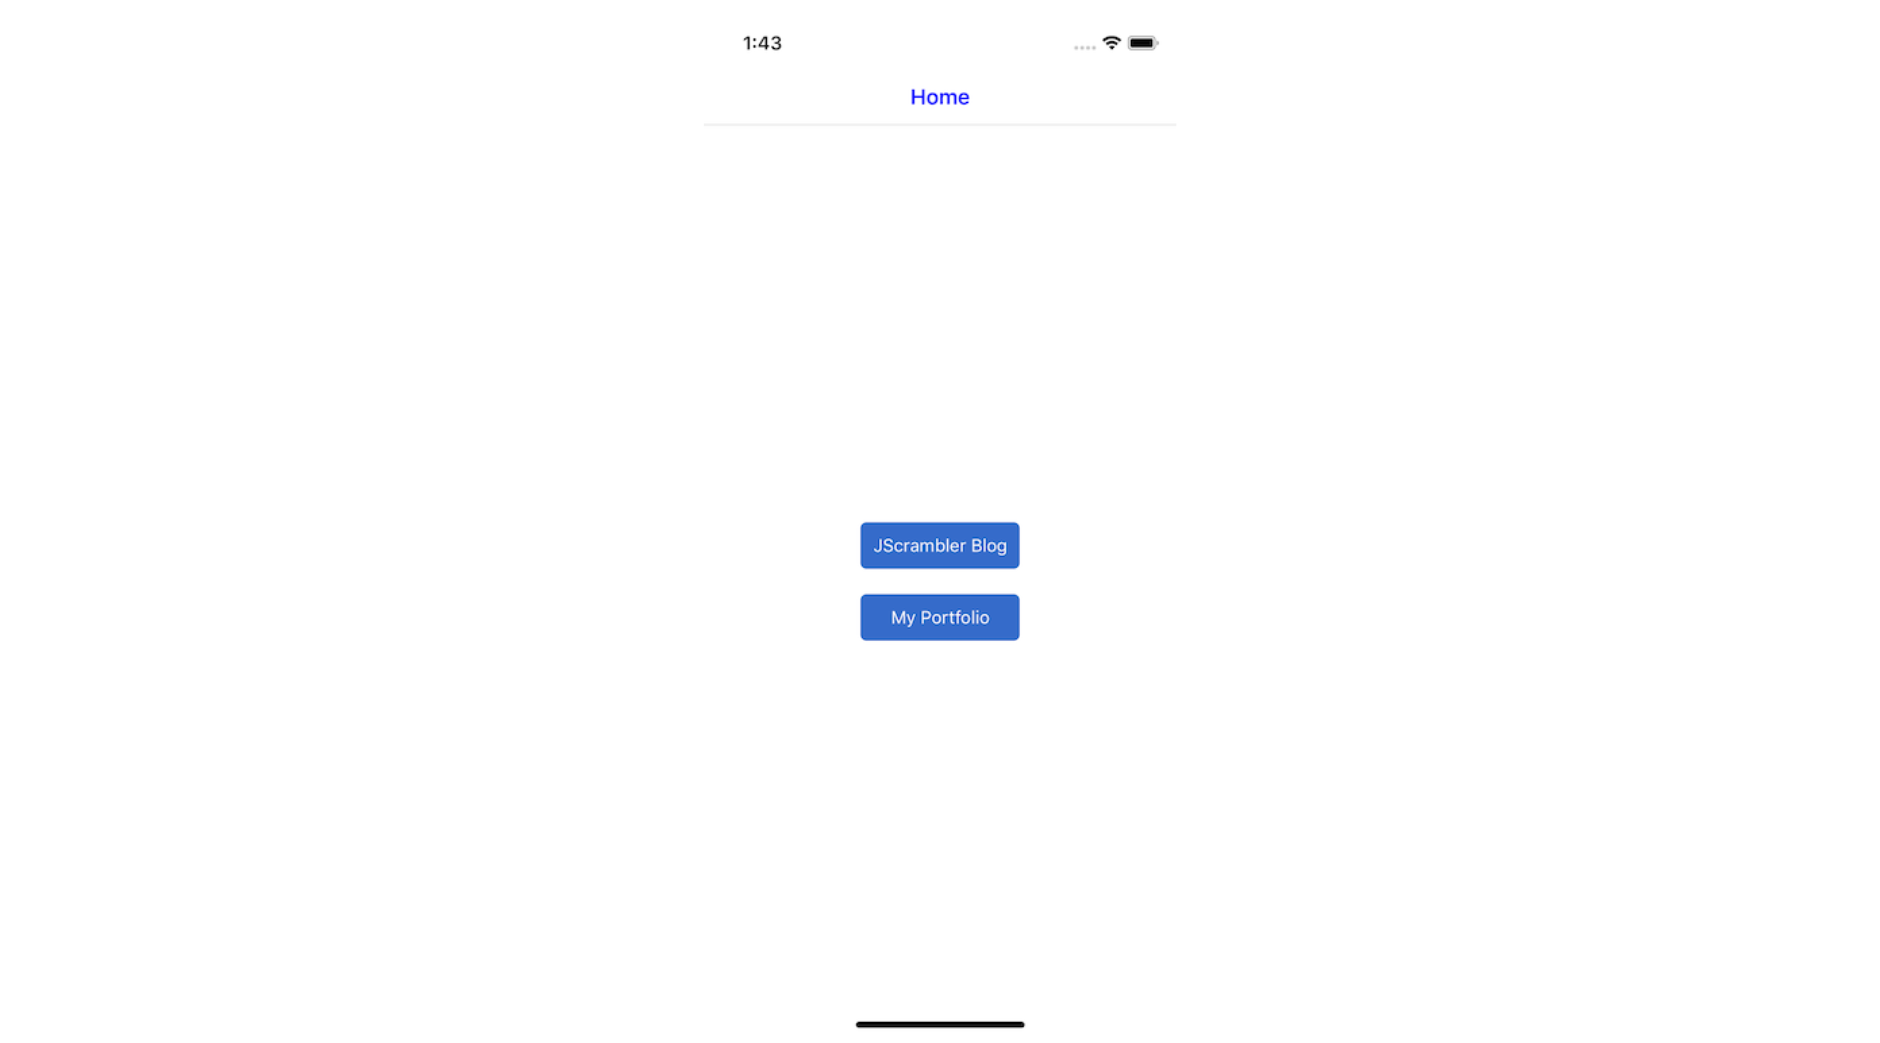
Create the Browser Screen
Inside the screens folder, create a new file called Browser.js This will hold the component Browser which is going to be responsible for navigating to the correct WebView, dynamically.
First, you have to hook this new screen in the AppNavigator.js file. To make use of navigation props, you have to specify each screen. Modify the HomeStack navigator as below.
// after other imports ...
import Browser from '../screens/Browser'

// ... modify only the HomeStack

const HomeStack = createStackNavigator({
  Home: {
    screen: Home,
    navigationOptions: ({ navigation }) => ({
      title: 'Home',
      headerTintColor: 'blue'
    })
  },
  Browser: {
    screen: Browser,
    navigationOptions: ({ navigation }) => ({
      title: navigation.state.params.title,
      headerTintColor: 'green'
    })
  }
})
In the above snippet, notice how each Browser screen will have a dynamic title coming and a tint color property that’s different from the Home screen.
Now, open Browser.js and add the following logic to it. Start by importing the WebView component from react-native-webview.
import React, { Component } from 'react'
import { WebView } from 'react-native-webview'

class Browser extends Component {
  render() {
    const { params } = this.props.navigation.state

    return <WebView source={{ uri: params.link }} />
  }
}

export default Browser
In the above snippet, you are fetching parameters. The this.props.navigation.state.params allow reading the parameters you passed through when handling the button press in the Home screen component. This params object can be then used to render the value of each web view link.
Now, if you click on any of the buttons, you will notice that it opens a new screen that displays the web page. Do note the color change in the title. Also, the stack navigator by default gives a way to exit the web view whenever required by providing a back button. See the below demo for detailed information.
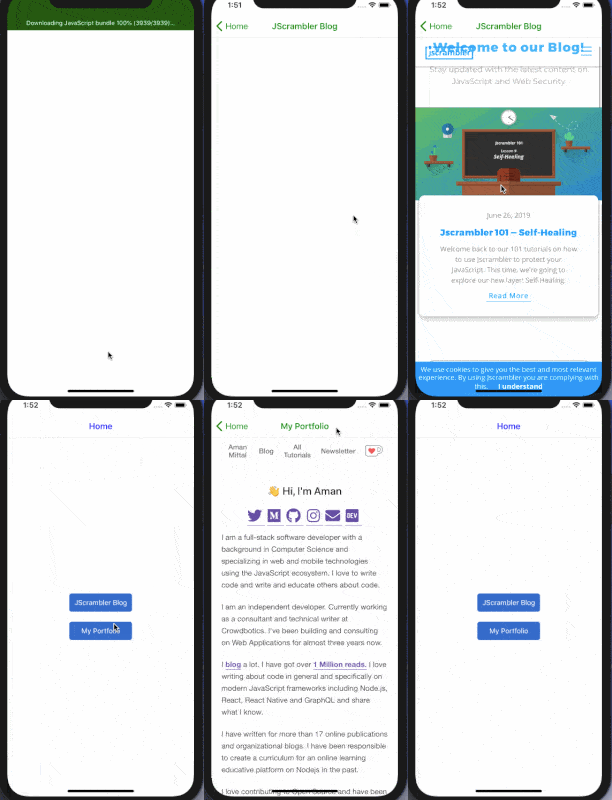
The web view integration is working now. However, there is still no way to indicate how much time a webpage will completely take to load. Let us add the functionality in the next section.
Adding ActivityIndicator to WebView
To add an ActivityIndicator to a WebViewcomponent you have to first define an ActivityIndicator. Import this component from the react-native core. Then, modify the Browser.js file as follows.
import React, { Component } from 'react'
import { WebView } from 'react-native-webview'
import { ActivityIndicator, StyleSheet } from 'react-native'

class Browser extends Component {
  LoadingIndicatorView() {
    return <ActivityIndicator color='#009b88' size='large' style={styles.ActivityIndicatorStyle} />
  }

  render() {
    const { params } = this.props.navigation.state

    return (
      <WebView
        source={{ uri: params.link }}
        renderLoading={this.LoadingIndicatorView}
        startInLoadingState={true}
      />
    )
  }
}

const styles = StyleSheet.create({
  ActivityIndicatorStyle: {
    flex: 1,
    justifyContent: 'center'
  }
})

export default Browser
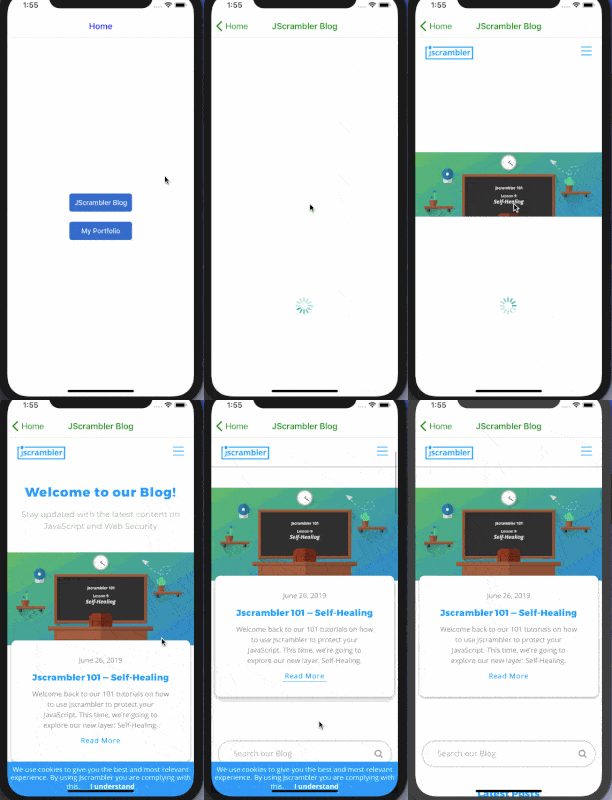
Once you have added the ActivityIndicator, the WebView component requires two props to make it work. First, the startInLoadingState prop must be set to true, as shown in the above snippet. Then, the renderLoading prop is responsible for triggering the loading indicator, in our case, the function: LoadingIndicatorView().
This prop always accepts a function as its value. Both of these props are not available by default. You have to specify them explicitly.
Take a look at how it works in the below screen.
Conclusion
This concludes the tutorial on getting started, setting up, and using a WebView component in a React Native application.
The important part of this tutorial is to make use of the react-navigation library to provide a complete navigational flow between different screens and a WebView screen.
Your challenge now is to extend the knowledge you have gained in this tutorial about WebView components and extend it further. An excellent place to start is by referring to its official API documentation.
Lastly, if you're building React Native apps with sensitive logic, be sure to protect them against code theft and reverse engineering.
Jscrambler
The leader in client-side Web security. With Jscrambler, JavaScript applications become self-defensive and capable of detecting and blocking client-side attacks like Magecart.
View All ArticlesMust read next
How to Animate a Header View on Scroll With React Native Animated
React Native Animated is a library that allows easily adding animations to React Native apps. In this tutorial, we use it to animate a header view.
October 1, 2020 | By Aman Mittal | 8 min read
Interview with Andrzej Mazur - Game Development Using JavaScript
The first in our series of interviews is with Andrzej Mazur, js13kGames competition creator and HTML5 Game Developer, talking about the perks and benefits of using JavaScript on game development.
September 8, 2017 | By Jscrambler | 7 min read
