Working with Angular FormArray
July 7th, 2021 | By Jay Raj | 17 min read

Working with Angular FormArray takes us to forms. They are a valuable component of the web application development process. There are many different ways we can use a form. For instance, you can have multiple forms on a page or just one. Depending on the use case the form will have, it might even be required to be created dynamically.
This practical tutorial explores this topic and dives into Angular FormArray in reactive forms.
What is an Angular FormArray?
Angular FormArray is a container that allows you to do that since it can be used to collect dynamically created controls.
We've already launched a step-by-step tutorial about developing Angular reactive forms using the FormControl and FormGroups APIs. However, you might need to repeat a form multiple times dynamically based on how the user interacts with the user interface.
Why do we need Angular FormArray?
FormArray provides a way to collect the dynamically created forms in one place. You can access each of the forms using the index and the controls inside it. Managing and validating the dynamically created forms’ data becomes easier, similar to the reactive forms.
How does Angular FormArray work?
Now, we are going to see how to use a FormArray in an Angular project, which will have the following steps:
Setting up the project;
Adding Bootstrap;
Adding items to Angular FormArray;
Saving Angular FormArray data;
Prepopulate Angular FormArray from Existing data; and
Validating an Angular FormArray.
Let's begin!
1. Setting up the project
Assuming that you already have the Angular CLI installed, use it to create a new Angular project.
ng new form-array
Select the default options when prompted for whether to use routing and the stylesheets option.
Once you have the project created, navigate to the project directory and start the project. You will have the project running at localhost:4200.
2. Adding Bootstrap
To style up the project, let's add the bootstrap library using npm.
npm install bootstrap jquery popper.js
Once you have it installed, add the following dependencies to the angular.json file. Go to architect -> build -> options and add the following styles and scripts:
  "styles": [
    "src/styles.css",
    "node_modules/bootstrap/dist/css/bootstrap.min.css"
],
"scripts": [
    "node_modules/jquery/dist/jquery.min.js",
    "node_modules/popper.js/dist/umd/popper.min.js",
    "node_modules/bootstrap/dist/js/bootstrap.min.js"
]
Now you should be able to use Bootstrap. Let's add some HTML design to our app.
Add the following HTML to the app.component.html file:
<div class="container">
<main class="main">
<div class="row">
<div class="col-md-12 col-lg-12">
<h4 class="mb-3">Customer Information</h4>
<form class="needs-validation" novalidate>
<div class="row g-3">
<div class="col-sm-6">
<label for="firstName" class="form-label">First name</label>
<input type="text" class="form-control" id="firstName" placeholder="First name" value="" required>
</div>
<div class="col-sm-6">
<label for="lastName" class="form-label">Last name</label>
<input type="text" class="form-control" id="lastName" placeholder="Last name" value="" required>
</div>
<div class="col-6">
<label for="username" class="form-label">Username</label>
<div class="input-group">
<input type="text" class="form-control" id="username" placeholder="Username" required>
</div>
</div>
<div class="col-sm-6">
<label for="email" class="form-label">Email Address</label>
<input type="email" class="form-control" id="email" placeholder="Email address" value="" required>
</div>
</div>
<div class="card mt-2r">
<div class="card-header ">
<div class="header-container">
<span class="product-header">
Add Product Information
</span>
<svg xmlns="http://www.w3.org/2000/svg" width="24" height="24" fill="currentColor"
class="bi bi-plus-square-fill" viewBox="0 0 16 16">
<path
d="M2 0a2 2 0 0 0-2 2v12a2 2 0 0 0 2 2h12a2 2 0 0 0 2-2V2a2 2 0 0 0-2-2H2zm6.5 4.5v3h3a.5.5 0 0 1 0 1h-3v3a.5.5 0 0 1-1 0v-3h-3a.5.5 0 0 1 0-1h3v-3a.5.5 0 0 1 1 0z" />
</svg>
</div>
</div>
<div class="card-body">
<div class="row">
<div class="col-12">
<ul class="list-group">
<li class="list-group-item">
<div class="row">
<div class="col-4">
<input type="text" class="form-control" id="firstName" placeholder="Product name" value=""
required>
</div>
<div class="col-6">
<input type="text" class="form-control" id="firstName" placeholder="Product description"
value="" required>
</div>
<div class="col-2">
<svg xmlns="http://www.w3.org/2000/svg" width="16" height="16" fill="currentColor"
class="bi bi-trash-fill" viewBox="0 0 16 16">
<path
d="M2.5 1a1 1 0 0 0-1 1v1a1 1 0 0 0 1 1H3v9a2 2 0 0 0 2 2h6a2 2 0 0 0 2-2V4h.5a1 1 0 0 0 1-1V2a1 1 0 0 0-1-1H10a1 1 0 0 0-1-1H7a1 1 0 0 0-1 1H2.5zm3 4a.5.5 0 0 1 .5.5v7a.5.5 0 0 1-1 0v-7a.5.5 0 0 1 .5-.5zM8 5a.5.5 0 0 1 .5.5v7a.5.5 0 0 1-1 0v-7A.5.5 0 0 1 8 5zm3 .5v7a.5.5 0 0 1-1 0v-7a.5.5 0 0 1 1 0z" />
</svg>
</div>
</div>
</li>
</ul>
</div>
</div>
</div>
</div>
<button class="mt-20 w-100 btn btn-primary btn-lg" type="submit">Create Customer</button>
</form>
</div>
</div>
</main>
<footer class="my-5 pt-5 text-muted text-center text-small">
<p class="mb-1">© 2017–2021 Company Name</p>
<ul class="list-inline">
<li class="list-inline-item"><a href="#">Privacy</a></li>
<li class="list-inline-item"><a href="#">Terms</a></li>
<li class="list-inline-item"><a href="#">Support</a></li>
</ul>
</footer>
</div>
Add the following CSS to the app.component.css file.
  .container {
    max-width: 960px;
  }

  .main{
      margin-top: 2rem;
  }

  .mt-20{
      margin-top: 20px;
  }

  .mt-2r{
      margin-top: 2rem;
  }

  .product-header{
      font-weight: 500;
  }
  .header-container{
    display: flex;
    flex-direction: row;
    justify-content: space-between;
  }
Save the changes, and you will be able to view the following in your Angular app.
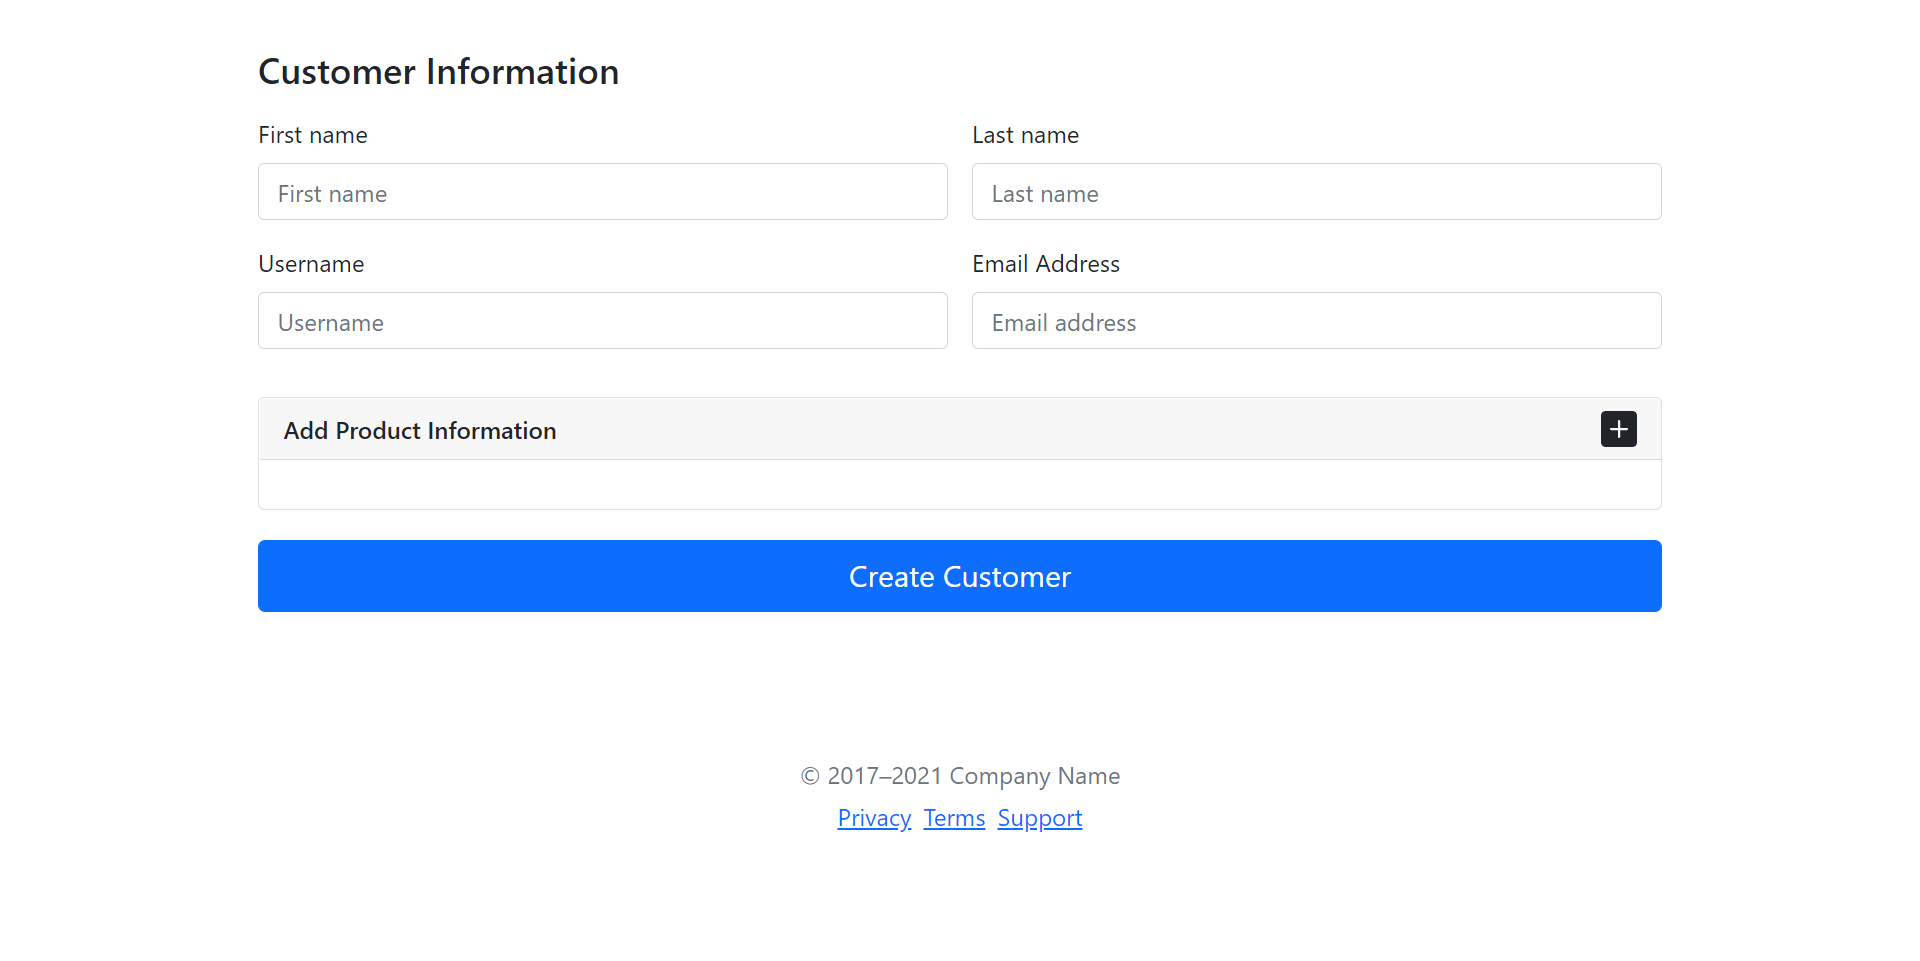
As you can see in the above screenshot, the product information block has multiple products added. That is where you'll be using FormArray to create and manage multiple products.
3. Adding Items to Angular FormArray
Now let's see how to insert or add some data to the product FormArray. Add a click event to the plus icon HTML and define the same in the app.component.ts.
<svg (click)="addProduct()" xmlns="http://www.w3.org/2000/svg" width="24" height="24" fill="currentColor" class="bi bi-plus-square-fill" viewBox="0 0 16 16">
    <path d="M2 0a2 2 0 0 0-2 2v12a2 2 0 0 0 2 2h12a2 2 0 0 0 2-2V2a2 2 0 0 0-2-2H2zm6.5 4.5v3h3a.5.5 0 0 1 0 1h-3v3a.5.5 0 0 1-1 0v-3h-3a.5.5 0 0 1 0-1h3v-3a.5.5 0 0 1 1 0z" />
</svg>
Get a reference to the products in FormArray from customerInfo. Once you have the reference, you can push a formGroup each time a new entry is required in the products array. Here is how the addProduct method looks:
  addProduct(){
    let products = this.customerInfo.get('products') as FormArray;
    products.push(this.formBuilder.group({
      name : [],
      description : []
    }));
  }
Save the above changes and refresh the app. From the app, click on the plus icon to add a new product. You'll be able to add a new entry to the product list.
4. Saving Angular FormArray Data
Add a click event to the create customer button.
<button (click)="createCustomerInfo()" class="mt-20 w-100 btn btn-primary btn-lg" type="button">Create Customer</button>
Define the event in the app.component.ts file. You can access the complete value of customerInfo as a JSON object.
  createCustomerInfo(){
    console.log('data is ', this.customerInfo.value);
  }
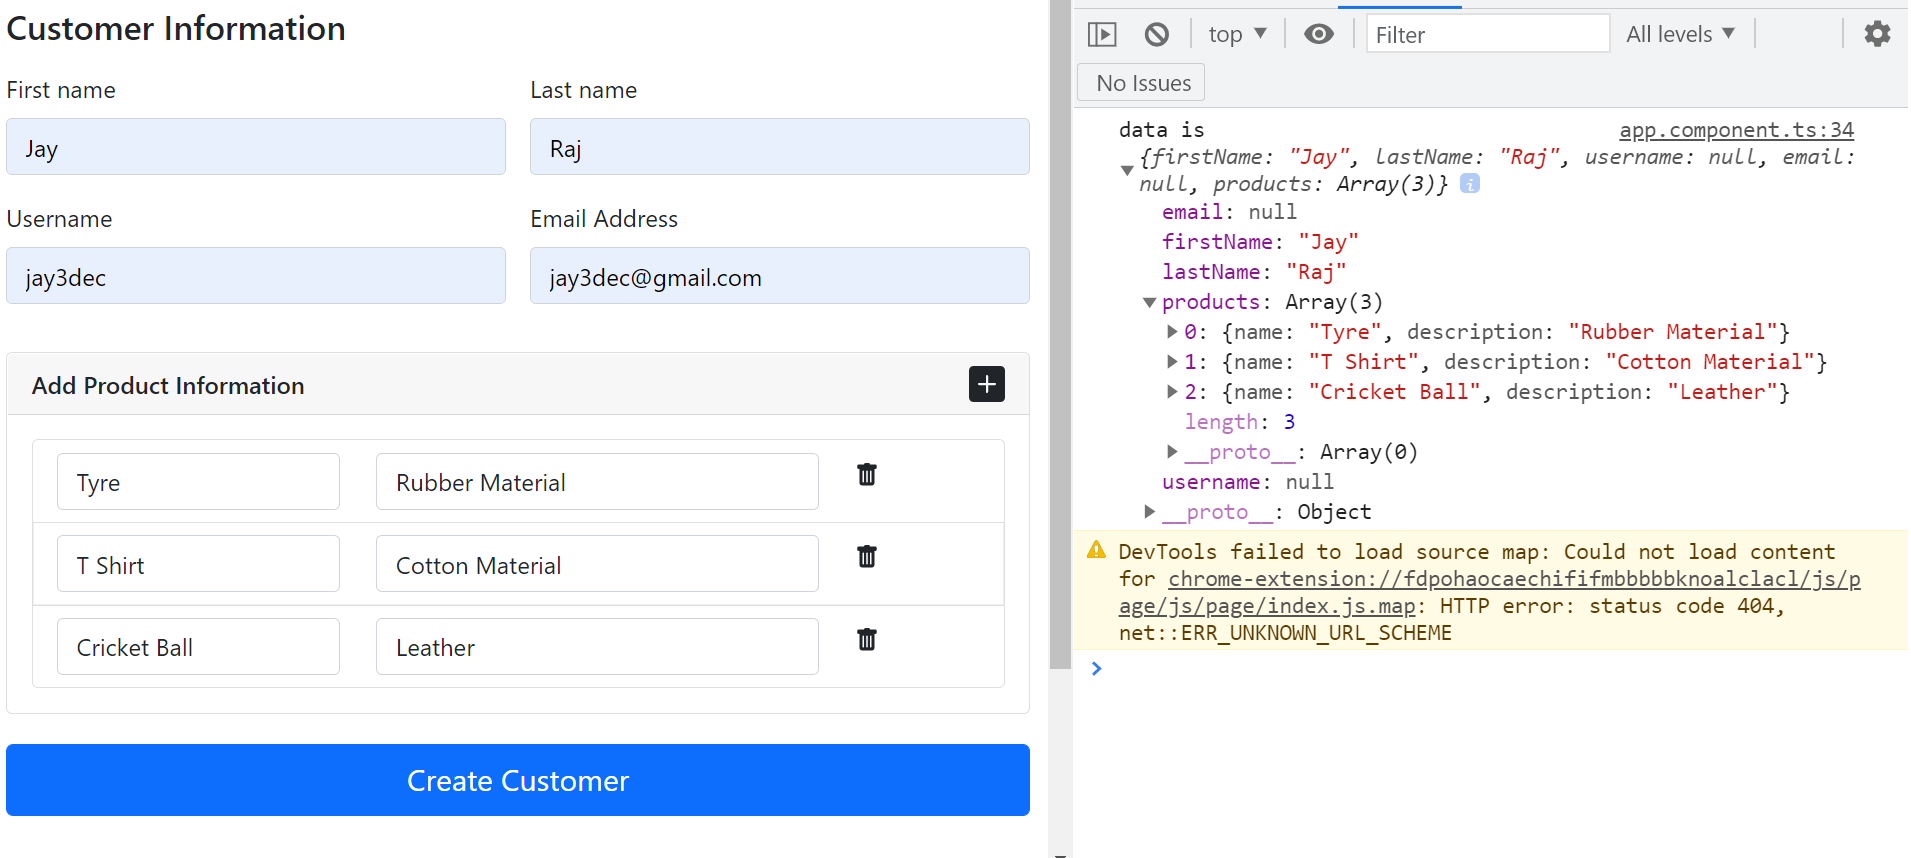
Save the changes and fill out the form. Add some data to the product list as well. Click on the create customer information button, and you will be able to see the data in the browser console.
5. Prepopulate Angular FormArray From Existing Data
You saw how to create a form array and how to get the user-entered data at the click of a button. You will also be required to populate the form array from some existing data. Let's have a look at how to achieve it.
Firstly, define a method called setDefaultData. Let's call the method once the form has been initialized inside ngOnInit.
  ngOnInit(){
    this.customerInfo = this.formBuilder.group({
      firstName : [],
      lastName : [],
      username : [],
      email : [],
      products : this.formBuilder.array([])
    })
    this.setDefaultData();
  }
From inside the setDefaultData method, you'll make a call to the addProduct.
  setDefaultData(){
    this.addProduct("tyre", "rubber material");
  }
Earlier you didn't pass anything for name and description. Let's modify the addProduct to pass parameters.
  addProduct(name = "", desc = ""){
    let products = this.customerInfo.get('products') as FormArray;
    products.push(this.formBuilder.group({
      name : [name],
      description : [desc]
    }));
  }
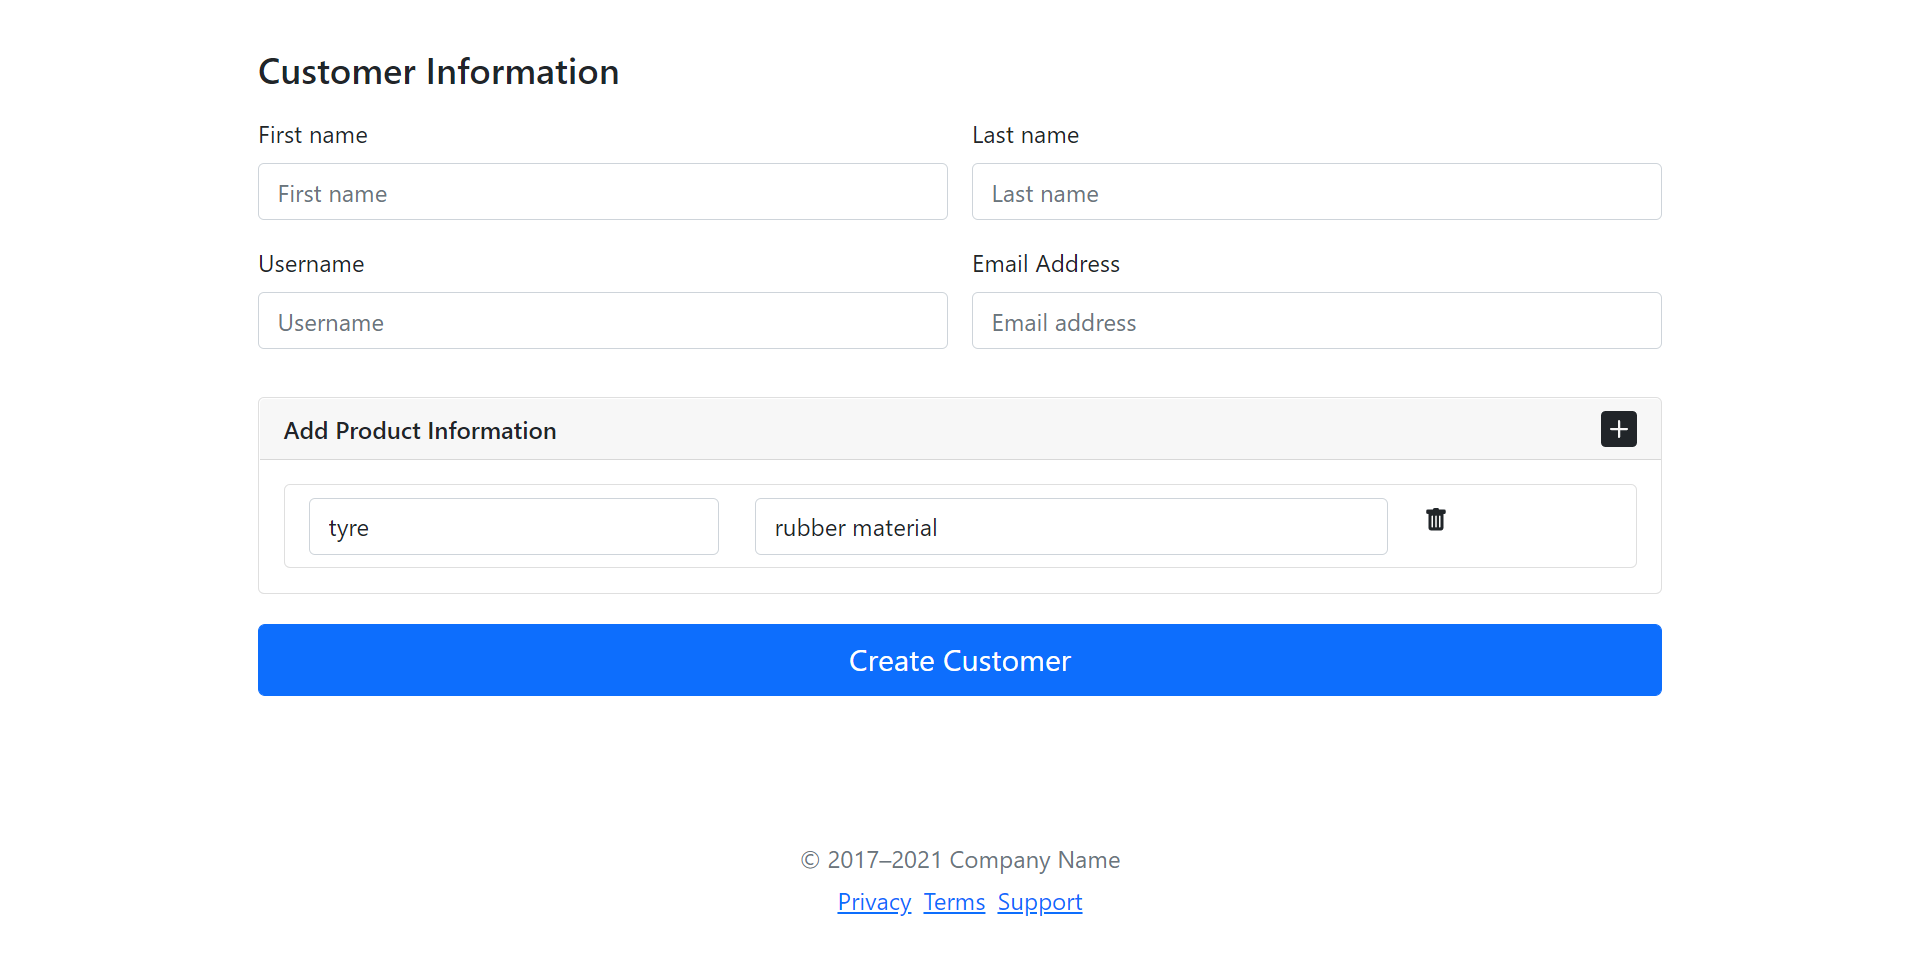
Save the above changes and refresh the application. On load, you'll be able to see a default product entry in products.
6. Validating Angular FormArray
Let's have a look at how to validate the form array controls and show error messages. You need to add the required validators while creating a new product form group inside the addProduct method.
  addProduct(name = "", desc = ""){
    let products = this.customerInfo.get('products') as FormArray;
    products.push(this.formBuilder.group({
      name : [name, [Validators.required]],
      description : [desc, [Validators.required]]
    }));
  }
Now let's add a span element adjacent to the input control.
<span class="validation">* required</span>
Add the following CSS to the app.component.css file.
.validation{
  color: red;
}
Using the formGroup product check for errors and show the error span. Add the following ngIf directive to show the message conditionally when the field is empty.
<span *ngIf="product.get('name').errors && product.get('name').hasError('required')" class="validation">* required</span>
Here is the modified portion of the app.component.html.
<ul class="list-group">
    <li class="list-group-item" formArrayName="products" *ngFor="let product of customerInfo.get('products')['controls']; let i = index;">
        <div [formGroupName]="i" class="row">
            <div class="col-4">
                <input type="text" formControlName="name" class="form-control" id="firstName" placeholder="Product name" value="" required>
                <span *ngIf="product.get('name').errors && product.get('name').hasError('required')" class="validation">* required</span>
            </div>
            <div class="col-6">
                <input type="text" formControlName="description" class="form-control" id="firstName" placeholder="Product description" value="" required>
                <span *ngIf="product.get('description').errors && product.get('description').hasError('required')" class="validation">* required</span>

            </div>
            <div class="col-2">
                <svg xmlns="http://www.w3.org/2000/svg" width="16" height="16" fill="currentColor" class="bi bi-trash-fill" viewBox="0 0 16 16">
                    <path d="M2.5 1a1 1 0 0 0-1 1v1a1 1 0 0 0 1 1H3v9a2 2 0 0 0 2 2h6a2 2 0 0 0 2-2V4h.5a1 1 0 0 0 1-1V2a1 1 0 0 0-1-1H10a1 1 0 0 0-1-1H7a1 1 0 0 0-1 1H2.5zm3 4a.5.5 0 0 1 .5.5v7a.5.5 0 0 1-1 0v-7a.5.5 0 0 1 .5-.5zM8 5a.5.5 0 0 1 .5.5v7a.5.5 0 0 1-1 0v-7A.5.5 0 0 1 8 5zm3 .5v7a.5.5 0 0 1-1 0v-7a.5.5 0 0 1 1 0z" />
                </svg>
            </div>
        </div>
    </li>
</ul>
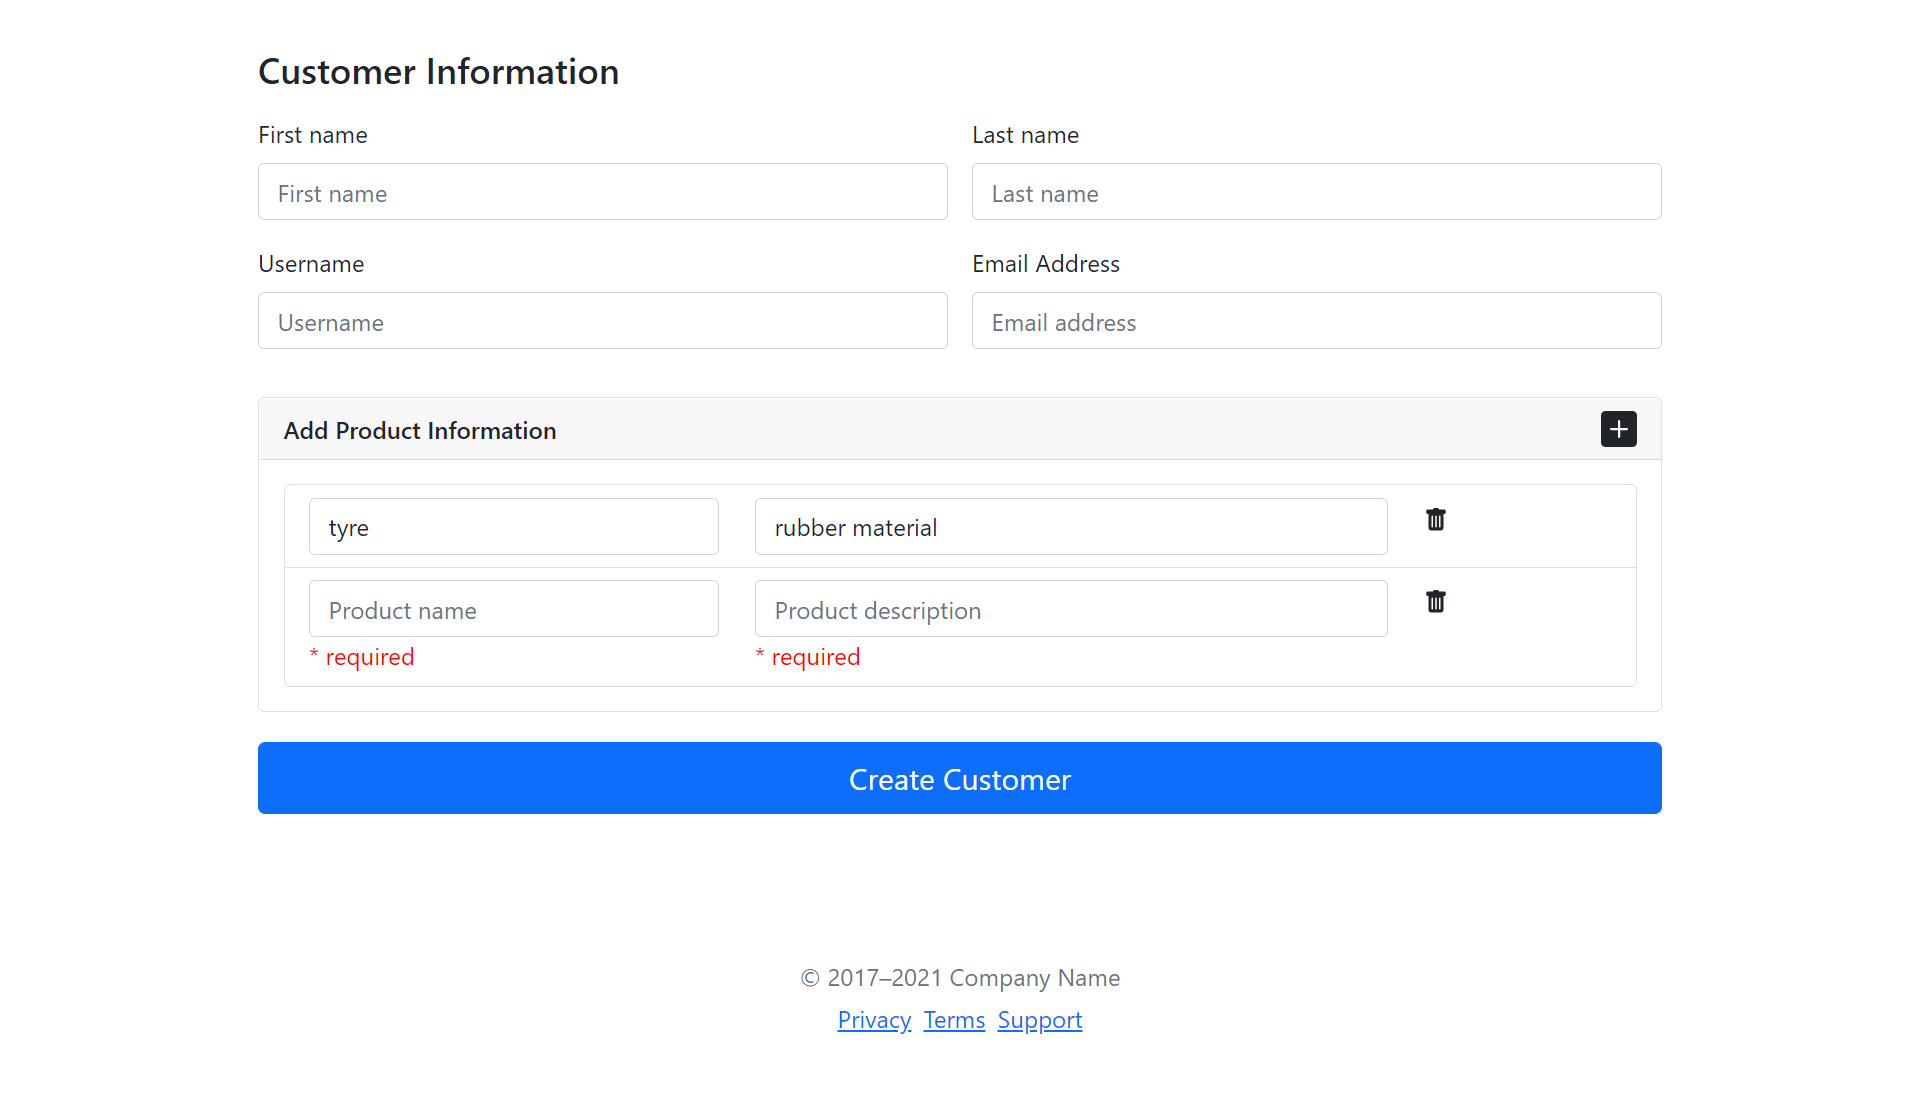
Save the above changes and load the app. Click the plus button to add a new entry and you will be able to see the validation message.
Final thoughts about working with Angular FormArray
What have your learned with this six steps tutorial?
First lesson: How to use FormArray to add dynamic data to the Angular form.
Second lesson: How to access that dynamic data and validate the Angular FormArray.
If you want to learn how you can protect your Angular application, be sure to check our guide about how to protect the Angular code against theft.
For detailed information on FormArray, do check out the official documentation.
The source code from this tutorial is available on GitHub FormArray demo docs.
Jscrambler
The leader in client-side Web security. With Jscrambler, JavaScript applications become self-defensive and capable of detecting and blocking client-side attacks like Magecart.
View All ArticlesMust read next
Building User Registration Form With Reactive Forms in Angular 7
Learn how you can handle forms in Angular 7 web apps by leveraging Reactive Forms and post the reactive form to a REST API endpoint.
January 15, 2019 | By Jay Raj | 7 min read
Working with Angular Local Storage
In this article, we'll discuss local storage and its usage from an Angular application's perspective. Let's start by trying to understand what Angular local storage is.
April 8, 2022 | By Jay Raj | 5 min read
How to Protect Angular Code Against Theft and Reverse-Engineering
In this step-by-step guide, you'll learn how to protect your Angular code from being stolen or reverse-engineered, by leveraging the power of Jscrambler.
April 30, 2024 | By Antonello Semeraro | 13 min read
