Creating a Pokedex App with NativeScript-Vue
September 5th, 2019 | By Wern Ancheta | 9 min read

Today, we will build a Pokédex as the NativeScript-Vue plugin enables building cross-platform mobile apps using Vue to create interfaces.
As a web developer who doesn't have much time to learn something outside of my toolset, it is valuable to have tools that allow me to reuse existing skills.
Building mobile apps with JavaScript is enticing, explaining the popularity of platforms such as Ionic, React Native, and NativeScript among the web developer crowd.
Today, we show you another way of building mobile apps with NativeScript: NativeScript-Vue.
If you're coming from Vue or looking for alternative ways to develop mobile apps with NativeScript, feel free to tag along.
You can find the source code of the app on this GitHub repo.
What is NativeScript-Vue?
NativeScript-Vue is a NativeScript plugin that allows you to use Vue.js to build mobile apps.
In case you are coming here not knowing what Vue is, it is a framework for building user interfaces (pretty much like React, if that rings a bell).
One thing that developers like about Vue is its simplicity. Bringing it to NativeScript only made the platform friendlier for beginners.
As you go through the tutorial, you will find that the code is very intuitive. I guarantee you will feel right at home, even if you do not have previous experience with Vue.
App Overview
We will be creating a simple Pokedex app. The app will list all the first-generation Pokemon and allow the user to select any of them to view more details.
Prerequisites
Basic knowledge of NativeScript is required to follow this tutorial. If you are new to NativeScript, see our introductory tutorial.
On the software side, you need the NativeScript development environment:
Windows Setup
MacOS Setup
Linux Setup
The following package versions were used in creating this tutorial:
Node 10.9.0: The NativeScript docs mention that you should install Node 10.6.0, but that does not work well with NativeScript-Vue.
Nativescript-Vue 2.0.0
NativeScript CLI 6.0.2
Use these versions (or higher) to ensure you won't encounter compilation issues.
Setting Things Up
Let's proceed to setting up the necessary tools so we can start building apps with NativeScript-Vue.
First, install the Vue CLI:
npm install -g @vue/cli @vue/cli-init
Once installed, initialize a new project using the Vue CLI. This uses the vue-cli-template to scaffold a NativeScript project. In the command below, nsvpokedex is the project name:
vue init nativescript-vue/vue-cli-template nsvpokedex
Use the following as a basis for answering the CLI questions:
? Project name nsvpokedex
? Project description a simple NativeScript-Vue Pokedex app
? Application name NativeScript-Vue Pokedex
? Unique application identifier org.wern.nsvpokedex
? Project version 1.0.0
? Author Wern Ancheta <[email protected]>
? License MIT
? Select the programming language javascript
? Select a preset (more coming soon) Simple
? Install vuex? (state management) No
? Install vue-devtools? No
? Color scheme none
In case you're wondering, we won't need state management in this app. And we won't be using vue-devtools either. But you can install those if you want. They won't change the project much, so you can still follow along even if you choose to install them.
Next, navigate inside the newly created folder and install the dependencies:
cd nsvpokedex
npm install
Next, install Axios, the library that we're using to make HTTP requests:
npm install axios --save
To make sure everything works correctly, connect your Android or iOS device or fire up your emulator and run the app:
tns run android --bundle
tns run ios --bundle
If you're following this tutorial a few days after it was published, you might get the following error when you try to run the app:
The current application is not compatible with NativeScript CLI 6.0.
Use the `tns migrate` command to migrate the app dependencies to a form compatible with NativeScript 6.0.
Running this command will not affect the codebase of the application and you might need to do additional changes manually – for more information, refer to the instructions from this [NativeScript blog post](https://www.nativescript.org/blog/nativescript-6.0-application-migration).
The above error is related to NativeScript version 6, released recently. Thankfully, the CLI is helpful, so the solution is in the error message.
All you have to do is execute tns migrate to migrate the dependencies to what works well with the most recent version of NativeScript.
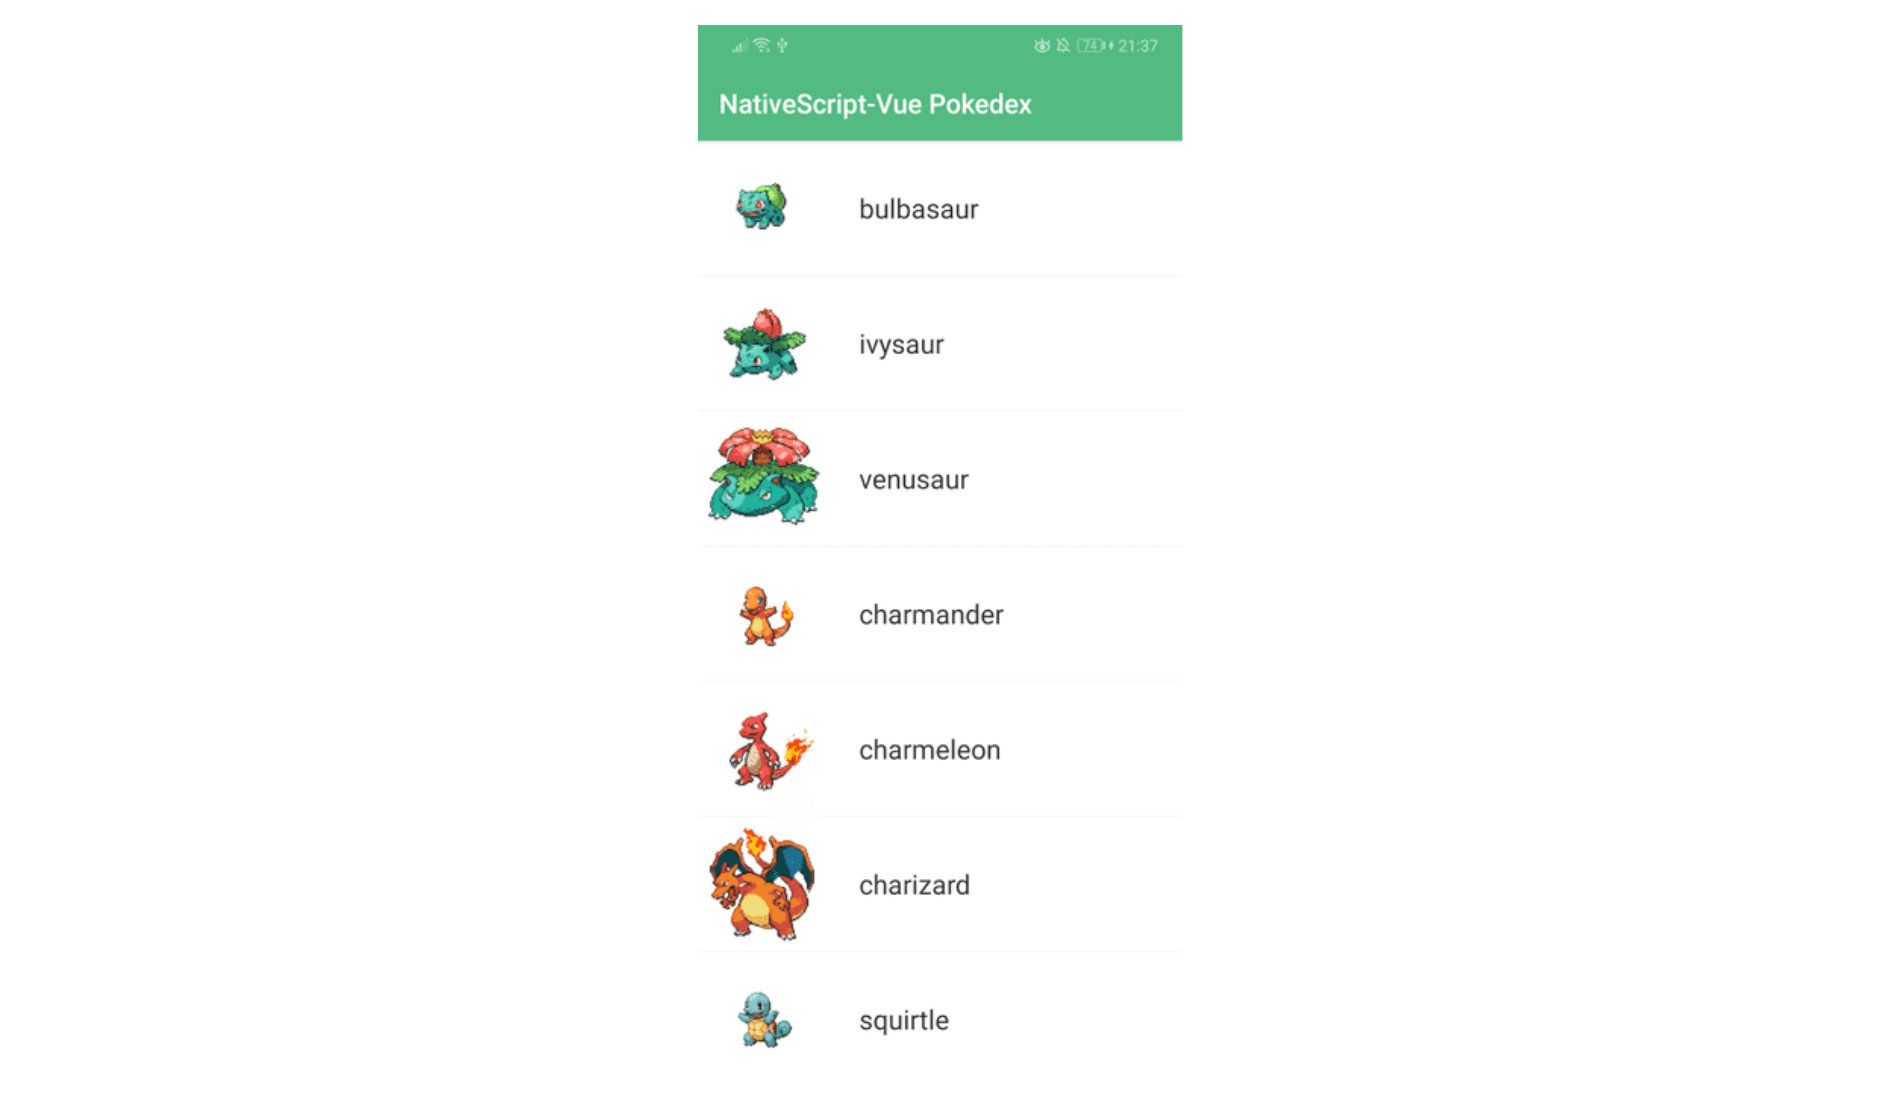
Once you've migrated, you should be able to run the app, and it should look like this:
Building The App
We will first develop the main screen, which lists all the Pokemon from the first generation. Then, we'll build the Pokemon screen to show the larger image of the Pokemon along with its name, types, and description.
Before we proceed, let's first take a quick look at the directory structure. Out of the box, this is what the NativeScript-Vue template provides: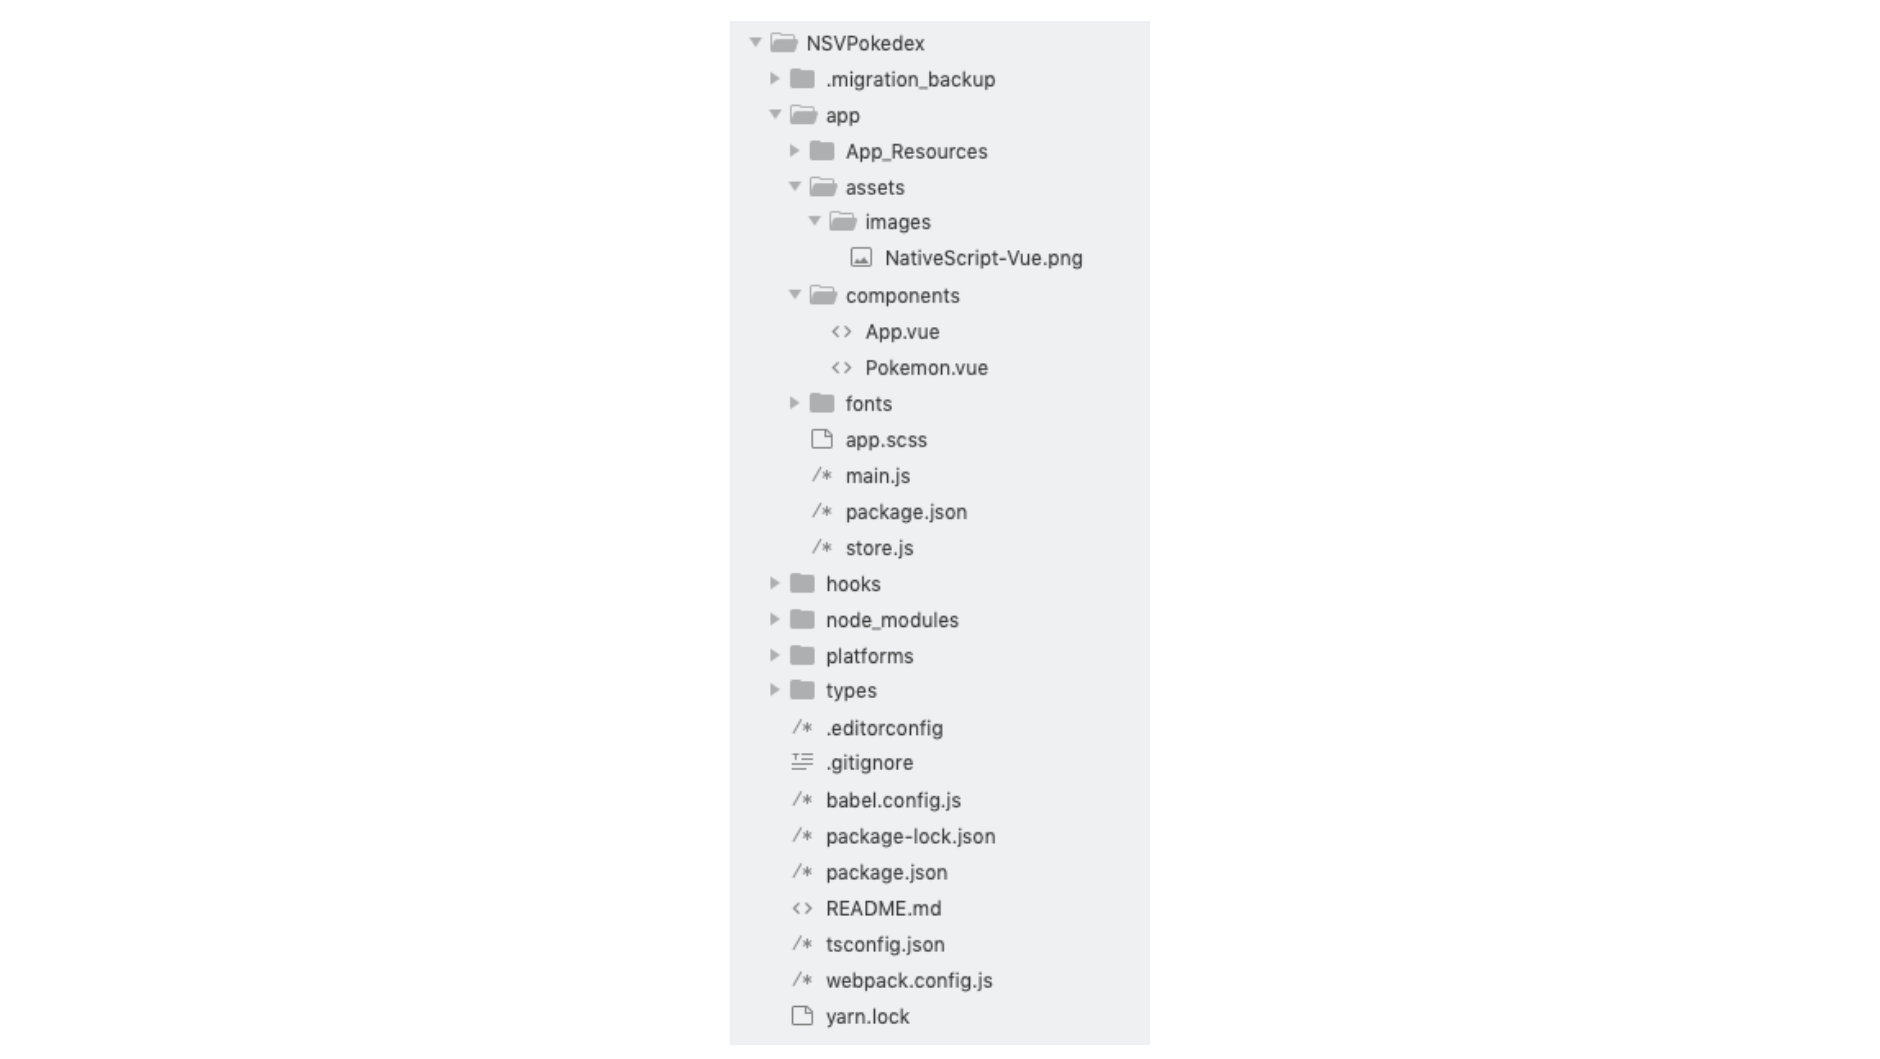
When you are getting started, there's only one file you need to work on: App.vue. It is the default Vue component, which will be rendered when you first run the app.
Main Screen
 Open the App.vue file, empty all of its contents, then add the following code. This is the UI for the main screen. All of these components should look familiar if you've used NativeScript previously:
<template>
 <Page>
   <ActionBar title="NativeScript-Vue Pokedex"/>
   <StackLayout backgroundColor="#3c495e">
     <ListView class="list-group" for="pokemon in pokedex" separatorColor="#e6e6e6" @itemTap="onItemTap">
       <v-template>
         <FlexboxLayout flexDirection="row" class="list-group-item">
           <Image :src="pokemon.sprite" class="thumb" />
           <Label :text="pokemon.name" class="list-group-item-heading" style="width: 60%" />
         </FlexboxLayout>
       </v-template>
     </ListView>
   </StackLayout>
 </Page>
</template>
Next, we add the JavaScript code for this component. Start by importing Axios.
We will use this to make an HTTP request to PokeAPI. This API allows us to get the Pokemon data that we need for this app.
After importing Axios, we import the component for rendering the Pokemon screen. We'll use it later to navigate to this screen:
<script>
import axios from 'axios/dist/axios';
import Pokemon from './Pokemon';

const POKE_API_BASE_URL =  "https://pokeapi.co/api/v2"; // base URL for PokeAPI

// next: make request to the PokeAPI when the component is mounted
</script>
Next, initialize the data which this component will use. This is where we will store the list of Pokemon to render in the ListView component:
export default {
  data() {
    return {
      pokedex: []
    }
  },

  // next: add code when component is mounted
}
Once the component is mounted, we make a request to the PokeAPI using Axios. The /pokemon endpoint returns the list of Pokemon.
We are specifying a limit of 150 so that only the first-generation Pokemon are returned. Once the results are returned, we modify it to include a sprite property. This is the Pokemon image sprite:
async mounted() {
  const { data } = await axios.get('https://pokeapi.co/api/v2/pokemon/?limit=150');
  this.pokedex = data.results.map((item) => {
    const id = item.url.split('/')[6];
    return {
      id,
      name: item.name,
      sprite: `https://raw.githubusercontent.com/PokeAPI/sprites/master/sprites/pokemon/${id}.png`
     }
  });
},
// next: add event handlers
Next, we add the event handler methods. In this case, we only need to add the function for handling tap events on each of the list items. This is the code for handling the @itemTap="onItemTap" that we added to the ListView component earlier.
When you tap an item, information about the specific item that was tapped is passed as an argument. That includes the source data for that specific item in the ListView. This means we can get the id, name, and the sprite.
We use the ID to perform two separate requests to the PokeAPI.
The first one is used for getting the basic Pokemon data, and the other one is used for getting the descriptions of that Pokemon on all Pokemon games.
From the first one, we only need the types (e.g. Electric, Fire, Water). On the second one, we only need the first English description that we can find:
methods: {
 onItemTap: async function (args) {
   const id = args.item.id;
   const { data: pokemonData } = await axios.get(`${POKE_API_BASE_URL}/pokemon/${id}`);
   const { data: pokemonSpecieData } = await axios.get(`${POKE_API_BASE_URL}/pokemon-species/${id}`);

   const { types } = pokemonData;
   const { flavor_text_entries } = pokemonSpecieData;

   const pokemon_types = types.map(({ slot, type }) => {
     return {
       "id": slot,
       "name": type.name,
       "classname": `TypeText ${type.name}` // for styling purposes
     }
   });

   const pokemon_description = flavor_text_entries.find(item => item.language.name === 'en').flavor_text; // get the first english description

   // next: navigate to Pokemon page

 },
},
At this point, we have all the data that we need so we can now navigate to the Pokemon screen and pass all the data as props.
Here, we are using the $navigateTo method which is built into NativeScript-Vue. This accepts the component which we want to navigate to as the first argument, and an object containing the navigation options as the second argument. In this case, we're passing the Pokemon data as props:
this.$navigateTo(Pokemon, {
 props: {
   id,
   name: args.item.name,
   description: pokemon_description,
   types: pokemon_types,
   image: `https://img.pokemondb.net/artwork/vector/large/${args.item.name}.png`
 }
});
Lastly, add the styles for the ListView items:
<style scoped>
ActionBar {
 background-color: #53ba82;
 color: #ffffff;
}

.list-group-item {
 background-color: #FFF;
 align-items: center;
}

.thumb {
 width: 100;
}

.list-group-item-heading {
 color: #333;
 font-size: 20;
 margin-left: 20;
}
</style>
Pokemon Screen
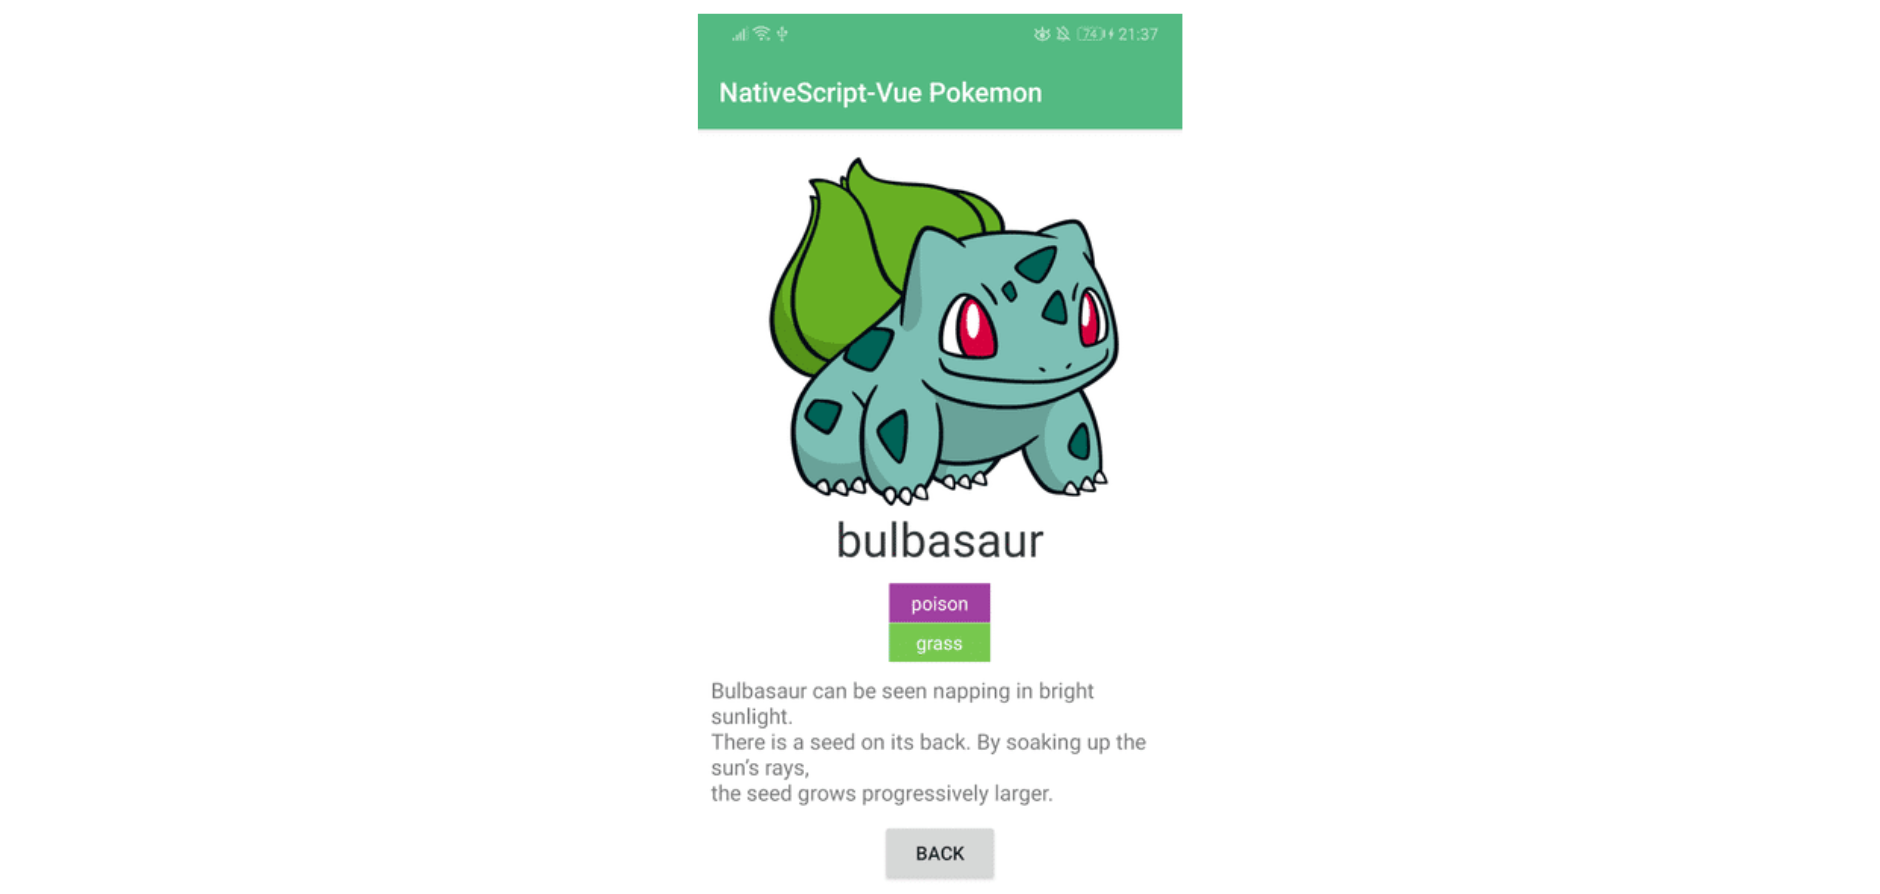 The Pokemon Screen displays the basic data of the selected Pokemon from the main screen.
Create a Pokemon.Vue file under the app/components directory and add the following code:
<template>
 <Page>
   <ActionBar title="NativeScript-Vue Pokemon"/>
   <StackLayout backgroundColor="#FFF">
     <FlexboxLayout flexDirection="column" class="PokemonContainer">

       <Image :src="this.image" />
       <Label :text="this.name" class="PokemonName" />

       <ListView class="PokemonTypes" separatorColor="#FFF" for="type in this.types">
         <v-template>
           <Label :text="type.name" :class="type.classname" />
         </v-template>
       </ListView>

       <Label :text="this.description" class="PokemonDescription" textWrap="true" />

       <Button text="Back" @tap="goBack" />

     </FlexboxLayout>
   </StackLayout>
 </Page>
</template>
Next, we add the JavaScript code. As you can see, it's very minimal because all we have to do is tell this screen that it should expect the Pokemon data as props.
That can be done by adding a props property and supplying the name of each prop as an array. Once that's done, you can add the method for handling the back navigation:
<script>
 export default {

   props: ['id', 'name', 'image', 'description', 'types'],

   methods: {
     goBack: function (args) {
       this.$navigateBack();
     }
   }

 }
</script>
Lastly, add the styles. Most of these are mainly used for adding the background color for the different Pokemon types. The others are for styling the other Pokemon details:
<style scoped>
ActionBar {
 background-color: #53ba82;
 color: #ffffff;
}

.PokemonContainer {
 align-items: center;
}

Image {
 width: 270;
 margin-top: 20;
}

.PokemonName {
 font-size: 35;
 color: #333;
}

.PokemonDescription {
 padding: 10;
 font-size: 16;
}

.PokemonTypes {
 margin-top: 10;
}

.TypeText {
 text-align: center;
 width: 75;
 color: #FFF;
 padding: 5;
}

.poison {
 background-color: violet;
}

.normal {
 background-color: #8a8a59;
}

.fire {
 background-color: #f08030;
}

.water {
 background-color: #6890f0;
}

.electric {
 background-color: #f8d030;
}

.grass {
 background-color: #78c850;
}

.ice {
 background-color: #98d8d8;
}

.fighting {
 background-color: #c03028;
}

.poison {
 background-color: #a040a0;
 color: #FFF;
}

.ground {
 background-color: #e0c068;
}

.flying {
 background-color: #a890f0;
}

.psychic {
 background-color: #f85888;
}

.bug {
 background-color: #a8b820;
}

.rock {
 background-color: #b8a038;
}

.ghost {
 background-color: #705898;
}

.dragon {
 background-color: #7038f8;
}

.dark {
 background-color: #705848;
}

.steel {
 background-color: #b8b8d0;
}

.fairy {
 background-color: #e898e8;
}
</style>
Conclusion
That's it! In this tutorial, you learned the basics of using Vue in a NativeScript app with NativeScript-Vue. Specifically, you learned how to bootstrap a new NativeScript-Vue project, perform HTTP requests using Axios, render a list, bind data to the view, and get into the overall workflow of using Vue in a NativeScript environment.
Before deploying your commercial NativeScript apps to production, make sure you are protecting their code against reverse engineering, abuse, and tampering.
Jscrambler
The leader in client-side Web security. With Jscrambler, JavaScript applications become self-defensive and capable of detecting and blocking client-side attacks like Magecart.
View All ArticlesMust read next
Creating a Real-Time Location Tracking App with NativeScript-Vue
In this blog post, we explore the NativeScript-Vue template for building a real-time location tracking app that uses the Google Maps API.
March 19, 2020 | By Wern Ancheta | 11 min read
Performance Optimizations in NativeScript
Performance is still a key driver of mobile app engagement. In this guide, we explore some strategies to boost the performance of your NativeScript apps.
November 15, 2019 | By Wern Ancheta | 7 min read
