Jscrambler 101 — SIEM Integration
July 21st, 2021 | By Jscrambler | 5 min read

Welcome back to Jscrambler 101, a collection of tutorials on how to use Jscrambler to protect your JavaScript. This tutorial is about SIEM integration and covers Jscrambler version 7.2.
Introduction
Last time, on Jscrambler 101: Memory Protection, we explored a new Jscrambler feature that ciphers sensitive data using cryptographic algorithms, only allowing the data to be deciphered when it needs to be accessed by the application.
This time, we’re going to explore SIEM Integration, a new Jscrambler feature that allows you to forward and aggregate the valuable security Information Jscrambler gives you into a SIEM (e.g., Elasticsearch, Splunk).
SIEM Integration
From Jscrambler version 6.0 onwards, we provide a JavaScript Threat Monitoring module that displays a real-time notification on the Jscrambler dashboard as soon as some violation occurs, such as the client’s JavaScript code being tampered with or used in a different environment or date from the one(s) that are set on the protection configuration.
Now, with the SIEM Integration, you can easily access all that valuable information from one place and automate the process of looking at audit logs and alerting.
Setting up your SIEM Integration
To set up the integration between Jscrambler and your SIEM, you need to configure a Jscrambler notification driver and map the fields of the notification body. Let’s explore these steps below.
To access the SIEM Integrations page, go to the Jscrambler dashboard, select the target application, and then click the “Integration” link under the Setup section.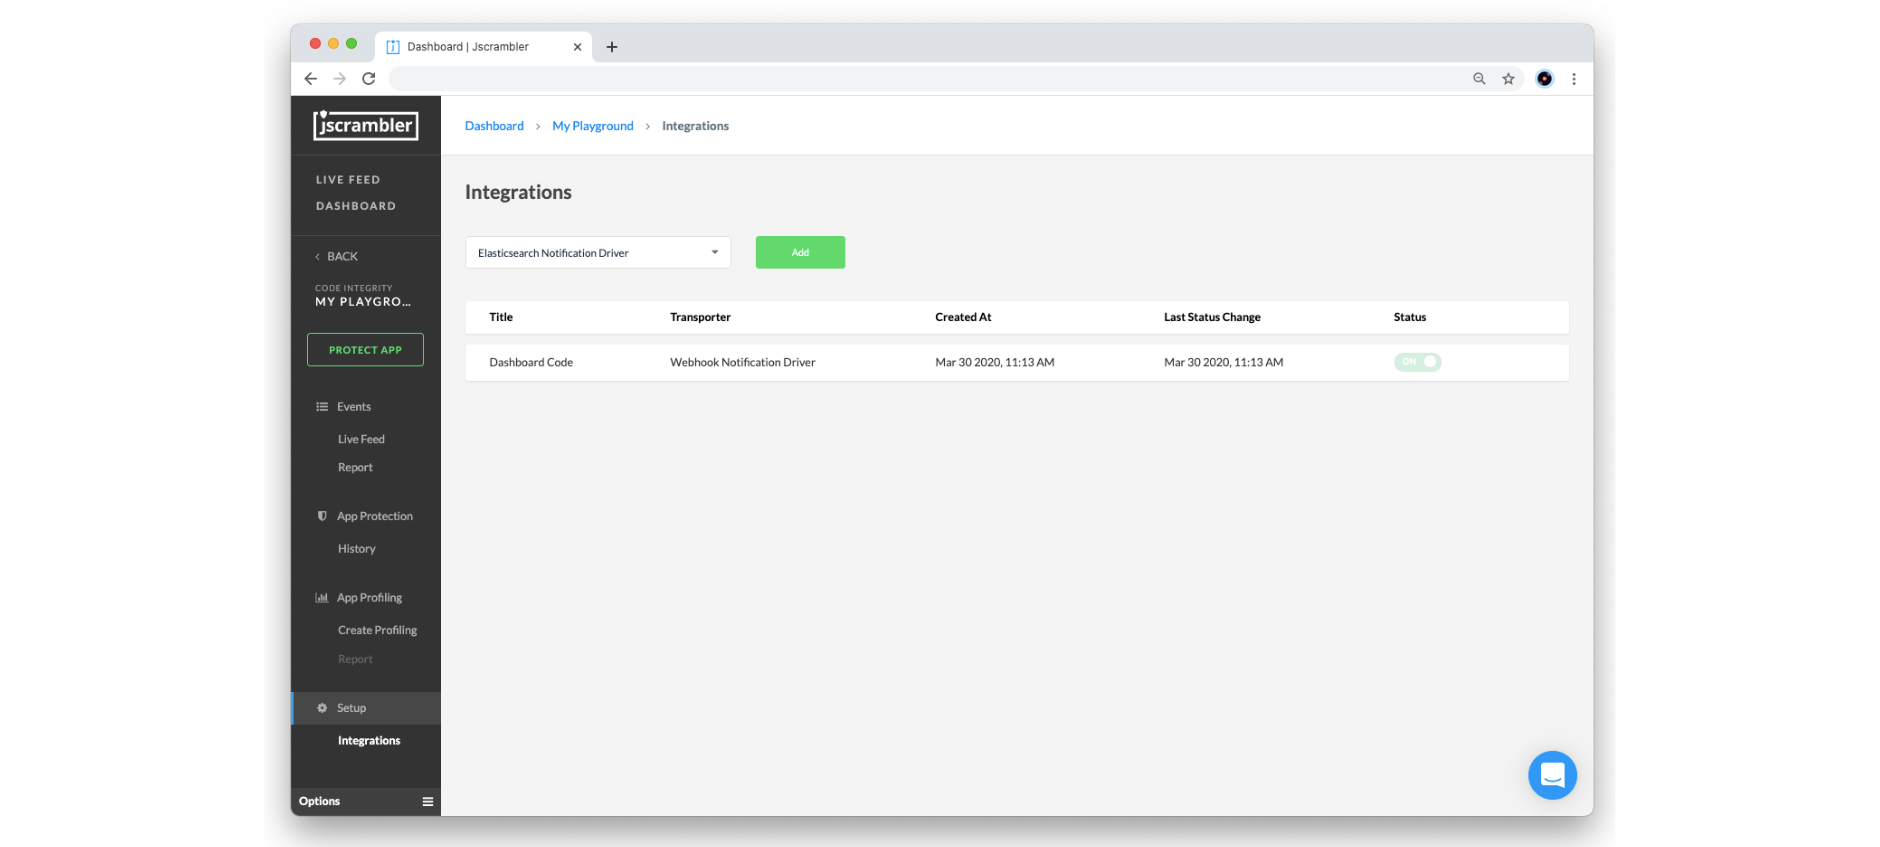
Currently, we provide two types of drivers that your SIEM will most likely be compatible with: Elasticsearch and Webhook. Below, we will explore how to set things up in each of these.
Elasticsearch
To set up real-time notifications with an Elasticsearch instance, select the Elasticsearch Notification driver from the dropdown box and click the “Add” button.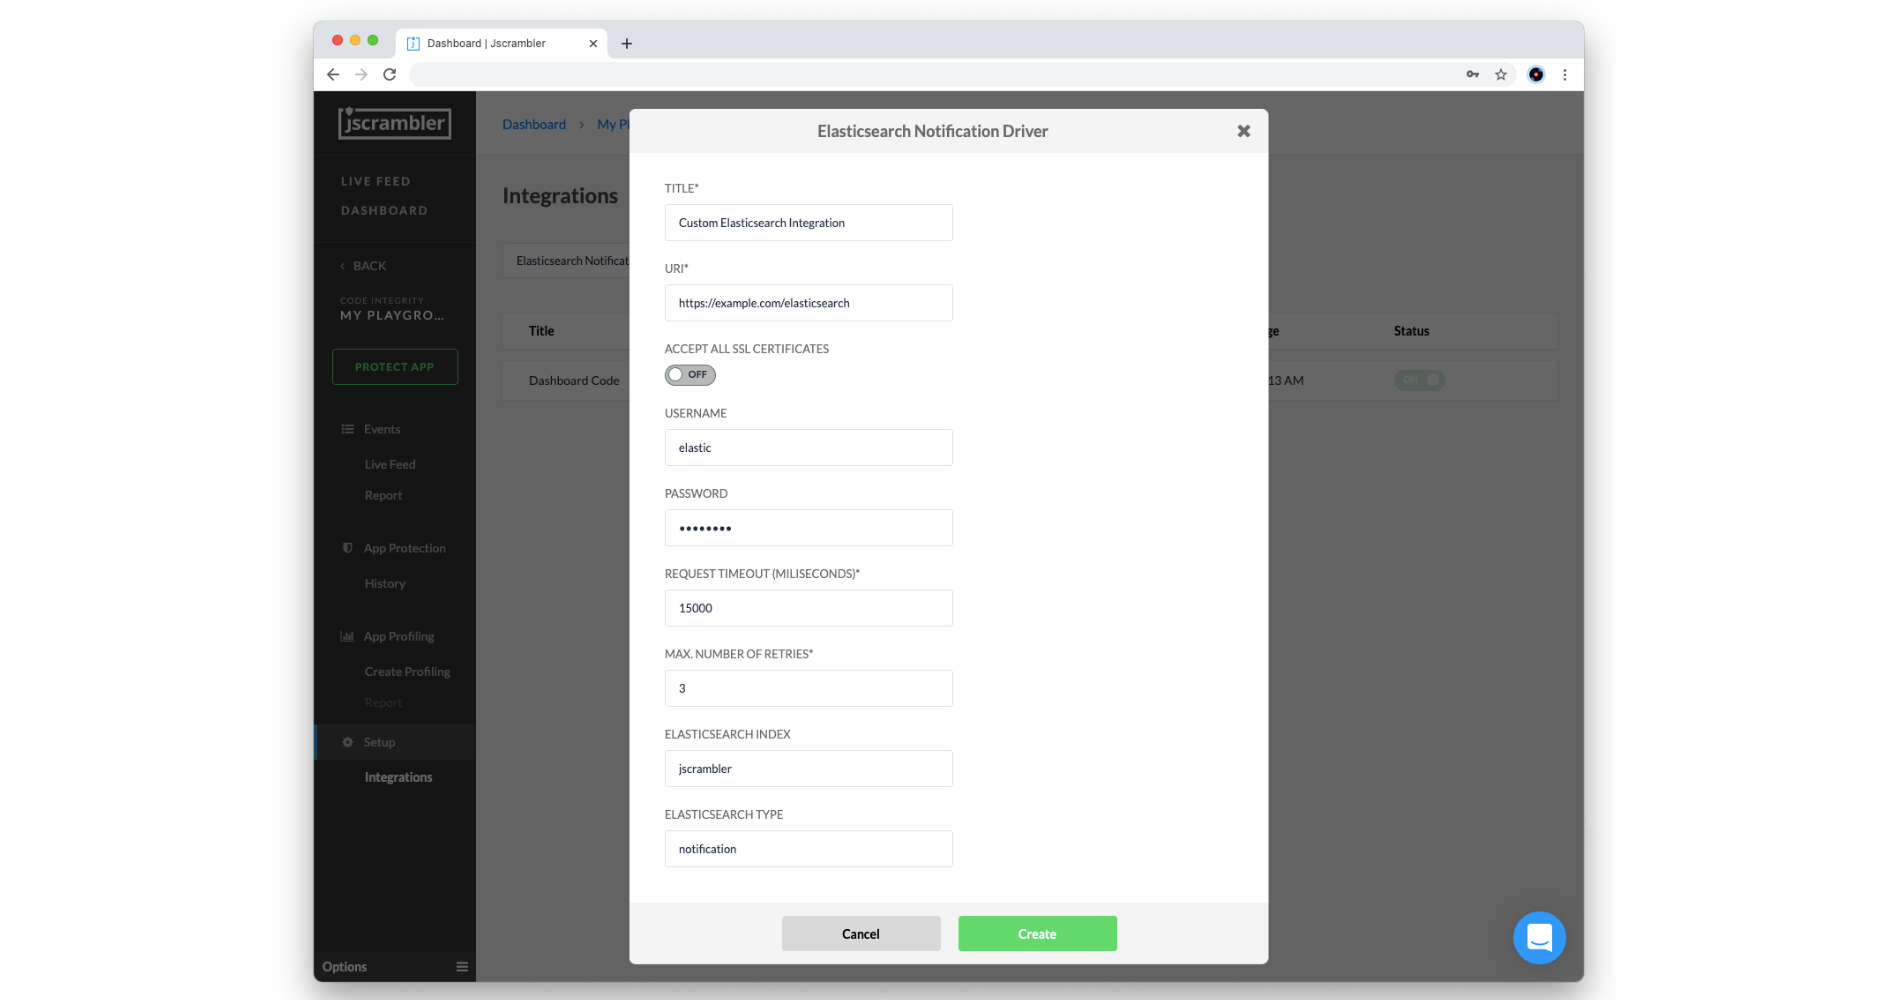
Then, you will need to configure the following parameters according to your Elasticsearch setup:
Title: Name of this integration
URI: Network endpoint of your Elasticsearch instance (must be publicly available)
Accept All Certificates: turn on to allow self-signed certificates
Username/Password: client authorization to the Elasticsearch instance
Request Timeout (milliseconds): maximum amount of time waiting for the request to be completed
Max. Number of Retries: number of times the service attempts to deliver the Real-Time Notification once the first attempt fails
Elasticsearch Index: name of the Elasticsearch index where your notifications will be grouped
Elasticsearch Type: name of the Elasticsearch type
When you are done, click on the Create button to validate and store the configured Elasticsearch integration.
Webhook
To set up real-time notifications with a Webhook, select the Webhook Notification driver from the dropdown box and click on the “Add” button.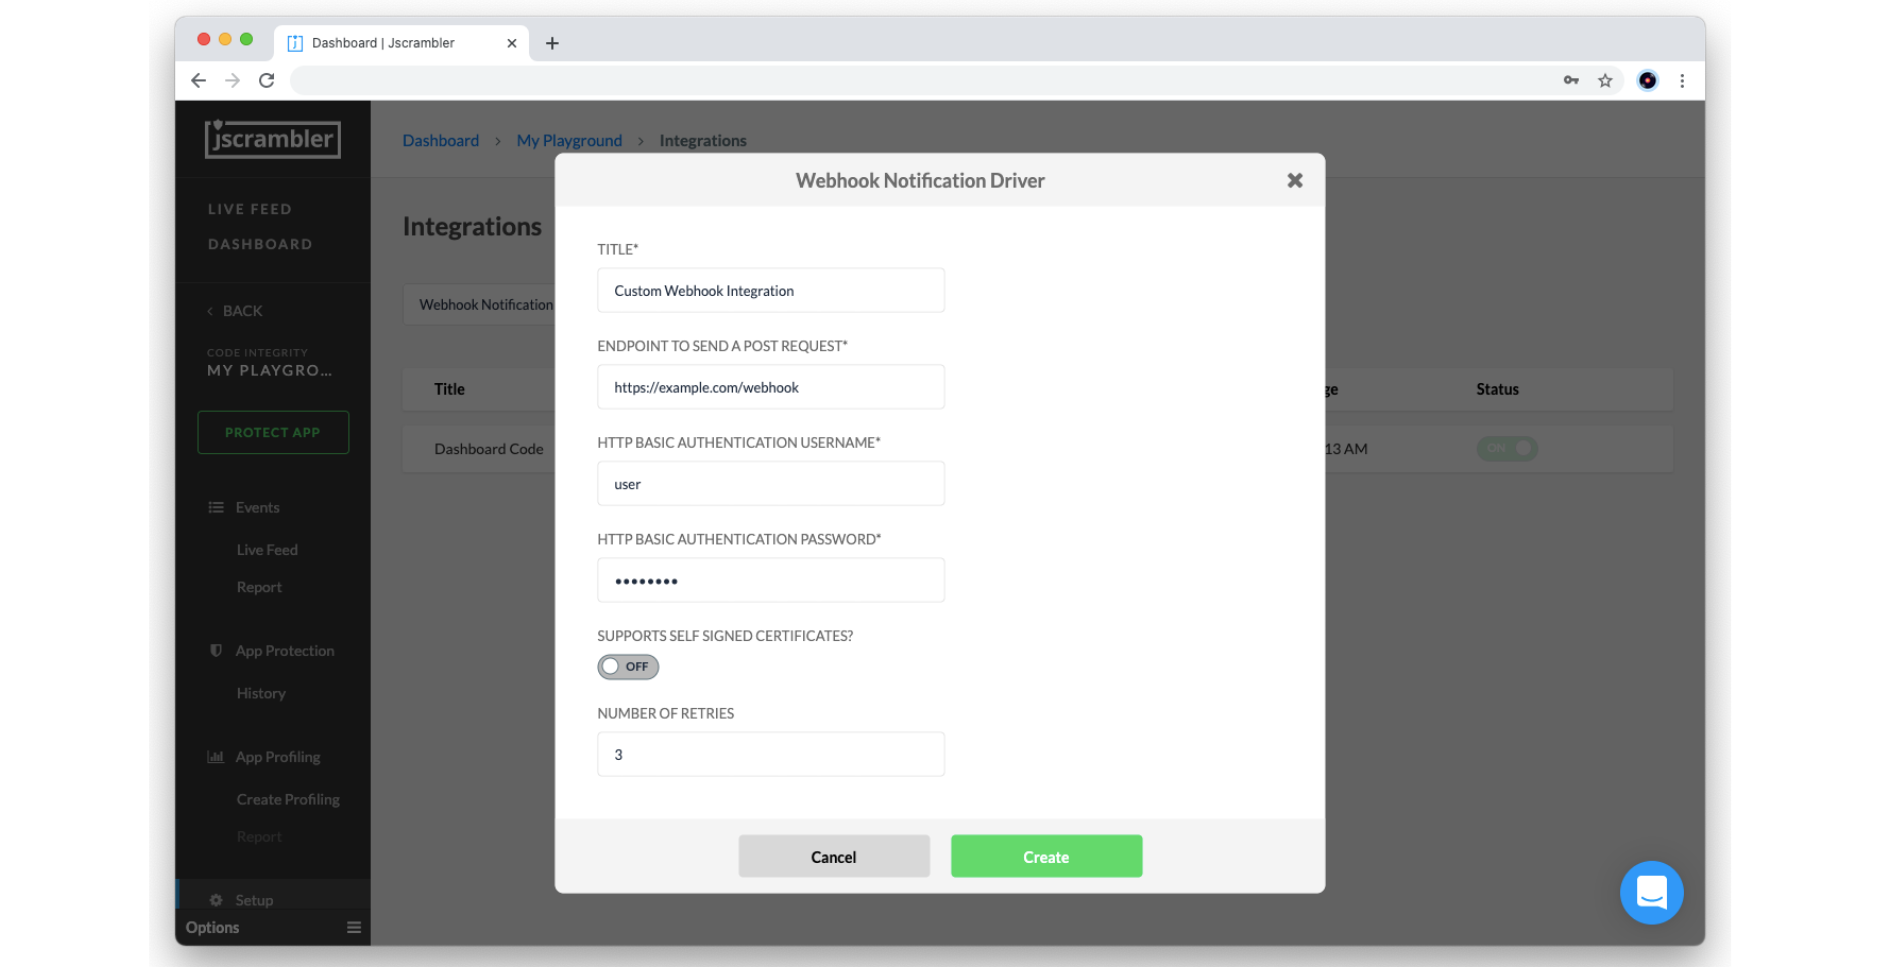
Then, you need to configure the following parameters according to your SIEM (which should be capable of receiving HTTPS requests):
Title: Name of this integration
Endpoint to send a POST Request: Network endpoint of your HTTP (S) server instance (must be publicly available)
Basic Authentication Username/Password: client authorization to the HTTP (S) server
Support Self-Signed Certificates: turn on to allow self-signed certificates
Max. Number of Retries: number of times the service attempts to deliver the Real-Time Notification once the first attempt fails
When you are done, click on the Create button to validate and store the configured webhook integration.
And that’s all from the Jscrambler dashboard! Let’s now see how to map the notification body to the respective security alerts.
Mapping the notification body
Each real-time notification sent by Jscrambler will follow the pattern below:
{
  "title": "Real time notification",
  "description": "Code violation: j-003-00001",
  "body": {
	"0": "j-003-00001",
	"1": 1625757006491,
	"2": -60,
	"3": "Linux x86_64",
	"4": "Mozilla/5.0 (X11; Linux x86_64; rv:89.0) Gecko/20100101 Firefox/89.0",
	"5": "https://example.com/index.html",
	"8": "Gecko"
  },
  “clientIp”: “111.111.111.111”
}
To properly visualize this data in your SIEM, you should map these fields to their corresponding descriptions.
Here’s the meaning of each field in the request’s body:
JSON selector | Field description |
|---|---|
body[“0”] | Alert codes (see table below for a mapping reference) |
body[“1”] | Alert timestamp in milliseconds |
body[“2”] | Timezone |
body[“3”] | Platform |
body[“4”] | User Agent |
body[“5”] | Script URL |
body[“8”] | Navigator product |
As for the alert codes of body[“0”], find the corresponding alert description below:
Alert code | Alert description |
|---|---|
j-001-xxxxx | Browser Lock |
j-002-xxxxx | Date Lock |
j-003-xxxxx | Domain Lock |
j-004-xxxxx | OS Lock |
j-005-xxxxx | Self Defending |
j-0012-xxxxx | Root/Jailbreak Detection Lock |
And that’s it! You’re done with the required configuration.
End Result
Now that you have set up your SIEM integration, you should see real-time notifications in your SIEM. In the image below, you can see a preview of the resulting dashboard using Kibana.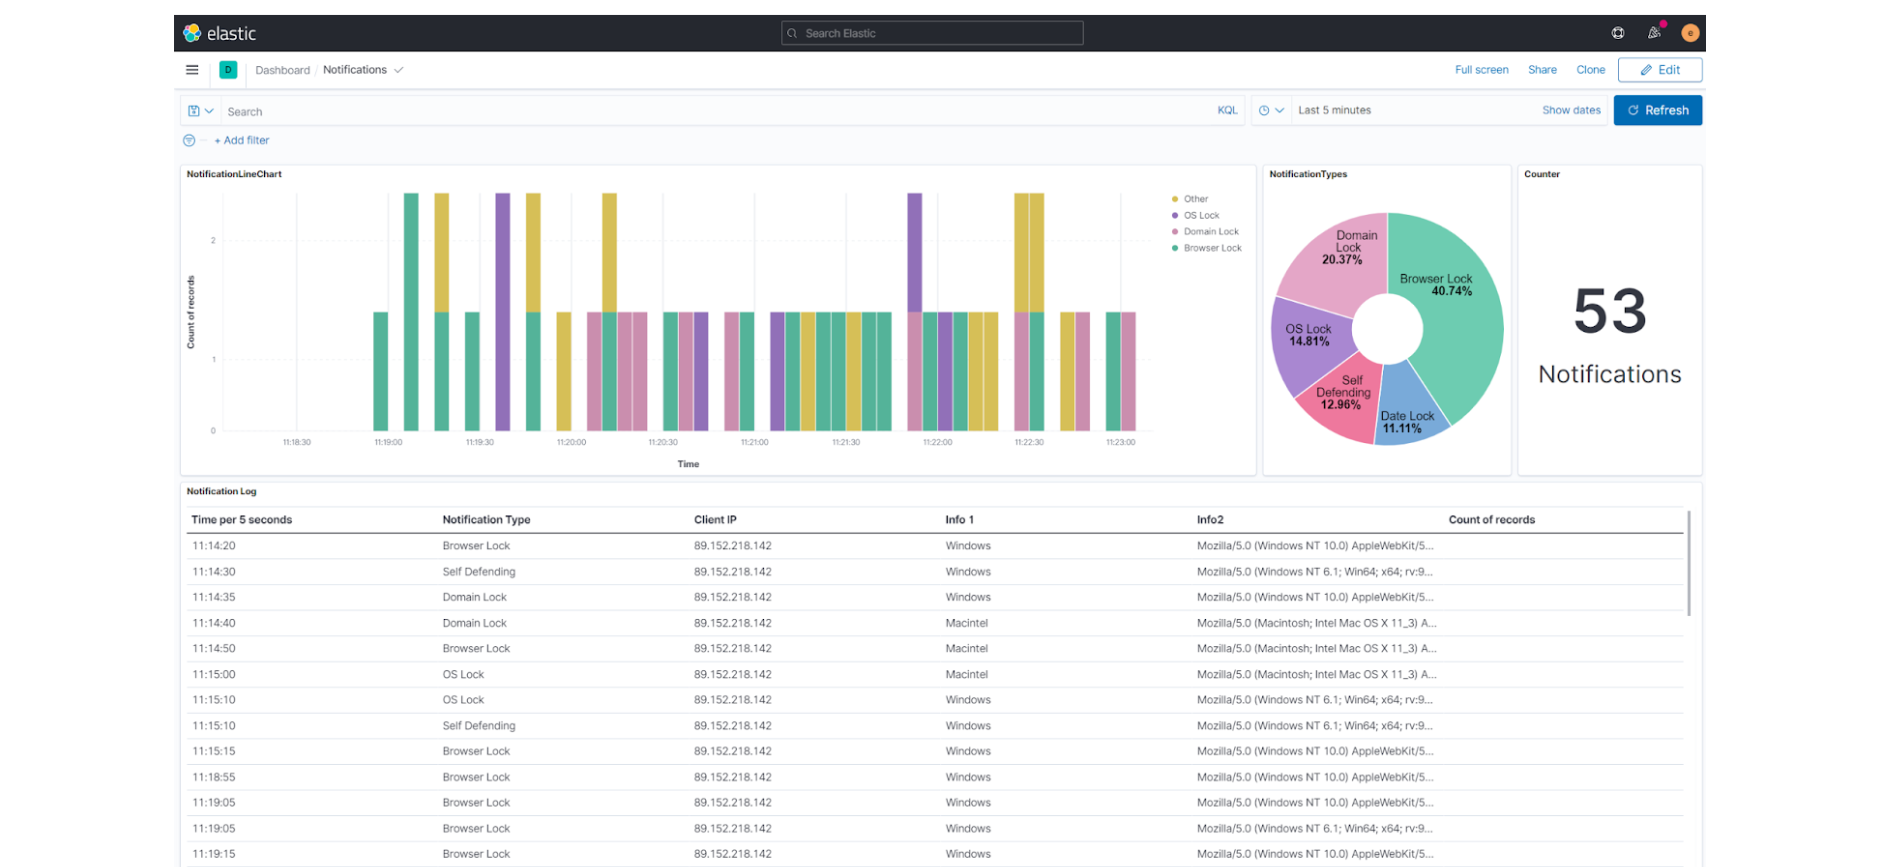
Now that you have centralized your security information in one system, it is easier to start automating your audit logs and alert checkups.
Conclusion
We have reached the end of our Jscrambler SIEM Integration tutorial.
As you saw, getting started with this feature is a simple, one-time process that will enrich your SIEM with valuable information. Don’t miss this chance to start centralizing your security information and making it easier to maintain in-depth security.
Feel free to proceed to one of our 101 Tutorials:
Jscrambler 101 — Code Annotations (Code Performance)
Jscrambler 101 — Profiling (Code Performance)
Enjoy your testing. Start protecting your Applications ASAP! If you have any additional questions, feel free to contact us.
Jscrambler
The leader in client-side Web security. With Jscrambler, JavaScript applications become self-defensive and capable of detecting and blocking client-side attacks like Magecart.
View All ArticlesMust read next
Jscrambler 101 — Self Defending
Welcome back to our 101 tutorials on how to use Jscrambler to protect your JavaScript. This time, we’re going to talk about Self Defending.
November 14, 2023 | By Jscrambler | 3 min read
Zero Footprint Policy - Seamless Continuous Integration with Jscrambler
With a couple scripts and an automation server, Jscrambler can be smoothly integrated into your DevOps practices, let us show you how.
February 12, 2018 | By Ricardo Leite | 4 min read
