Build Your Chatbot with OpenAI's API
March 19th, 2024 | By Ejiro Thankgod | 13 min read

How to build a chatbot using OpenAI API?
Chatbots have become increasingly popular and valuable tools in today's digital landscape. They provide automated and personalized conversational experiences, offering assistance, information, and engagement to users across various platforms.
Read this step-by-step guide to set up a custom chatbot with Open AI.
Understanding OpenAI’s API
An API serves as a communication framework for software applications to interact. OpenAI's API facilitates the integration of their advanced language models, empowering developers to incorporate these models into their projects for diverse natural language processing tasks. Here are some key points to understand about OpenAI's API:
Access to Language Models: OpenAI's API provides access to state-of-the-art language models that can understand and generate human-like text. These models can answer questions, generate creative content, translate languages, summarize text, and much more.
Integration: Developers can integrate OpenAI's API into their software, websites, chatbots, or any application that involves natural language processing. This integration is done through HTTP requests, making it relatively straightforward for developers.
Customization: OpenAI's API allows developers to fine-tune models for specific tasks or applications. This means developers can adapt the language models to suit their particular needs, making them highly versatile.
Usage-Based Pricing: OpenAI's API typically operates on a pay-as-you-go pricing model, with developers paying for the number of requests or tokens processed. This allows for scalability and cost control.
Language Support: The API supports multiple languages, making it versatile for applications in different regions and languages.
Ethical Considerations: Using OpenAI's API comes with ethical responsibilities, as it can generate text that may be harmful or biased. Developers must implement safeguards and moderation to ensure responsible use.
Chatbots have become integral in enhancing user interactions and automating customer support, and when powered by OpenAI's language models, they can engage users in remarkably natural and intelligent conversations. In this journey, we will explore the dynamic synergy of OpenAI's API, Node.js, and React, learning how to build a chatbot that not only understands and responds to user queries but also seamlessly integrates into your web applications. This article will be divided into two sections:
Chatbot with OpenAI’s API and Nodejs
Chatbot With OpenAI’s API and React
Chatbot with OpenAI’s API and Nodejs
The aim here is to develop a chat application designed to operate exclusively within a text-based command-line environment, such as the terminal or command prompt, and our main backend framework would be Nodejs.
Registering for an OpenAI API key
First and foremost we have to generate an API key, and for us to do that will have to follow the steps below:
Create an account on the OpenAI website.
To access the menu, log onto your account and click your profile name or icon.
Choose the 'View API Keys' option from the menu.
Select the 'Create New Secret Key' button.
Copy and paste the API key into a secure location when it has been generated. Keep in mind that the key won't be shown again, so store it safely.
Setting up the Development Environment
Create a folder for the project first, then inside your folder run the following CLI.
npm init -y
This will create a package.json file inside our project folder to keep track of the project details
Add the following line of code in the package.JSON underneath the script line:
"scripts": {
"dev": "node script.js"  },
This will help us any time we want to run our js file all we have to do is run the npm run dev command.
Also, Add the following line of code to the file:
"type": "module",
This single code line will enable the ES6 module Import statement.
Installing necessary libraries and dependencies
After that, we install dotenv and openai dependencies.
|
This helps our code to recognize the .env file that we’re going to create as well as our script.js.
Next, we create our .env file and paste the API key that was generated.
API_KEY="YOUR_OPENAI_KEY_GENERATED"
Inside the script.js we’ll import config, OpenAI, and readline from dotenv, openai, and readline module:
import { config } from "dotenv";
config()
import OpenAI from 'openai';
import readline from "readline";
Add the following code below after importing your module.
const openai = new OpenAI({
    apiKey: process.env.API_KEY
});
The code initializes an instance of the OpenAI API with the API key stored in the process.env.API_KEY environment variable, enabling secure access to OpenAI's services within a Node.js application. You can generate an API key if you don't already have one by following the steps above.
So we’re going to use the createChatCompletion function created by Openai, so we will type the code below.
const chatCompletion = await openai.chat.completions.create({
 model: "gpt-3.5-turbo",
 messages: [{"role": "user", "content": "Hello!"}],
});
console.log(chatCompletion.choices[0].message);
The code above calls the createChatCompletion function with a sample input message and then prints the response to the console (chatCompletion.choices[0].message) for you to review and verify if the function is working correctly.
This code snippet uses OpenAI's Chat API to engage the GPT-3.5 Turbo model in a conversation initiated by a "Hello!" message from a user. It captures the model's response and logs it to the console, making it a fundamental building block for creating chatbots with OpenAI's powerful language models.
So when we run the npm run dev command, we get a response from the AI after some time. And there you have it; our chatbot is up and running.
However, it will be advantageous to increase the application's interactivity by asking the user for feedback rather than hardcoding the message's text into the code. We can benefit from the readline module in this situation.
For that to happen, we’re going to set up an event listener.
const userInterface = readline.createInterface({
   input: process.stdin,
   output: process.stdout
})

userInterface.on("line", async input =>{
   const chatCompletion = await openai.chat.completions.create({
model: "gpt-3.5-turbo",
messages: [{role: "user", content: "input"}],
     })
console.log(chatCompletion.choices[0].message.content);
userInterface.prompt()
})
By creating this userInterface, you enable the application to interact with users by reading their input from the command line (process.stdin) and displaying output to the command line (process.stdout).
We’ll wrap our previous code within the event listener, then create a userInterface.prompt() for the next input. So whenever a user sends a message, they get a reply, and the code prompts the user for the next input message, and it runs like a loop.
Run the program to engage the AI in conversation. You will see a similar illustration below:

What about those individuals who might not know how to use a CLI application? They'll require a more user-friendly product with an improved user interface (UI) and user experience (UX). The creation of that type of application using React will be the main topic of the following section.
Chatbot With OpenAI’s API and React
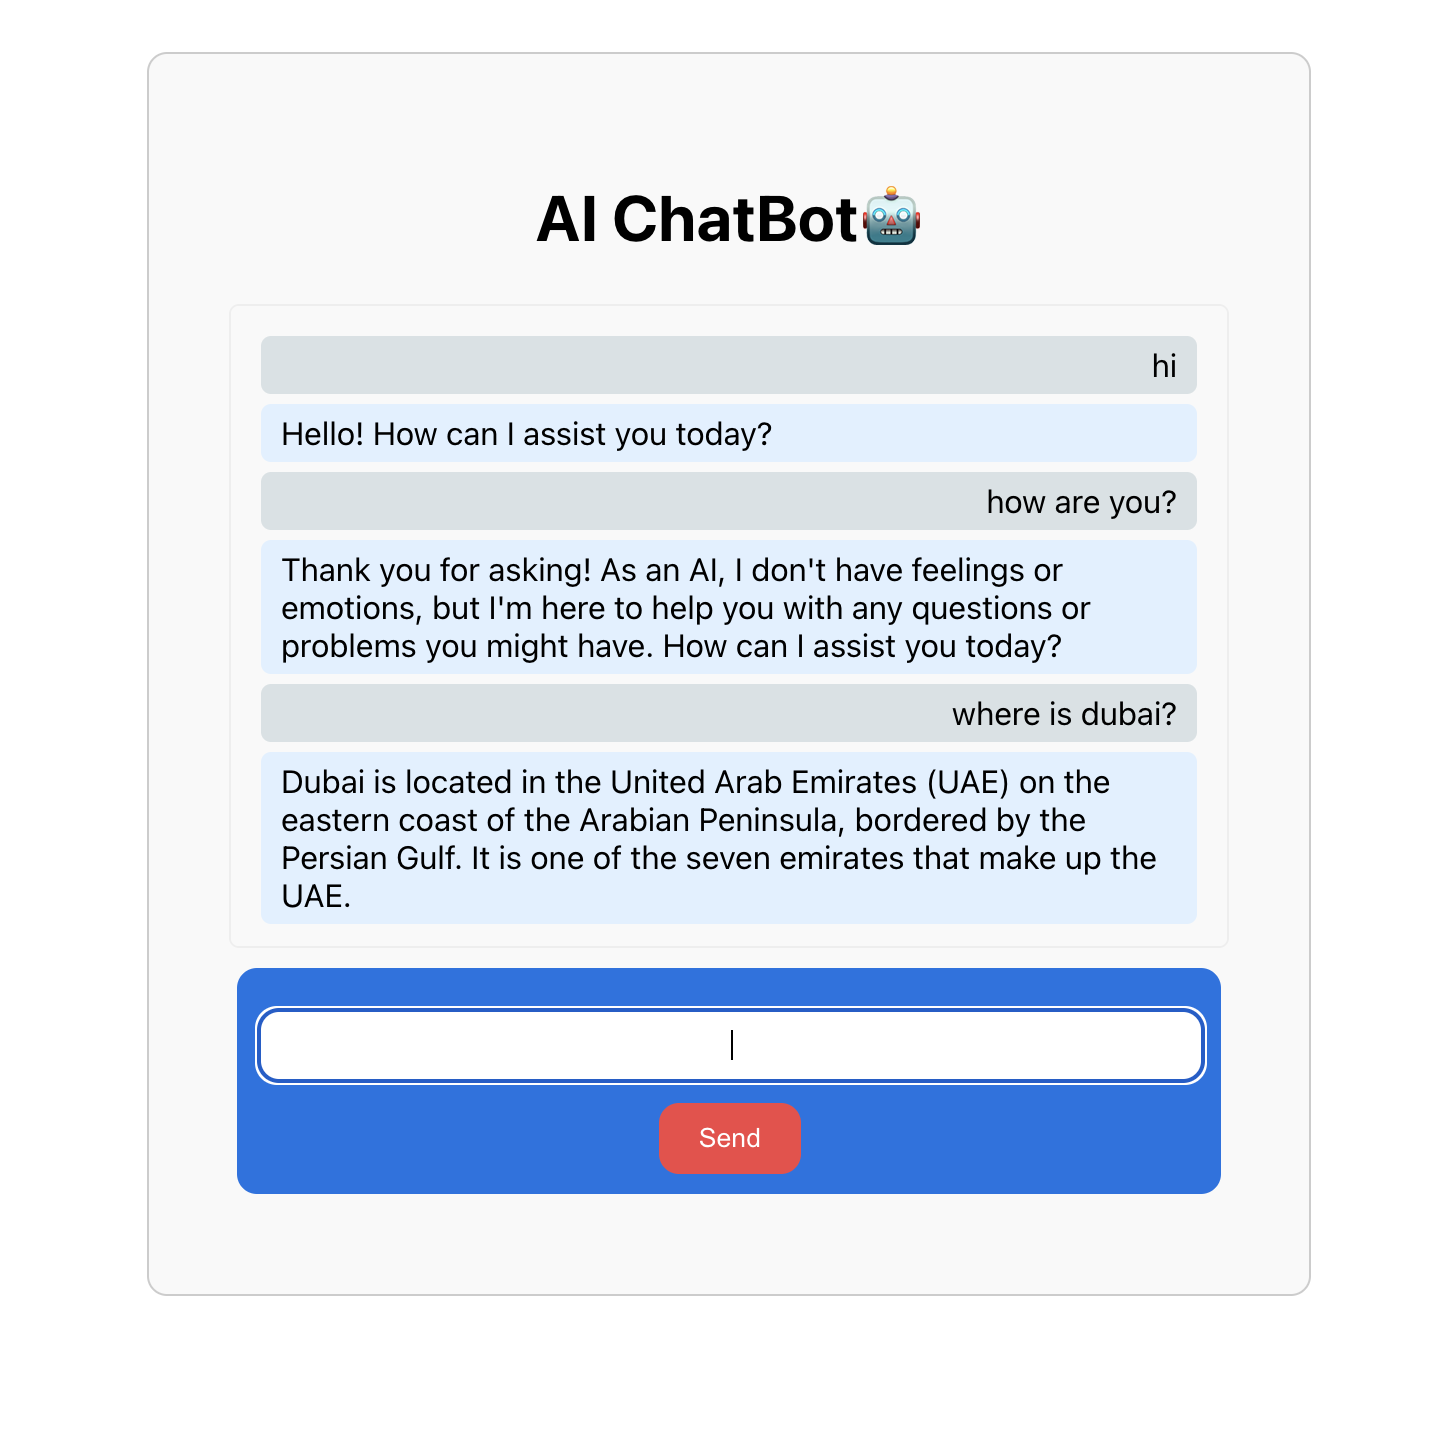
The goal of this section is to assist front-end developers in becoming familiar with the OpenAI API so they can design better chat applications and user interfaces for improved user experiences, like what we have below.
The first thing to do is set up a basic React boilerplate by running the command below:
npx create-react-app chatbotAfter clearing the bloated files, then install the only dependency we need.
npm i openaiWe’ll create a component folder in our react project and also create a Chatbot.js file and that’s where the work needs to be done.
Inside the Chabot.js we’ll import the following module below:
import React, { useState } from "react"; |
Implementing basic input and output functionality
Let’s define the Chatbot component, which is the main component of the chatbot:
const Chatbot = () => { |
The Chatbot component uses the useState hook to store the input, output, and message history of the chatbot.
Then we create an instance of the OpenAI API with specific configurations.
const openai = new OpenAI({ |
The code initializes the openAI variable, which is an instance of the OpenAI API, with an API key and a configuration that may be used in a browser environment i.e. adding dangerouslyAllowBrowser: true to your code. This allows your application to make requests to OpenAI's services securely and interact with its language models and AI capabilities.
We’re going to create a function that’s responsible for sending a user's message to the OpenAI GPT-3.5 Turbo model, receiving the chatbot's response, updating the conversation history, and clearing the input field for a seamless and organized conversation.
const sendMessage = async () => {
    const chatCompletion = await openai.chat.completions.create({
      model: "gpt-3.5-turbo",
      messages: [{ role: "user", content: input }],
    });
    setOutput(output + chatCompletion.choices[0].message.content + "\n");
    setInput("");  };
The sendMessage function is responsible for sending a user's input message to the OpenAI GPT-3.5 Turbo model through the OpenAI API. It awaits the response from the model and captures it in the chatCompletion variable, allowing you to use the Chatbot's generated response for further interactions or display to the user.
Create a form-like component, where we can interact with the Chatbot.
const Chatbot = () => {
...
return (
    <div className="chat-container">
      <h1>AI ChatBot🤖</h1>
      <div className="bot-message">{output}</div>
      <div className="user-message">
        <input
          type="text"
          value={input}
          onChange={(e) => setInput(e.target.value)}
          className="chat-input"
        />
        <button type="button" onClick={sendMessage} className="send-button">
          Send
        </button>
      </div>
    </div>
  );
};
export default Chatbot;
The input field and the button are both controlled components which means that their values are managed by the React state. The input state variable stores the user's input, and the output state variable stores the chatbot's response.
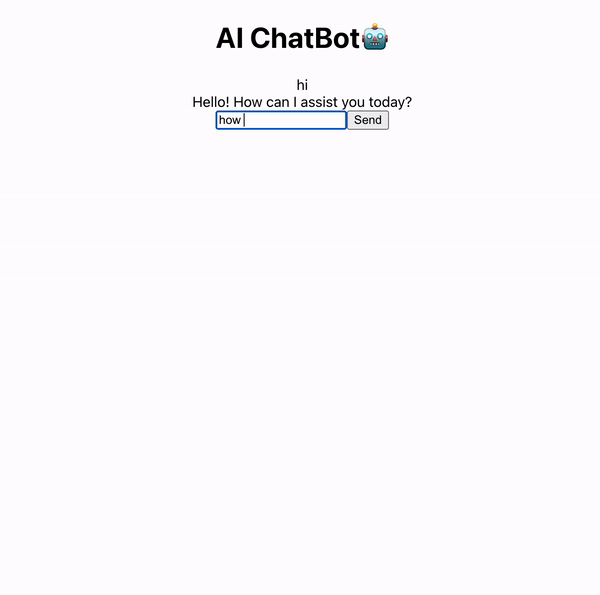
If we try and run our code we’d get something like this below:

Now, if we ask our ChatBot a question, we hope to get a reply.
Designing the chatbot's conversational flow
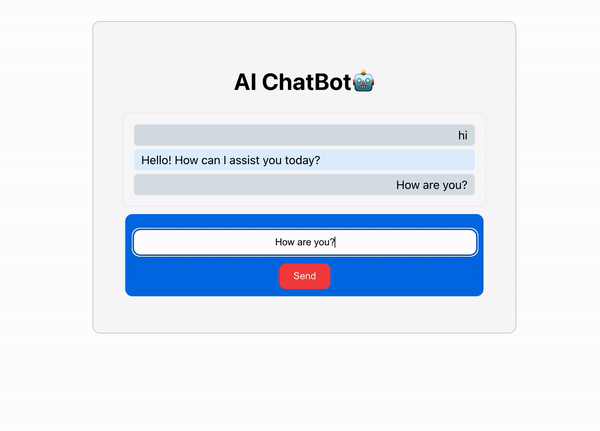
Structuring the chatbot's interactions with users by adding some styles, will ensure a smooth and natural flow of conversation. So we styled our Chabot; click on the GitHub link for the complete code.
Best Practices for Chatbot Development
Developing a successful chatbot involves a combination of technical and user experience considerations. Here are some best practices to keep in mind when creating a chatbot:
Ensuring user privacy and data security: Safeguarding user data and maintaining compliance with data protection regulations. Communicate your privacy policy to users.
Iterative development and continuous improvement: Continuously test and refine your chatbot. User feedback, analytics, and A/B testing can help improve its performance and user satisfaction.
Regulatory Compliance: Ensure that your chatbot complies with relevant industry and regional regulations, especially in highly regulated sectors like healthcare or finance.
Conclusion
Exploring chatbot development using OpenAI's API provides a chance to utilize advanced AI technology and create innovative conversational agents, benefiting various industries.
Whether you're a seasoned developer or just starting, OpenAI's tools empower you to enhance customer service, user experiences, and communication methods, driving innovation in the digital age.
Resources
Jscrambler
The leader in client-side Web security. With Jscrambler, JavaScript applications become self-defensive and capable of detecting and blocking client-side attacks like Magecart.
View All ArticlesMust read next
Build a Chatbot with Dialogflow and React Native
Learn how to build your first chatbot with Dialogflow and React Native and improve the user experience in your next mobile app.
March 26, 2019 | By Aman Mittal | 9 min read
Understanding Context API In React.js
In this tutorial, you'll learn about the Context API which is used for passing or sharing data across components in React.js.
September 9, 2022 | By Jay Raj | 9 min read
