Category: Client-Side Security

12 Checklist Items for Defeating Magecart Attacks

Magecart groups have made many successful attacks on high-profile companies over the past years.

In a Magecart attack, attackers covertly inject credit card skimming code into the checkout pages of e-commerce websites to exfiltrate data on thousands of customers.

While some might only remember Magecart from the 2018 British Airways breach, one of these cybercrime groups breached the payment forms of retail giant Claire’s earlier this summer. And just a month or so ago, attackers breached the websites of eight U.S. cities through a third-party service.

If we zero in on the targets of high-profile Magecart attacks, the average revenue of the victims sits just north of $2.1 billion.

There’s another important metric of web skimming attacks that can’t be ignored. The Magecart skimmer remained active on Claire’s website for 50 days before being detected and removed.

On average, companies take 22 days to uncover the actual attack. This huge lag largely explains why Magecart attacks are still such potent threats to every company that processes online payments.

How to Defend Against Magecart Attacks

Several companies are actively looking for specific protection against this kind of web skimming attack, also known as “formjacking.” There’s enough evidence that web skimmers are evolving fast, and more traditional security solutions such as a Content Security Policy or using Subresource Integrity (SRI) aren’t up to par.

When security teams look for and assess different products to tackle this important business problem, what specific features should they consider? And which tests should companies perform to best mimic a real-world Magecart skimmer?

Companies should start by understanding that they shouldn’t focus on preventing the actual infection from a web skimmer. There are so many possible ways for attackers to inject malicious code into the company’s platform that most security pros consider it a lost cause.

It is better to acknowledge that an infection will likely occur at some point. Then the clock starts ticking. Every minute that passes without the ability to detect and block the skimmer means thousands of infected user sessions.

Consider a two-step process of detection and blocking. The implemented product needs to detect signs of a web skimming infection in real time and then deliver the ability to block this malicious behavior.

We recently finished a three-month proof of concept with a major airline that was testing several distinct approaches to mitigating Magecart attacks. As we went head-to-head with several competitors, we got a firmer understanding of the rigorous type of testing that companies should put in place when procuring a product.

Checklist for defeating Magecart Attacks

Here is a checklist of the tests required:

Detect and block the addition of “click” or “submit” event handlers to the page.

Security pros consider the addition of form-related event handlers (for example, an on-mouseover event) a common malicious behavior in Magecart skimmers.

Detect and block the addition of elements to the page

More advanced web skimmers add fake credit card payment forms to the page or new buttons to the page. Security pros also consider this sort of document object model (DOM) tampering a common indicator of malicious behavior.

Detect and block the removal of elements from the page

This includes a div and its child nodes. By removing content from the page, attackers can divert users from legitimate flows instead of compromised ones.

Detect and block the modification of page content

It can be an editing element attribute or changing element visibility. Much like removing elements from the page, modifying it lets attackers trick users, for example, by hiding a spinner.

Detect and block sensitive data collection and its exfiltration

Magecart attackers invariably need to send the captured data out to a drop server. Security teams need to detect this, namely by monitoring for outbound network events to unknown domains or even unexpected data to known domains.

We consider a product that passes all of these tests a good candidate in terms of raw capabilities. But security teams know that this just represents the beginning.

There are important issues of performance, maintenance, flexibility, and the security and resilience of the product itself.

Extra points to consider

Require a complete website inventory

This improves the visibility of the scripts and network connections that take place in any given user session, making it easier to learn what’s normal and spot malicious behaviors.

Avoid bot-based approaches

Some of the more advanced Magecart skimmers use bot detection techniques to avoid detection from approaches that visit the page continuously to check for skimmers.

Avoid products with limited compatibility

Some products don’t work on all browsers and versions; for example, SRI isn’t compatible with Internet Explorer or Safari for iOS.

Avoid impact on page performance

Online experts consider page performance an important driver of e-commerce sales; the solution should leave a minimal footprint on performance.

Avoid high-maintenance products that are difficult to integrate

Integrating a product that requires significant refactoring of current systems or substantial maintenance and configuration effort will lead to problems further down the road.

Avoid approaches that are only signature-based

These products will be very limited in terms of detection capabilities and will likely fail to detect new exploits. Optimal products look for behaviors instead.

Look for tamper-resistant defense code

The defense code will often run alongside potentially malicious code. To avoid interference from the malicious code, the code itself must deter direct tampering attacks.

Conclusion

Magecart attacks are relevant to any e-commerce organization today.

We’re confident that following these checklists will help any company that’s looking to protect itself against this growing business threat.

To help companies win this battle, we have a free inventory report for you to gain visibility over your website’s scripts. This includes a full website inventory with details of infected scripts and suspicious network events.

Originally published in SC Magazine by Pedro Fortuna.

Closing Security Gaps in Mobile Apps With Source Code Protection

Close security gaps. Stay ahead of attackers and cybercriminals with source code protection.

The Department of Justice and the Federal Trade Commission have been issuing more scam alerts since the pandemic outbreak. Attackers create apps that use the same branding as official government apps and distribute these copycats via unofficial channels.

In June, Canadians were tricked into installing a fake COVID-19 contact tracing app that, despite being advertised as Health Canada, covertly installed ransomware, encrypting the user’s files and demanding a ransom payment.

Similarly, 12 other fake contact tracing apps in South America, Europe, and Asia were also found to be installing Trojan horses on users’ devices and stealing their credentials and other sensitive data.

But contact tracing programs are an example of the many apps developed by public- and private-sector teams that have been imitated or breached by attackers.

Often, the app developers must meet strict deadlines and may end up putting security on the back burner, intending to address it later.

Application security guidelines

Security is critical for any application that handles sensitive user information. Personally identifiable information is valuable to attackers, and it takes just one security gap for an app to facilitate a data breach. For government apps, this can have countrywide ramifications.

What can be done to ensure in-depth security?

First and foremost, these applications, especially government-backed apps, must always undergo strict independent security audits before being released. This process should start as early as possible in the software development lifecycle.

1. Mobile Security Testing Guide

Development teams should follow well-established application security guidelines, namely the Open Web Application Security Project’s (OWASP) Mobile Security Testing Guide. This guidance describes several possible attack vectors and urges teams to ensure the app is not vulnerable on any of its many fronts.

2. Source Code Protection

Another security concern is source code protection. When apps are released, their source code is typically shipped in plain text, exposed to the eyes of users and attackers alike.

This poses a significant security risk mentioned in the ISO 27001 information security standard, which states that “program source code can be vulnerable to attack if not adequately protected and can provide an attacker with a good means to compromise systems in an often covert manner.”

As stated in the OWASP Mobile Top 10 Security Risks guide, attackers take exposed code to “directly modify the code, change the contents of memory dynamically, change or replace the system APIs that the application uses, or modify the application’s data and resources. This can provide the attacker with a direct method of subverting the intended use of the software for personal or monetary gain”.

If attackers have easy access to an app’s source code, they can distribute dozens or hundreds of copycats via third-party websites or apps, tricking users into installing them by exploiting the branding of government agencies.

To counter this and other security liabilities, development teams must look for resilient source code protection that not only obfuscates the source code to hinder reverse engineering but also adds runtime defenses to prevent tampering to thwart copycats and lock attackers out.

With every passing day, attackers go further to grab valuable user data, so development teams must be aware of the responsibility in their hands.

With government-backed apps and the private data of millions, no security risk is too small.

Security Gaps: Jscrambler Source Code Protection

To get started protecting the source code of your mobile apps, learn more about our technology for protecting JavaScript, Hybrid, or Native Apps, or get started with a free trial of Jscrambler client-side security solution.

Jscrambler Recognized In Gartner’s Hype Cycle for Application Security, 2020 and Hype Cycle for Endpoint Security, 2020

Gartner, the world’s leading research and advisory company, has recognized Jscrambler as a Sample Vendor in the Hype Cycle for Application Security, 2020 and the Hype Cycle for Endpoint Security, 2020 reports.

Gartner has also recognized Jscrambler as a Representative Vendor in its Market Guide for In-App Protection and Market Guide for Online Fraud Detection.

Jscrambler Code Integrity enables enterprises to secure crucial business logic (such as proprietary algorithms), enforce licensing agreements, and prevent attackers from debugging or tampering with JavaScript code.

Jscrambler Webpage Integrity presents a holistic solution to detect and block, in real-time, malicious behavior on the client-side of web applications. It allows businesses to stop more advanced client-side threats such as Magecart and data exfiltration.

“In our opinion, being recognized by Gartner truly validates our commitment to pushing forward the boundaries of the Application Security industry,” said Rui Ribeiro, co-founder and CEO of Jscrambler. “We are helping thousands of companies protect their investments and users from potential threats, which means it’s always about staying ahead of attackers. That’s exactly what our solutions deliver for some of the world’s biggest organizations.”

Read the full press release.

Jscrambler is trusted by Fortune 500 and major companies in sectors such as Finance, Broadcasting, Software Development, E-Commerce, and Gaming.

Gartner Disclaimer

Gartner does not endorse any vendor, product, or service depicted in its research publications, and does not advise technology users to select only those vendors with the highest ratings or other designations. Gartner’s research publications consist of the opinions of Gartner’s research organization and should not be construed as statements of fact. Gartner disclaims all warranties, expressed or implied, with respect to this research, including any warranties of merchantability or fitness for a particular purpose.

How To Protect Node.js Apps With Jscrambler

Learn to protect Node.js apps with the most advanced polymorphic obfuscation techniques, code locks, and self-defensive capabilities. This tutorial will explain how to integrate Jscrambler seamlessly into the build process of a typical Node.js app in just a few minutes.

Node.js is a popular and open-source JavaScript runtime environment for creating server-side applications.

Prerequisites

First, ensure you have the latest version of NPM installed on your local machine.

npm update -g npm


Now, we need a sample Node.js app to use in this tutorial. Go ahead and use a simple Hello World Express app. First, install Express.

npm install express --save


Then, create an app.js file in our project root folder with the following code provided on the Express website:

const express = require('express')
const app = express()
const port = 3000

app.get('/', (req, res) => {
  res.send('Hello World!')
})

app.listen(port, () => {
  console.log(`Example app listening at http://localhost:${port}`)
})


This app starts a server and listens on port 3000 for connections. The app responds with Hello World! for requests to the root URL (/) or route.

If we run the app with the code below:

node app.js


We will see a Hello World message on localhost:3000.

Integrating Jscrambler

Let’s begin by getting a ready-to-use file with our intended Jscrambler configuration.

If you haven’t created a Jscrambler account yet, be sure to do so before moving forward.

Log into the Jscrambler Web App. Once there, create a new app. It is time to pick the Jscrambler transformations we want to use. We can pick them one by one in the Fine-Tuning tab, but, in our case, let’s go ahead to the Templates tab and pick up the Obfuscation template. If you need help with these steps, please refer to our guide to making your first protection request.

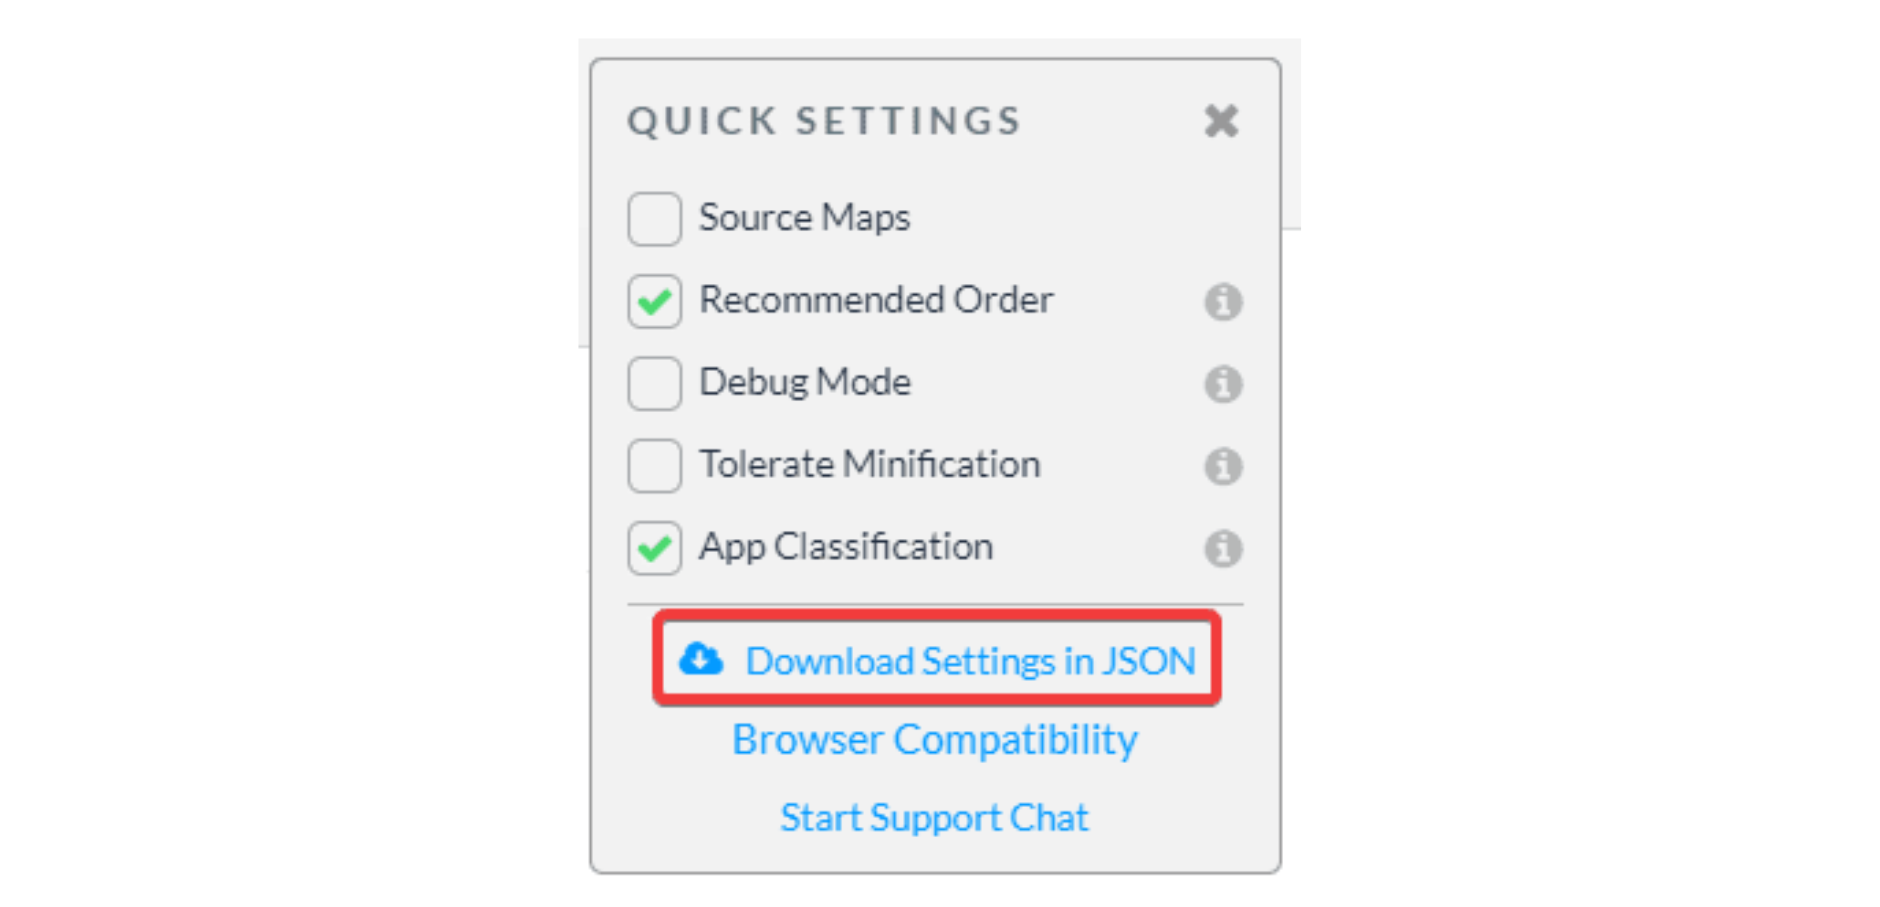
Now, we have to download a JSON file with all this configuration, which will be used only for quickly getting the required settings. You can do this by clicking the cogwheel next to “Protect App” on the right sidebar, which will present the following screen:
download-Jscrambler-JSON-explanationNow that you have the file with the needed configuration, you can integrate Jscrambler into your Node.js app’s build process using one of the tools, Grunt or Gulp. Let’s explore both approaches.

Grunt

Grunt is a JavaScript task runner to automate repetitive tasks like minification, compilation, unit testing, code protection, etc. In this case, it is a handy option to ensure that the source code of your Node.js app is always protected at build time.

To get started with Grunt, let’s install it as a dev dependency:

npm install grunt --save-dev


Now, we need to create a configuration file for Grunt, Gruntfile.js. This file contains our project and Grunt task configuration and loads Grunt plugins and tasks.

To keep things simple, let’s set up a basic Gruntfile:

module.exports = function(grunt) {
  grunt.initConfig({
    pkg: grunt.file.readJSON('package.json')
  });
};


Next, we want to add the Jscrambler Grunt plugin:

npm install grunt-jscrambler --save-dev


Now that the plugin is installed, we must enable it in our Gruntfile by adding this line at the bottom:

grunt.loadNpmTasks('grunt-jscrambler');


Right after this line, we have to set the “default” Grunt task with:

grunt.registerTask('default', ['jscrambler']);


Now that this is done, we must specify the task itself. Here, we will use some parts of the jscrambler.json file we downloaded before, namely accessKey, secretKey, applicationId, and the params array.

Our final Gruntfile.js file should look like this:

module.exports = function(grunt) {

    grunt.initConfig({
      pkg: grunt.file.readJSON('package.json'),
      jscrambler: {
        main: {
          options: {
            keys: {
              accessKey: 'YOUR_ACCESS_KEY',
              secretKey: 'YOUR_SECRET_KEY'
            },
            applicationId: 'YOUR_APPLICATION_ID',
            params: [
                {
                    "name": "objectPropertiesSparsing"
                  },
                  {
                    "name": "variableMasking"
                  },
                  {
                    "name": "whitespaceRemoval"
                  },
                  {
                    "name": "identifiersRenaming",
                    "options": {
                      "mode": "SAFEST"
                    }
                  },
                  {
                    "name": "dotToBracketNotation"
                  },
                  {
                    "name": "stringConcealing"
                  },
                  {
                    "name": "functionReordering"
                  },
                  {
                    "options": {
                      "freq": 1,
                      "features": [
                        "opaqueFunctions"
                      ]
                    },
                    "name": "functionOutlining"
                  },
                  {
                    "name": "propertyKeysObfuscation",
                    "options": {
                      "encoding": [
                        "hexadecimal"
                      ]
                    }
                  },
                  {
                    "name": "regexObfuscation"
                  },
                  {
                    "name": "booleanToAnything"
                  }
                ]
          },
          files: [
            {expand: true, src: ['app.js'], dest: 'dist/'},
          ]
        }
      }
    });
  
    grunt.loadNpmTasks('grunt-jscrambler');
    
    
    grunt.registerTask('default', ['jscrambler']);
    
  };


If we look at the file array, we’ll see that Jscrambler will use the app.js file, protect it, and then place the protected version in the dist/ folder. You can change these to match your project’s requirements.

All that’s left is to ensure our build process uses Grunt. In our case, we must make sure that there’s a script in our package.JSON file to build our app using Grunt:

"scripts": {
    "build": "grunt"
  },


We’re now ready to run our build:

npm run build


That’s it! If we check our /dist/app.js file, we will see that it has been obfuscated with Jscrambler.

Gulp

According to the 2019 State of JavaScript survey, Gulp is the second most popular build tool for JS. Similarly to Grunt, it allows you to automate repetitive workflows into efficient build pipelines.

To get started with Gulp, let’s install it as a dev dependency:

npm install gulp --save-dev


Let’s also install the Jscrambler Gulp plugin:

npm install gulp-jscrambler --save-dev


Now, we need to create a configuration file for Gulp, gulpfile.js.

Let’s go right ahead and add the configurations we need to get Jscrambler working with Gulp. To do this, we will need some parts of the jscrambler.json file we downloaded earlier: accessKey, secretKey, applicationId, and the params array.

Our final gulpfile.js file should look like this:

var gulp = require('gulp');
var jscrambler = require('gulp-jscrambler');

gulp.task('default', function (done) {
  gulp
    .src('app/**/*.js')
    .pipe(jscrambler({
      keys: {
        accessKey: 'YOUR_ACCESS_KEY',
        secretKey: 'YOUR_SECRET_KEY'
      },
      applicationId: 'YOUR_APPLICATION_ID',
      params: [
        {
            "name": "objectPropertiesSparsing"
          },
          {
            "name": "variableMasking"
          },
          {
            "name": "whitespaceRemoval"
          },
          {
            "name": "identifiersRenaming",
            "options": {
              "mode": "SAFEST"
            }
          },
          {
            "name": "dotToBracketNotation"
          },
          {
            "name": "stringConcealing"
          },
          {
            "name": "functionReordering"
          },
          {
            "options": {
              "freq": 1,
              "features": [
                "opaqueFunctions"
              ]
            },
            "name": "functionOutlining"
          },
          {
            "name": "propertyKeysObfuscation",
            "options": {
              "encoding": [
                "hexadecimal"
              ]
            }
          },
          {
            "name": "regexObfuscation"
          },
          {
            "name": "booleanToAnything"
          }
        ]
    }))
    .pipe(gulp.dest('dist/'))
    .on('end', done);
});


If we take a closer look at this file, we’ll see that src specifies the path to the files that Jscrambler will use. At the bottom of the file, .pipe(gulp.dest(‘dist/’)) places the protected version in the dist/ folder. You can change these to match your project’s requirements.

Now, all that’s left is to make sure that our build process is using Gulp. In our case, we must make sure that there’s a script in our package.JSON file to build our app using Gulp:

"scripts": {
    "build": "gulp"
  },


We’re now ready to run our build:

npm run build


That’s it! If we check our /dist/app.js file, we will see that it has been obfuscated with Jscrambler.

Final Thoughts

Node.js is the technology for building server-side apps, thanks to frameworks like Express.

If you’re building Node.js applications that have sensitive logic and want to prevent reverse engineering, licensing violations, and tampering, a security solution such as Jscrambler is a must.

You can easily integrate Jscrambler into Node’s build process using either Grunt or Gulp.

Even though we used the Obfuscation template, try other templates and protection layers like Self-Defending for improved runtime protection.

Jscrambler comes with premium support, so contact us if you have any questions!

Cryptography Introduction: Block Ciphers

Welcome to this step-by-step tutorial to connect a Node.js app with Sequelize to a PostgreSQL Cluster to write to the primary node and read from standby nodes.

Before we dive deep into what symmetric ciphers are and how important they are in our daily lives, two theoretical concepts need to be reviewed to better understand them: (Pseudo) Random Number Generators and Perfect Secrecy.

Random Numbers

Most of the cryptographic algorithms have their roots in mathematical operations performed over the data we are trying to hide from unauthorized eyes. As such, it is only logical to add random noise to help increase the confusion created by the cryptographic algorithms.

But no kind of noise is acceptable to be used in cryptography. It has to be secure and truly random because otherwise, it would be easy for an attacker to replicate the process and more easily decrypt your protected data. The main problem is that computers are deterministic and incapable of producing truly random values on their own.

A place where the generation of random values can be observed is a casino.

Flipping coins, rolling dice, or playing roulette are good examples of true randomness (if none of the items have been tampered with), as it is theoretically impossible to predict the results of those actions with 100% accuracy. However, this solution is too slow for modern cryptography, where sometimes it is necessary to generate thousands of random numbers quickly.

Another way of generating random values for physical properties is through the use of special hardware that measures thermal or electric noise. These types of hardware gather information over a small period, and once enough entropy has been generated, they can produce random values that are theoretically unpredictable by an attacker. The downside of this method is that it can also take a while to gather enough entropy and, as such, delay the cryptographic protocol from executing.

The other option to produce secure random numbers is through the use of Pseudo-Random Number Generators. These are computational and deterministic algorithms that can produce long sequences of apparently random numbers from a smaller value (often called a seed or key). The algorithm must produce outputs indistinguishable from a uniform distribution when observed by statistical tests to be considered a pseudorandom generator.

Perfect Secrecy


Claude Elwood Shannon was an American mathematician, electrical engineer, and cryptographer known as “the father of information theory”. In 1945, he wrote a paper on the Communication Theory of Secrecy Systems (that was only declassified in 1949), which is often used as the basis for theoretical cryptography. In this paper, he defines the concept of theoretically unbreakable ciphers as well as the concepts of confusion and diffusion.

In cryptography, confusion refers to making the relationship between ciphertext and the symmetric key as complex as possible. Diffusion is used to dissipate the statistical structure of plaintext over the bulk of ciphertext. What this means is that a single bit change on the plaintext should at least change half of the resulting ciphertext.

Both of these concepts are usually implemented with the use of substitutions and permutations, where substitutions increase the confusion of the cipher by deterministically changing some components, while permutations manipulate the order in which bits are represented in the final result. Both of these steps are usually applied over several rounds, as will be seen later in this post.

The term “perfect secrecy” is applied to encryption algorithms where there is no information that can correlate any particular ciphertext to the key used or the original plaintext. What this means is that the ciphertext cannot be broken by any type of cryptanalysis, as there is an equal probability of a given key being used to encrypt a plaintext message with a given ciphertext. However, in the literature, this is only possible in situations where the key is at least the same size as the plaintext message.

A technique that is used as a demonstration of this concept is the One-time pad. By generating a truly random key, at least as long as the message, never reusing it, and always keeping it a secret between the two people communicating, it can then be used either as a modular addition or a bitwise XOR operation with the plaintext to create a perfectly secure ciphertext.

Since the early 1900s and until around the ‘80s, when computers became easier to manufacture and use, this method was often used across nations for secure communications, including the hotline between Moscow and Washington, D.C., during the Cold War. These systems used two equal and long key tapes, one at each end of the communication, that were synchronized and used as messages were either sent or received.

However, this system is impractical for day-to-day usage. As such, simpler algorithms that make use of pseudorandom generators are needed, as in the case of Block Ciphers.

Block Ciphers


Unlike stream ciphers that are applied continuously bit by bit, block ciphers, like the name implies, are applied on a fixed-length bit block, which, for the example of AES, is 128 bits long.

Block ciphers are deterministic algorithms, so for a specific key and input data block, the resulting block will always be the same. They are a secure way to protect a single block of data, but since we usually want to protect more information than just 128 bits, it is recommended to use cryptographic protocols that are built on top of this construction to increase the security of the information.

Block Cipher Modes of Operation


When discussing block ciphers, it is important to understand the different block cipher modes of operation. Block cipher modes are the overlaying algorithm that reuses the block cipher constructions to encrypt multiple blocks of data with the same key, without compromising its security.

Electronic Codebook (ECB) mode


The first block cipher mode we are going to discuss is Electronic Codebook (ECB) mode. It is often mentioned as an example of what not to do when using block ciphers.

The ECB mode applies the underlying block cipher algorithm over each block of data without any alteration to it or the used key. As a result, if two blocks of the original data are the same, the same two blocks will be equal in terms of the encrypted version.

Even if attackers can’t decrypt the contents of the message, the knowledge that some blocks are equal to others might already give them insights into what the original message could be based on its context.

Cipher Block Chaining (CBC) mode


A better option is the Cipher Block Chaining (CBC) mode, which adds an extra operation before applying the block cipher algorithm.

So, before applying the block cipher algorithm to a block of plaintext, a bitwise XOR operation is performed with the current block’s plaintext and the last block’s resulting ciphertext. In the case of the first block, a random block of data is used, which is often called an Initialization Vector (IV).

There are two consequences of this extra operation: first, reusing the same key to encrypt two equal messages will produce two entirely different ciphertexts when using different IVs; second, even if two blocks on the same message are equal, their ciphered version won’t be since they will be mixed with different values before being encrypted.

Also, a single bit difference on a block is propagated to all the following blocks, creating even more confusion when trying to compare two different messages. Because each block needs the result of the previous block, the encryption process is not parallelizable. However, the reverse process of decryption does not have such requirements, so multiple blocks can be decrypted at the same time. It is also possible to simply decrypt some blocks, but not all of them, for quick access to some information.

The CBC mode can also be reused to create a message authentication code (MAC). Instead of using a randomly generated IV, a zero IV is used, and the last block in the encryption process is used as the MAC.

Any bit change on the message will result in a completely different MAC since every change is propagated until the last block. Even though it is tempting, it is not advisable to try and just execute a CBC algorithm once and keep the last block as MAC. It is always advisable to keep both operations separated and to use different cryptographic keys for each process.

Cipher Feedback Mode (CFB)


A similar solution to CBC is the Cipher Feedback Mode (CFB), which also uses an IV and the XOR operation over the plaintext, but this time after the block cipher algorithm. In this mode, the IV (for the first block) or the previous block (remaining blocks) is encrypted with the block cipher algorithm, and its result is then mixed with the plaintext block.

The restrictions and advantages of the encryption and decryption processes are the same as in CBC mode.

Output feedback mode (OFB)


An alternative mode to CFB is the Output feedback mode (OFB), which, instead of using the ciphertext of the previous block in the current block’s encryption, uses the output of the block cipher applied to the IV of the previous block. The downside of this change is that the decryption process can no longer be parallelized.

Counter mode (CTR)


The last mode we are going to discuss is the Counter mode (CTR). It is also one of the most popular modes for block ciphers for both its security and performance properties. It is a mixture of ECB and OFB modes, working with the advantages of both.

Like the ECB, each block is independent, so blocks can be encrypted, decrypted, and changed separately from each other, which facilitates its parallelizability. However, each block is not encrypted directly with the block cipher algorithm. Like in OFB, the plaintext block is XORed with the result of applying the block cipher to an IV block.

The difference is that, in CTR mode, this block is not the result of the previous iteration. Instead, it is a block where the 64 first bits are a random nonce, shared across all blocks in the same message, and 64 bits of “counter”. This counter portion can be a counter where, for each block, its value is increased by one; or it can be the result of a function that produces a sequence of results that do not repeat over a long time.

AES


Several block cipher algorithms have been created and used over the last few decades. Currently, the Advanced Encryption Standard (AES) is viewed as the standard in secure symmetric cryptography.

In the late ‘90s, the National Institute of Standards and Technology of the United States (NIST) started the process of creating a new block cipher to replace its predecessor, Data Encryption Standard (DES), since its 56-bit key size was becoming more vulnerable to brute-force attacks as computers became faster.

During this process, two Belgian cryptographers, Vincent Rijmen and Joan Daemen, came up with the Rijndael family of block ciphers, with three algorithms chosen for the standard. All of them work on 128-bit blocks but have different key sizes: 128, 196, and 256 bits.

To better understand how the base algorithm works, it’s best to imagine a block of 128 bits (16 bytes) as a two-dimensional array displayed as follows:

d0

d4

d8

d12

d1

d5

d9

d13

d2

d6

d10

d14

d3

d7

d11

d15

The algorithm performs operations on this matrix in 10, 12, or 14 rounds, depending on the key size (128, 196, and 256, respectively).

Using a specific Key expansion algorithm (which we will not approach in this post), multiple 128-bit blocks are generated from the original key, one for each round plus one to be applied at the beginning of the block transformation.

If we have the key block similarly organized as the following data block:

k0

k4

k8

k12

k1

k5

k9

k13

k2

k6

k10

k14

k3

k7

k11

k15


Then, the first operation on the data block is a simple bitwise xor operation between the data and the corresponding key, overriding the existing byte contents. This is often called the AddRoundKey step.

After this operation, we have 9, 11, or 13 rounds of applying the following operations:

1. SubBytes


For every byte on the matrix, replace it with a value on the Substitution Box, which behaves like a lookup table. This box is constructed in such a way that it provides non-linear properties to the cipher.

The method to retrieve a value from this table is to split the byte we are trying to replace in half, where the first half defines the row and the second half defines the column. This step is important to increase the confusion of the encrypted text.

2. ShiftRows


This step moves bytes around by making no shifts on the first row, making a one-byte shift on the second row, two bytes on the third row, and three bytes on the fourth row. In other words, this matrix:

d0

d4

d8

d12

d1

d5

d9

d13

d2

d6

d10

d14

d3

d7

d11

d15


becomes this one:

d0

d4

d8

d12

d5

d9

d13

d1

d10

d14

d2

d6

d15

d3

d7

d11

3. MixColumns


In this step, each column is extracted from the matrix and multiplied by a static matrix with the following contents:

2

3

1

1

1

2

3

1

1

1

2

3

3

1

1

2


For those who still remember Algebra, multiplying a matrix with an array will result in an array of the same size. This array is replaced in the same place where the column was retrieved from.

4. AddRoundKey


The first and fourth steps are used to increase the confusion in the resulting cipher, while the second and third steps are used to increase its diffusion, propagating small bit changes to as many bytes as possible.

The final round simply executes these steps:

  1. SubBytes

  2. ShiftRows

  3. AddRoundKey

There is no cryptographical necessity for the MixColumns step, as it is easily reverted on this last round.

Usage


On the browser, there are two ways of adding cryptographic functionalities to your application: external cryptographic libraries or the browser’s WebCrypto API.

A simple example of encrypting a message from the user using AES-CTR mode, if using the WebCrypto API, would look something like this:

async function encryptMessage(message, password){
    let counter = new Uint8Array(16) // the counter to be used should have the size of a block. this creates a 16 byte buffer which is 128 bits
    window.crypto.getRandomValues(counter); // generates data to be used as a nonce for this encryption;
    let encryptionParameters = {
        name:"AES-CTR",
        counter,
        length:64 // define how many bits to be used as the counter portion. the default is set at 64 bits, but the number can be increased if the message is longer than 2^64
    };
    let encodedMessage = new TextEncoder().encode(message); // Web Crypto only works with TypedArrays (Uint8Array)
    
    let masterKey = await window.crypto.subtle.importKey(
    "raw",
    new TextEncoder().encode(password),
    "PBKDF2",
    false,
    ["deriveBits", "deriveKey"]
  ); //getting a CryptoKey object from a string like password using the PBKDF2 algorithm
        let salt = window.crypto.getRandomValues(new Uint8Array(16));
    const encodedKey = await window.crypto.subtle.deriveKey(
    {
      "name": "PBKDF2",
      salt: salt,
      "iterations": 100000,
      "hash": "SHA-256"
    },
    masterKey,
    { "name": "AES-CTR", "length": 256},
    true,
    [ "encrypt", "decrypt" ]
  ); // Derive the encryption key from the master key to increase its entropy
    
    const encryptedContent = await window.crypto.subtle.encrypt(
    encryptionParameters,
    encodedKey,
    encodedMessage
  );
    
    return encryptedContent;
}

encryptMessage("big message contents to protect", "safest password").then(encryptedContents => console.log(encryptedContents));


While this solution can be more secure, since the cryptographic algorithms are protected and isolated in the browser’s native implementation, it is an asynchronous solution. This means that you have to use Promises if you intend to use this Web API. Another requirement is that it is only supported in HTTPS connections.

If a synchronous solution is required, or if you need support for legacy browser versions, a great library to use is the Stanford JavaScript Crypto Library (SJCL). The previous example can be written similarly to the SJCL:

function encryptMessage(message,password){
    sjcl.random = new sjcl.prng(8);
    let buffer = new Uint32Array(32);
    sjcl.random.addEntropy(buffer, 1024, "crypto.getRandomValues"); //initialize random generator
    let salt = sjcl.random.randomWords(8) // a word consists of 32 bits (4 bytes) 
    let iv = sjcl.random.randomWords(8)
    let encodedKey = sjcl.misc.pbkdf2(password,salt,1000);
    let aesAlgorithm = new sjcl.cipher.aes(encodedKey);
    let encondedMessage = sjcl.codec.utf8String.toBits(message);
    let encryptedContent = sjcl.mode['gcm'].encrypt(aesAlgorithm,encondedMessage,iv);
    return sjcl.codec.base64.fromBits(encryptedContent)
}

console.log(encryptMessage("big message contents to protect", "safest password"));


In this case, we are using the Galois Counter Mode (GCM), which is an adapted version of the Counter mode for improved performance since the normal counter mode is not available in the default SJCL script.

At the server side, the Node.js Crypto API can be used as well to take care of the encryption algorithms, or simply reuse the SJCL:

const crypto = require('crypto');

function encryptMessage(message,password){
    const algorithm = 'aes-192-ctr';
    const key = crypto.scryptSync(password, 'salt', 24); // generate a secure crypto key from a string based password
    const iv = crypto.randomBytes(16);
    const aesCipher = crypto.createCipheriv(algorithm, key, iv);
    let encryptedContent = aesCipher.update(message, 'utf8','hex');
    encryptedContent += aesCipher.final('hex');
    return encryptedContent;
}

console.log(encryptMessage("big message contents to protect", "safest passwor

Final Thoughts


Encryption is very important in order to protect both our own and our user’s data in today’s world. It is easy to assume that either the browser (or the operating system it is being executed on) could become compromised, and the assumptions given by an HTTPS connection can occur only after an attacker has gained access to information.

For scenarios where it is important to guarantee sensitive information is sent to the server side as soon as possible, a solution can be to reuse the user’s password. That can be accomplished by deriving a secret key from it to be used in a symmetric cryptographic algorithm, like the AES described in this post.

Since only the user and the server know the original password, and given that the operation is deterministic, it may be a useful and safe solution to implement.

The key aspect to retain from this post is to use the correct operation mode for your use case and to never try to invent a new mode or algorithm. Misuse of cryptographic structures can introduce vulnerabilities to the system that were not there before.

Finally, if you’re developing web or mobile applications using JavaScript, make sure you are protecting your source code from code theft, tampering, and reverse engineering. You can try this in your own code with a free Jscrambler trial.

Jscrambler Named in Deloitte’s Technology Fast 500

This week, Deloitte, the largest professional services network in the world, released the 2019 edition of its Technology Fast 500 ranking.

For the last 19 years, this has been one of the most objective rankings for technology, media, telecommunications, life sciences, and energy tech companies in EMEA.

Jscrambler has been named among the 500 fastest-growing tech companies in the region due to the company’s impressive recent growth. This growth has been fostered by a very strong investment in R&D among two cutting-edge products: Code Integrity and Webpage Integrity.

Jscrambler solutions

Jscrambler Code Integrity enables enterprises to secure crucial business logic (such as algorithms), enforce licensing agreements, and prevent attackers from debugging or tampering with JavaScript code.

Jscrambler Webpage Integrity presents a holistic solution to detect and block, in real-time, malicious behavior on the client-side of web applications. It allows businesses to stop more advanced client-side threats such as Magecart and data exfiltration.

Both solutions have also been consistently recognized by Gartner in its Market Guides for In-App Protection and Online Fraud Detection.

“We’re incredibly proud to be named by Deloitte in its ranking of the fastest-growing companies in EMEA. I’m hugely proud of our team for their hard work. This kind of recognition is great, but we never rest on our laurels. We’re always striving to grow and stay at the forefront of cybersecurity technology.” said Rui Ribeiro, co-founder and CEO of Jscrambler.

Jscrambler is trusted by Fortune 500 and major companies in sectors such as Finance, Broadcasting, Software Development, E-Commerce, and Gaming.

Read the full press release.

Handling CPU-Intensive Work Using Web Workers In Angular

Learn how to handle CPU-Intensive Work using Web Workers in Angular to improve the performance of web apps.

There are times when you have to handle CPU-intensive tasks in web applications. CPU-intensive tasks can be anything from a complex calculation to some logic with too many iterations. Such tasks tend to make the web browser hang or lag until the task is complete.

Why does the browser hang?

JavaScript is single-threaded. Whatever code you have written is executed synchronously. Thus, if a task or a piece of code is taking time to complete, the browser freezes until it finishes. Only one thing is executed at a time on the single main thread.

Introduction to Web Workers

Web workers are great for making web applications fast. They make the application fast by running CPU-intensive tasks on a different thread than the main thread.

Angular has added support for web workers in Angular version 8 and later. CLI support has been added to create web workers from the Angular CLI.

You can create a web worker by using the following CLI command:

ng g web-worker <worker-name>


From FrontendMasters official docs:

Web Workers are a simple means for web content to run scripts in background threads. The worker thread can perform tasks without interfering with the user interface.

The main thread and the worker thread communicate by posting messages to an event handler.

Creating the basic app skeleton

Assuming that you already have the Angular CLI installed, let’s create an Angular app:

ng new ang-web-worker


Then, navigate to the app project folder and start the app.

cd ang-web-worker
npm start


You will have the web app running at localhost:4200.

Let’s now create a task that updates a graph at 1-second intervals. It’ll help in observing the performance improvement provided by the web worker.

For the sake of this tutorial, let’s use ng2-nvd3 for creating a graph in Angular.

We will update the graph data in 1-second intervals. Along with the graph update, we’ll add another task to create rectangles in the canvas using the main thread and also using the web worker.

Install the ng2-nvd3 module in the project.

npm install ng2-nvd3 


Add NvD3Module to the AppModule in app.module.ts:

import { BrowserModule } from '@angular/platform-browser';
import { NgModule } from '@angular/core';

import { AppRoutingModule } from './app-routing.module';
import { AppComponent } from './app.component';
import { NvD3Module } from 'ng2-nvd3';
import { HttpClientModule } from '@angular/common/http';
import 'd3';
import 'nvd3';

@NgModule({
  declarations: [
    AppComponent
  ],
  imports: [
    BrowserModule,
    NvD3Module,
    HttpClientModule,
    AppRoutingModule
  ],
  providers: [],
  bootstrap: [AppComponent]
})
export class AppModule { }

Now, let’s add some code to the app.component.html file:

<div class="main">
  <div class="graph">
    <nvd3 [options]="options" [data]="data"></nvd3>
  </div>
  <div class="container">
    <div>
      <input type="button" (click)="handleButtonClick()" value="Main Thread Task" />
      <input type="button" (click)="handleWebWorkerProcess()" value="Web Worker Task" />
    </div>
    <div id="canContainer" class="canvasContainer">
    </div>
  </div>
</div>


Let’s also modify the app.component.ts file. Here is how it looks:

import { Component,OnInit, ViewEncapsulation, ViewChild, ElementRef  } from '@angular/core';
declare let d3: any;

@Component({
  selector: 'app-root',
  templateUrl: './app.component.html',
  styleUrls: ['./app.component.css', '../../node_modules/nvd3/build/nv.d3.css'],
  encapsulation: ViewEncapsulation.None
})
export class AppComponent implements OnInit {

  title = 'nvd3-graph';
  options;
  data;

  constructor(){}
  
  ngOnInit() {
    this.initChart();
    setInterval(()=>{
      this.updateChart();
    }, 500)
  }

  initChart(){
    this.options = {
      chart: {
        type: 'discreteBarChart',
        height: 450,
        x: function(d){return d.label;},
        y: function(d){return d.value;},
        showValues: true,
        valueFormat: function(d){
          return d3.format(',.4f')(d);
        },
        duration: 500,
        xAxis: {
          axisLabel: 'X Axis'
        },
        yAxis: {
          axisLabel: 'Y Axis',
          axisLabelDistance: -10
        }
      }
    }
  }

  updateChart()
  {
    this.data = [
      {
        values: [
          {
            "label" : "A" ,
            "value" : Math.floor(Math.random() * 100)
          } ,
          {
            "label" : "B" ,
            "value" : Math.floor(Math.random() * 100)
          } ,
          {
            "label" : "C" ,
            "value" : Math.floor(Math.random() * 100)
          } ,
          {
            "label" : "D" ,
            "value" : Math.floor(Math.random() * 100)
          } ,
          {
            "label" : "E" ,
            "value" : Math.floor(Math.random() * 100)
          } ,
          {
            "label" : "F" ,
            "value" : Math.floor(Math.random() * 100)
          } ,
          {
            "label" : "G" ,
            "value" : Math.floor(Math.random() * 100)
          } ,
          {
            "label" : "H" ,
            "value" : Math.floor(Math.random() * 100)
          }
        ]
      }
    ];
  }

  handleButtonClick(){
    
  }

  handleWebWorkerProcess(){
    
  }
  
  clearCanvas(){
    let element = <HTMLCanvasElement> document.getElementById('canContainer');
    element.innerHTML = ''
  }

}


Make sure to modify the target in compilerOptions to es5 in tsconfig.json, or it might not work. Save the above changes and start the app.

npm start


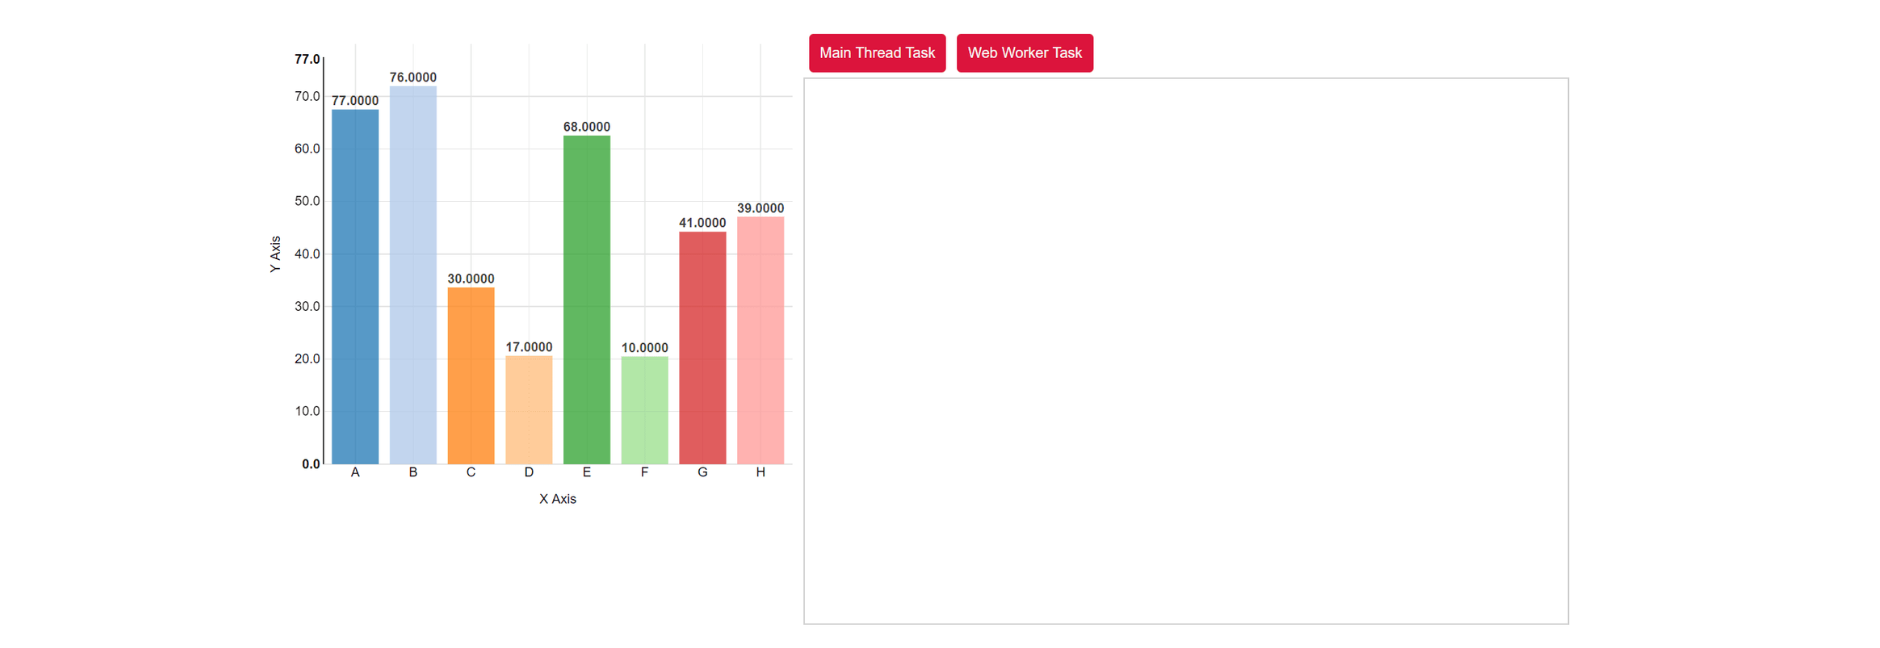
You will have the Angular app running at localhost:4200 and displaying a bar chart.
jscrambler-blog-web-workers-angular-bar-chart-example

Processing the CPU-intensive task in the Main UI thread

As seen in the above screenshot, the app contains two buttons, both of which accomplish the same task: drawing on a canvas. One will make use of the main thread, and the other will make use of a web worker.

Let’s add the code to run the task in the main UI thread. Start by creating the canvas element in app.component.ts.

  createCanvas(){
    let canvas = document.createElement('canvas');
    canvas.setAttribute('width','700');
    canvas.setAttribute('height','500');
    return canvas;
  }


Once you have the context for the canvas, create 10x10px rectangles to fill the canvas, which is 700px by 500px.

Here is how the handleButtonClick handler looks:

  handleButtonClick(){
    this.clearCanvas();
    let canvas = this.createCanvas();
    document.getElementById('canContainer').append(canvas);
    let context = canvas.getContext("2d");
    context.beginPath();
    for(let x = 0; x < 691; x++){
      for(let y = 0; y < 491; y++){
        context.fillRect(x, y, 10, 10);
      }
    } 
  }


Save the above changes. You will notice that the graph is updating at frequent intervals.

Upon clicking the Main Thread Task button, the UI hangs for a couple of seconds, and then the graph update continues. That delay was caused by the time-consuming canvas-writing task.

Processing the CPU-intensive task in a web worker

Now, let’s see how you can solve the UI lag issue caused by the CPU-intensive canvas writing task. Let’s create a web worker in your Angular project using the following command:

ng g web-worker canvas


The above command creates a file called canvas.worker.ts. Here is how it looks:

/// <reference lib="webworker" />

addEventListener('message', ({ data }) => {
  const response = `worker response to ${data}`;
  postMessage(response);
});


Add the canvas code to the web worker:

/// <reference lib="webworker" />

addEventListener('message', ({ data }) => {
  let canvas = data.canvas;
  let context = canvas.getContext("2d");
  context.beginPath();
  for(let x = 0; x < 691; x++){
    for(let y = 0; y < 491; y++){
      context.fillRect(x, y, 10, 10);
    }
  }
});


Note: If you have a more powerful CPU and are unable to see the UI getting stuck, feel free to increase the x and y ranges from 691 and 491, respectively, to a higher range.

For the web worker to write to the canvas, you need to make use of the OffscreenCanvas API. It decouples the canvas API and DOM and can be used in a web worker, unlike the canvas element.

Let’s add the code to create a worker thread using the canvas.worker.ts file.

let  _worker = new  Worker("./canvas.worker", { type:  'module' });


Once you have the worker instance created, you need to attach an onmessage handler to the worker.

To get the worker started, you need to call postMessage on _worker instance.

_worker.postMessage();


You need to pass the OffscreenCanvas to the worker thread. Let’s create the canvas element and get an off-screen canvas.

let  canvas = this.createCanvas();
document.getElementById('canContainer').append(canvas);


You need to pass the off-screen canvas to the worker thread.

let  offscreen = canvas.transferControlToOffscreen();
_worker.postMessage({canvas:  offscreen}, [offscreen]);


Here is how the complete handleWebWorkerProcess button event looks:

  handleWebWorkerProcess(){
    this.clearCanvas();
    let canvas = this.createCanvas();
    document.getElementById('canContainer').append(canvas);
    let offscreen = canvas.transferControlToOffscreen();
    let _worker = new Worker("./canvas.worker", { type: 'module' }); 
    _worker.onmessage = ({ data }) => {
        console.log(data);
    };
    _worker.postMessage({canvas: offscreen}, [offscreen]);
  }


Save the above changes and restart the app.

You should now see the graph updating at an interval of 500 ms. You can observe that clicking on the Main Thread Task button hangs the UI since it’s running the task on the main thread.

However, clicking on the Web Worker Task button runs the task in another thread without changing the UI.

You can find the source code for this tutorial on the GitHub repository, along with a demo of Web Worker in Angular.

Conclusion

In this tutorial, you learned how to handle CPU-intensive tasks using web workers in Angular.

Before web workers came into existence, running time-consuming tasks in the browser was difficult. With web workers, you can run any long-running task in parallel without blocking the main UI thread.

What we discussed in this tutorial is just the tip of the iceberg. I recommend reading the official documentation to learn more about web workers.

Don’t forget to pay special attention if you’re developing commercial Angular apps that contain sensitive logic.

You can protect them against code theft, tampering, and reverse engineering.

How To Protect Your Organization From Magecart

The cybersecurity attacks on the likes of British Airways, Macy’s, and Forbes, amongst others, have been widely reported.

They all had in common the fact that they were targeted by Magecart. The Magecart attack involves a plurality of cybercrime groups whose modus operandi are cyberattacks involving digital credit card theft.

Magecart attacks are typically carried out by having the skimmer load at checkout, thereby capturing billing information and forwarding it to the attacker’s server.

Another recent high-profile attack was on hardware retailer Robert Dyas. In this instance, their website was hacked by Magecart attackers, who injected malicious code to steal 20,000 customer payment card details over the course of 23 days. This attack hit the hardware store especially hard as it occurred during a period when e-commerce sales were enjoying significant growth.

The Robert Dyas attack is just another big feather in the cap for the Magecart massive.

Unfortunately, though, these are not victimless crimes. Typically, each attack results in the theft of credit card details for hundreds of thousands of customers (or other personally identifiable information, or PII).

Each of these affected individuals may be surprised by credit card fraud and have to go through a difficult remediation process.

For companies, such an attack often causes permanent damage. Apart from possible data privacy fines and lawsuits, breached companies often experience a significant loss in revenue due to negative PR and customer distrust.

Understanding the client-side security gap

Not all Magecart attacks follow the same approach to infected websites.

There are several known instances of first-party breaches, where attackers either directly breach the first-party server or inject code that is later pulled to the server as part of the build process. However, as attackers prefer to go after low-hanging fruit, third-party attacks, commonly known as web-based supply chain attacks, provide a more attractive way in.

In a third-party Magecart attack, attackers have no need to directly breach the first-party server they are targeting; instead, they insert the malicious skimmer’s code into one of the third-party scripts that their target uses, for example, live chat, widgets, or analytics; companies that use them actually have zero control over their security. This malicious code will be called directly from the server of the infected third-party and because it comes from a legitimate third-party supplier, it will not be seen as a threat.

Such Magecart attacks have been largely successful because they exploit the lax attitude that most businesses have towards third-party code. And so we reach a point where an organization’s website or web app has become the ideal place for criminals to steal customer data.

The danger posed by third-party code has highlighted the need for vetting third-party code and the security of these code suppliers.

While code vetting is definitely a good practice to have, it is not nearly enough to stop Magecart, and companies often forgo vetting to make room for faster development. The job often falls to client-side security systems such as Content Security Policy or Subresource Integrity; however, these are often unable to counter Magecart, especially considering the new wave of evolved web skimmers.

Magecart attacks keep getting more sophisticated with each new iteration. More recent versions of these web skimmers go as far as employing bot detection techniques to become much harder to detect. It makes sense, therefore, that the way we address such attacks needs to evolve accordingly.

Where are your security blind spots?

The first question you should ask yourself if your website handles credit card payments is: do you know if, under the hood, your website is behaving normally in each of your customers’ sessions? In other words, are your clients interacting with a clean platform instead of one that may have been compromised by attackers?

It’s likely that you won’t have a definite answer to these questions. Companies sadly can’t control everything that happens between their customers opening their website and paying for an order. There’s a whole lot happening on the client-side (i.e., in the context of the browser) that companies are completely oblivious to.

On the flip side, we now have enough analysis of past Magecart attacks to begin to understand how to shield companies from this threat. And one of the biggest conclusions we can draw for now is that there’s no guaranteed way of preventing these types of attacks altogether, especially with these ever-evolving web skimmers.

Protection Tactics

What can organizations do to fix this blind spot and mitigate Magecart-type attacks?
The road to Magecart mitigation starts with a security-in-depth mindset.

Managing and validating third-party code is a good start, but it comes short. Even vetted scripts can suddenly start displaying malicious behavior, so trust must be maintained whenever this change occurs. For example, a vetted live chat script can play an essential role on an e-commerce platform, but if it suddenly starts meddling with a payment form, that is a strong indicator that the script has somehow gone rogue. And even with more complex scripts that frequently send data out to trusted domains, there’s a clear indication of compromise when they start sending data to unknown domains.

These scenarios are just a few of many where organizations are still failing. Some Magecart attacks have remained undetected for longer than a year, and attacks like the one on British Airways showed that 15 days is enough time for attackers to siphon the credit card details of over 380,000 customers. Such long-standing attacks make it very clear that companies have no way of knowing when a malicious skimmer is running on their websites.

Gaining client-side visibility should be a top priority in the fight against Magecart. This way, whenever a Magecart skimmer somehow finds its way into a company’s website, the company has enough time to respond to the attack.

The next step is to be able to restrict these malicious behaviors in real-time so that the attack doesn’t do any real damage.

With a behavior control of the webpage, companies can couple full client-side visibility with the ability to block the vast array of malicious behaviors that Magecart attacks display. Besides allowing businesses to block Magecart attacks, this behavior control approach enables following the least privilege principle by locking each third-party script to their allowed behavior and nothing more.

Achieving this level of protection makes huge financial sense too. For example, after the attack on British Airways, the Information Commissioner’s Office announced its intention to fine British Airways nearly £183 million for GDPR breaches. And while BA offered to reimburse customers who suffered financial loss as a result of the breach, they never actually admitted liability for this breach.

Reputational damage arising from such high-profile attacks cannot be easily calculated, but there is a financial loss associated for sure.

With this continuing surge of Magecart attacks, which keep happening every week, we see just how vulnerable eCommerce businesses continue to be from a security point of view.

It’s crucial that companies focus on in-depth security with code vetting, web page monitoring, and client-side behavior control to detect and block Magecart in seconds (rather than many weeks). Then perhaps we can see the first nails appear in Magecart’s coffin.

How to Set Up and Use Navigators in React Native

React Navigation released its fifth stable version a few months ago. Even though the library is just a little over two years old, it is without a doubt one of the most popular navigation solutions in React Native apps and also has support for the Expo SDK.

The major highlight of this new release version is that the routing of screens is now based on component configuration.

In this tutorial, let’s take a look at how to set up and use a stack navigation pattern between two screens, and pass data from one screen to another. The data is going to be fetched from a third-party API using GraphQL query language. This is possible using the Apollo client, which allows us to fetch results from a REST endpoint.

Prerequisites

To follow this tutorial, please make sure you have the following installed on your local development environment:

  • Node.js version >= 12.x.x installed

  • JavaScript/ES6 basics

  • Have access to one package manager, such as npm or yarn

  • the expo-cli version installed or use npx


The demonstrated example is based on Expo SDK 38.

Install dependencies

To start, generate a new Expo project with a blank template by running the following command in a terminal window:

npx expo init [Project Name]

# after the project directory has been generated

cd [Project Name]


Then, install the dependencies below for the react-navigation library to work. The first command is going to install the core packages of react-navigation. These core packages are used by navigators to create the navigation structure in the app.

The second command uses expo install instead of npm install or yarn add. The reason is that Expo is going to install the versions of the libraries mentioned that are compatible with the Expo SDK. This second command installs the peer dependencies that the react-navigation library depends on.

yarn add @react-navigation/native @react-navigation/stack

# use expo install for Expo projects only
expo install react-native-gesture-handler react-native-reanimated react-native-screens react-native-safe-area-context @react-native-community/masked-view


Do note that the package @react-navigation/stack is only required to install when you are going to use the Stack navigation pattern in the app. For example, if you are just going to use tab navigation, you are going to install a different package.

What is a stack navigator?

The stack navigation pattern allows transitioning from one screen of the app to another while managing the navigation history. If the app uses only one stack navigator, then it is conceptually similar to how a web browser handles the navigation state.

The app pushes and pops screens from the navigation stack as users interact with it, and this results in the user seeing different screens.

Start by creating a new directory called src/navigation/, and inside it, create a new file called MainStackNavigator.js with the following import statements:

import * as React from 'react';
import { NavigationContainer } from '@react-navigation/native';
import { createStackNavigator } from '@react-navigation/stack';


From the above snippet, the NavigationContainer is a component that manages the navigation tree. It contains the navigation state, and it has to wrap the structure of all navigators.

The createStackNavigator is a function that is used to implement a stack navigation pattern. This function returns two React components: Screen and Navigator, which help configure each component screen.

Since the app does not have any screen components for now, in the next section, let us create both the screens the app requires using some mock data to display.

Create app screens

Start by creating two screen component files called Home.js and Details.js inside the directory src/screens/ with the following code snippets:

// src/screens/Home.js
import React from 'react';
import { StyleSheet, View, Text } from 'react-native';

export default function Home() {
  return (
    <View style={styles.container}>
      <Text style={styles.text}>Home Screen</Text>
    </View>
  );
}

const styles = StyleSheet.create({
  container: {
    flex: 1,
    justifyContent: 'center',
    alignItems: 'center',
    backgroundColor: '#ebebeb'
  },
  text: {
    color: '#333',
    fontSize: 24,
    fontWeight: 'bold'
  }
});
// src/screens/Details.js
import React from 'react';
import { StyleSheet, View, Text } from 'react-native';

export default function Details() {
  return (
    <View style={styles.container}>
      <Text style={styles.text}>Details Screen</Text>
    </View>
  );
}

const styles = StyleSheet.create({
  container: {
    flex: 1,
    justifyContent: 'center',
    alignItems: 'center',
    backgroundColor: '#ebebeb'
  },
  text: {
    color: '#333',
    fontSize: 24,
    fontWeight: 'bold'
  }
});


The stack navigator needs screen components as routes. These routes are available in the form of screen components. Import these two screen components inside the MainStackNavigator.js file and then create the Stack Navigator function.

// other import statements

import Home from '../screens/Home';
import Details from '../screens/Details';

const Stack = createStackNavigator();

function MainStackNavigator() {
  return (
    <NavigationContainer>
      <Stack.Navigator>
        <Stack.Screen name="Home" component={Home} />
        <Stack.Screen name="Details" component={Details} />
      </Stack.Navigator>
    </NavigationContainer>
  );
}

export default MainStackNavigator;


In the above snippet, there are two required props for each Stack.Screen. The prop name refers to the name of the route, and the prop component specifies which screen to render at the particular route. The order of the screens matters as the first screen defined in the stack navigator pattern is going to be the bottom of the stack.

Import this navigator inside the App.js component.

import React from 'react';
import MainStackNavigator from './src/navigation/MainStackNavigator';

export default function App() {
  return <MainStackNavigator />;
}


To check if the configuration is working, start the development server with Expo start and then open the app either on a real device or in a simulator, as shown below.
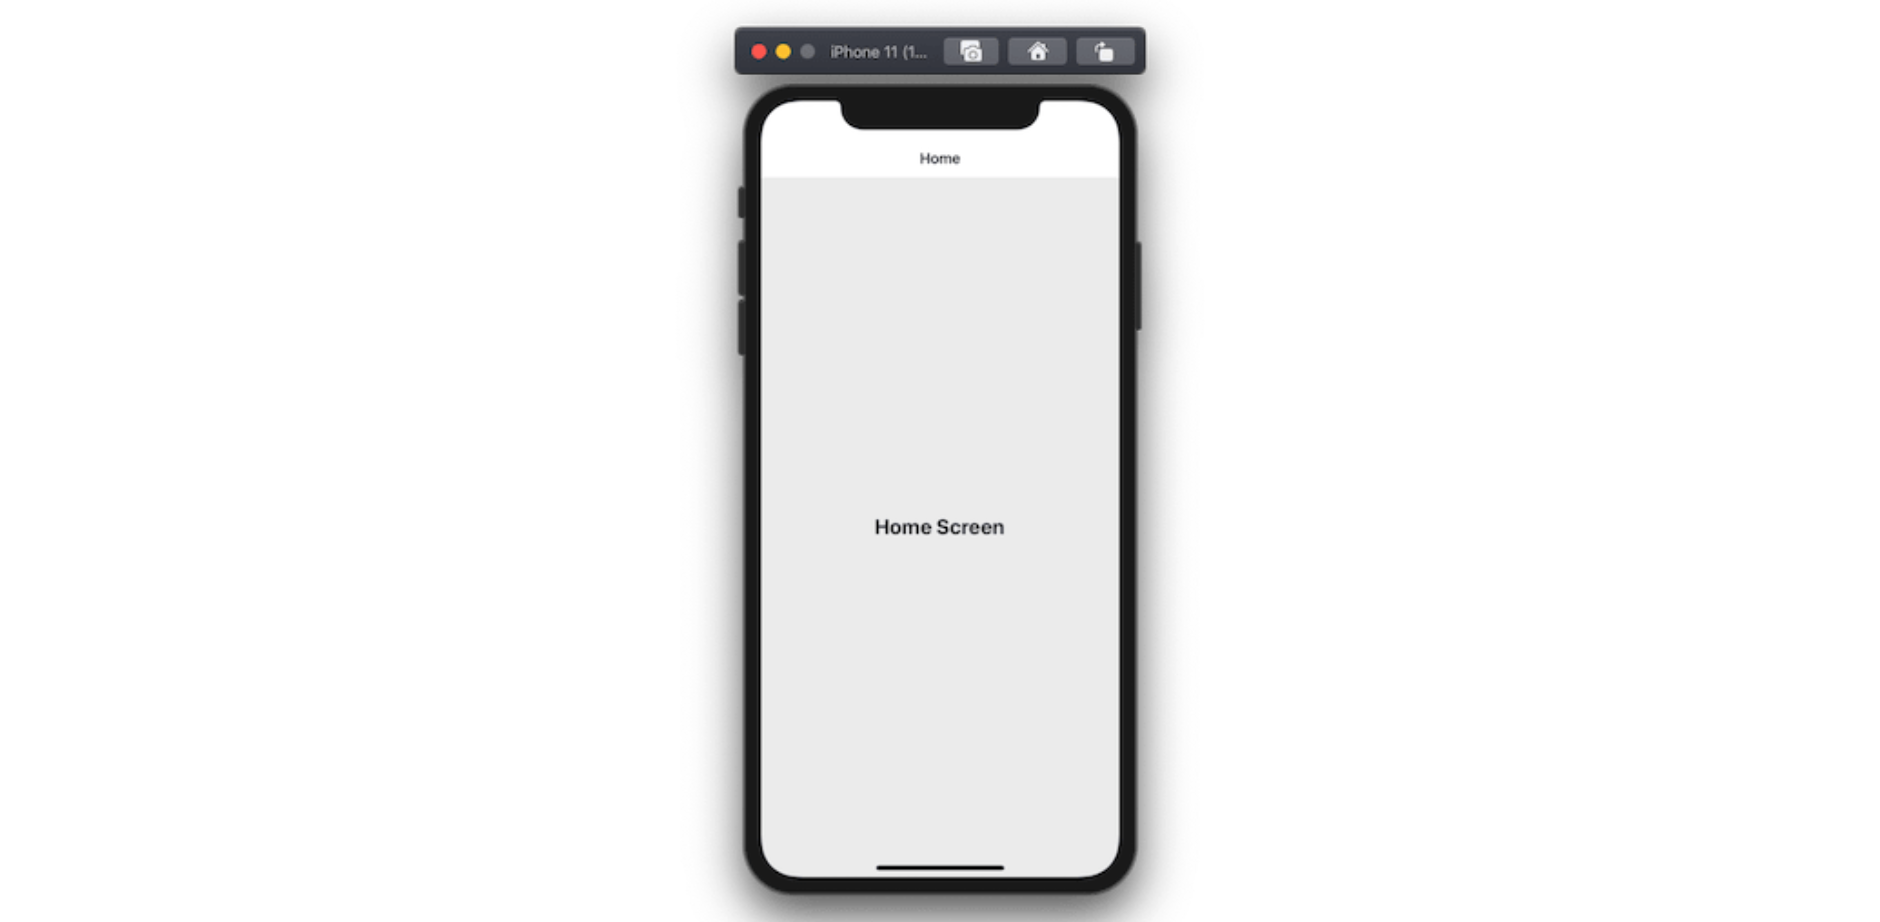
React-Native-Navigators-Screen

Specifying options for each screen in Stack Navigator

By default, the title shown on each screen is the same as the value provided on the name attribute for each screen component in the stack navigator. However, you can set the title of the screen. Let us change the title of the screen shown, from “Home” to “Crypto List”.

This is done by specifying the options on each screen as shown below. Open the MainStackNavigator.js file and the prop options on Stack.Screen for the Home component.

<Stack.Screen name="Home" component={Home} options={{ title: 'Crypto List' }} />


The changes are instantly reflected in the Expo client.

Open screens/Home.js and add a button component that is going to navigate from the Home screen component to the Details screen when pressed.

Import TouchableOpacity from react-native and make sure to use the navigation prop passed to the Home screen. This prop is passed to every screen that is a route wrapped by the current Stack Navigator in the app.

import React from 'react';
import { StyleSheet, View, Text, TouchableOpacity } from 'react-native';

export default function Home({ navigation }) {
  return (
    <View style={styles.container}>
      <Text style={styles.text}>Home Screen</Text>
      <TouchableOpacity
        style={styles.buttonContainer}
        onPress={() => navigation.navigate('Details')}
      >
        <Text style={styles.buttonText}>Go to Detail Screen</Text>
      </TouchableOpacity>
    </View>
  );
}

const styles = StyleSheet.create({
  container: {
    flex: 1,
    justifyContent: 'center',
    alignItems: 'center',
    backgroundColor: '#ebebeb'
  },
  text: {
    color: '#333',
    fontSize: 24,
    fontWeight: 'bold'
  },
  buttonContainer: {
    backgroundColor: '#222',
    borderRadius: 5,
    padding: 10,
    margin: 20
  },
  buttonText: {
    fontSize: 20,
    color: '#fff'
  }
});


Here is the output you are going to get after this step:
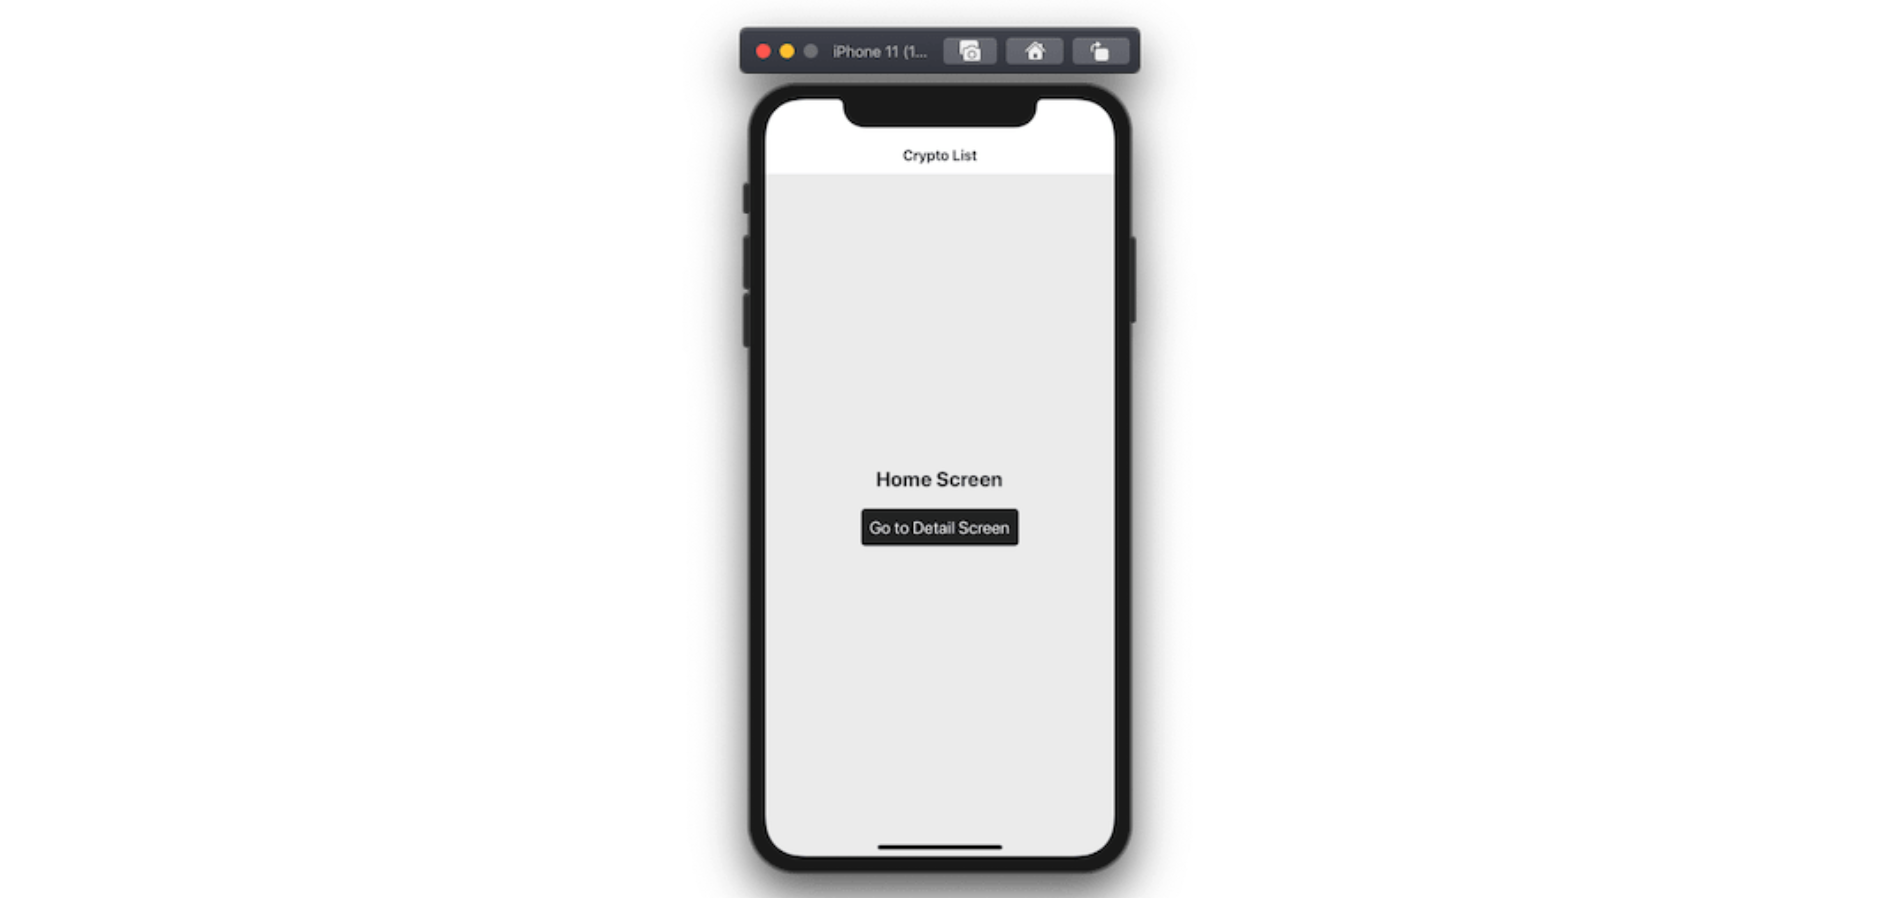
output-after-navigating-between-two-screens

When the user presses the button on the Home screen, the navigator will direct the user to the Details screen.
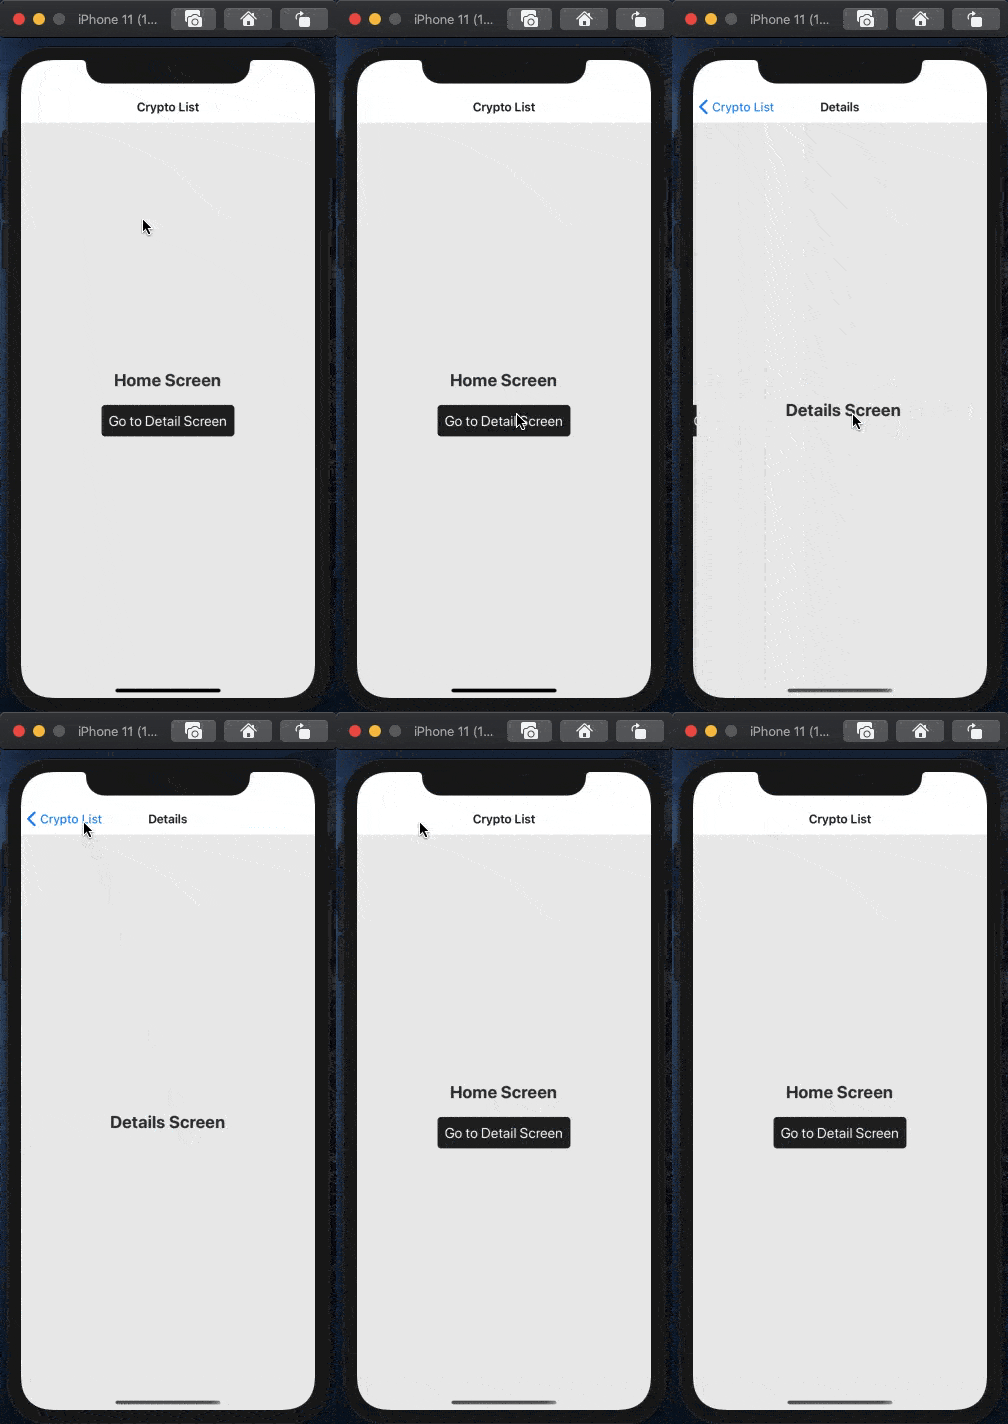
React Native Navigators Screen 4

Using screen options to modify the header

You can use the screenOptions prop to apply common styles to the header across the navigator. For example, in the code snippet below, let us set the properties, headerStyle, headerTintColor, and headerTitleStyle to change the background color of all screen headers as well as the color of the title on each screen.

  • headerStyle is a style object that can be used to set the background color of the header for the screen component.

  • headerTitleStyle is another style object that allows you to customize the title or the text of the header.

  • headerTintColor is the color property for both the back button and the title of the header.


Open the src/navigation/MainStackNavigator.js file to make these changes.

<Stack.Navigator
        screenOptions={{
          gestureEnabled: true,
          headerStyle: { backgroundColor: 'tomato' },
          headerTitleStyle: { fontWeight: 'bold' },
          headerTintColor: '#f8f8f8'
        }}
      >


With the basic configuration of a stack navigator working, let us now fetch the data from a third-party API using the Apollo client in the next section.

Install Apollo dependencies

Let’s install all the required dependencies to integrate the Apollo client and request the REST endpoint using GraphQL queries:

yarn add apollo-client apollo-cache-inmemory graphql-tag apollo-link-rest apo

Configure the Apollo client in React Native

In this section, let us integrate the Apollo client so that we can fetch the data from the REST endpoint. Start by creating a new directory src/graphql and, inside it, also create a new file Client.js.

The Apollo-client package, along with Apollo-cache-inmemory and Apollo-link, is a fully-featured GraphQL client that can be integrated into React or React Native apps. Let us import all three of them into this file:

import { ApolloClient } from 'apollo-client';
import { InMemoryCache } from 'apollo-cache-inmemory';
import { RestLink } from 'apollo-link-rest';


For demo purposes, the API endpoint will be used as a REST endpoint from CryptoCompare.com. Make sure, at this point, that you have access to the API Key (which is free at the time of writing this tutorial).

Their API offers many endpoints for different use cases, but we are going to fetch several top coins by their total volume across all markets in the last 24 hours.

Add a RestLink for the REST API endpoint and pass headers, which is an object representing values to be sent as headers on the request:

const restLink = new RestLink({
  uri: 'https://min-api.cryptocompare.com',
  headers: {
    Authorization:
      'd251970548f7321b548d3fb61d58c1a456974ea02ba41437fc9bf711f4e89782'
  }
});


Add the following configuration with the default cache and RestLink to complete the configuration of the Apollo client:

export const client = new ApolloClient({
  link: restLink,
  cache: new InMemoryCache()
});


Now, open the App.js file to wrap the current stack navigator with ApolloProvider. This provider is similar to React’s Context.Provider and places the Apollo client in the context. This makes them accessible to the Apollo client easily and from anywhere inside the component tree.

import React from 'react';
import MainStackNavigator from './src/navigation/MainStackNavigator';

import { ApolloProvider } from '@apollo/react-hooks';
import { client } from './src/graphql/Client';

export default function App() {
  return;
  <ApolloProvider client={client}>
    <MainStackNavigator />
  </ApolloProvider>;
}

Writing your first GraphQL query

In this section, let us write a query to hook the Apollo client to fetch results from the REST API endpoint. However, the query is going to be made in GraphQL query language with the help of graphql-tag.

In the src/graphql/ directory, create a new file called Queries.js and import graphql-tag. Then, create a query to fetch data. This query is called FETCH_COIN_LIST and is defined using a template from the gql tag. Using the @rest directive, Apollo manages the parsing of the query from a REST endpoint to the GraphQL API.

import gql from 'graphql-tag';

export const FETCH_COIN_LIST = gql`
  query FetchCoinsList {
    coinsList
      @rest(type: "ListPayload", path: "/data/top/totalvolfull?tsym=USD") {
      Data @type(name: "DataPayload") {
        CoinInfo @type(name: "CoinInfoPayload") {
          Id
          Name
          FullName
        }
        DISPLAY @type(name: "DisplayPayload") {
          USD @type(name: "USDPayLoad") {
            PRICE
            OPENDAY
            HIGHDAY
            LOWDAY
            OPEN24HOUR
          }
        }
      }
    }
  }
`;

Make a request to the REST endpoint with the Apollo client

Open the file screens/Home.js and import the FETCH_COIN_LIST query as well as the useQuery hook from @apollo/react-hooks.

The React hook useEffect is used below to test that the endpoint is fetching data as per our needs. The data fetched is going to be displayed in a console statement.

The hook useQuery is used to request the API endpoint by referencing the query FETCH_COIN_LIST. After being called, it returns a result object with a set of properties. We only need two properties for now: loading and data. De-structure this query hook inside the Home component as shown below.

import React, { useEffect } from 'react';
import { useQuery } from '@apollo/react-hooks';

import { StyleSheet, View, Text, TouchableOpacity } from 'react-native';
import { FETCH_COIN_LIST } from '../graphql/Queries';

export default function Home({ navigation }) {
  const { loading, data } = useQuery(FETCH_COIN_LIST);

  useEffect(() => {
    console.log(data);
  }, []);

  return (
    <View style={styles.container}>
      <Text style={styles.text}>Home Screen</Text>
    </View>
  );
}

// ... rest remains same


Sidenote: Don’t forget that you should always protect your source code in commercial and enterprise apps to prevent tampering.

To see the result, make sure the expo start command is running in the terminal window. Then, go to the Expo client, either on a real device or a simulator, and open the developer menu on a Mac using:

  • if on the iOS simulator, press Ctrl-Cmd-Z

  • if on an Android emulator, press Cmd+M

  • if using a real device, just shake your device a bit


This is what the developer menu in an Expo client looks like:
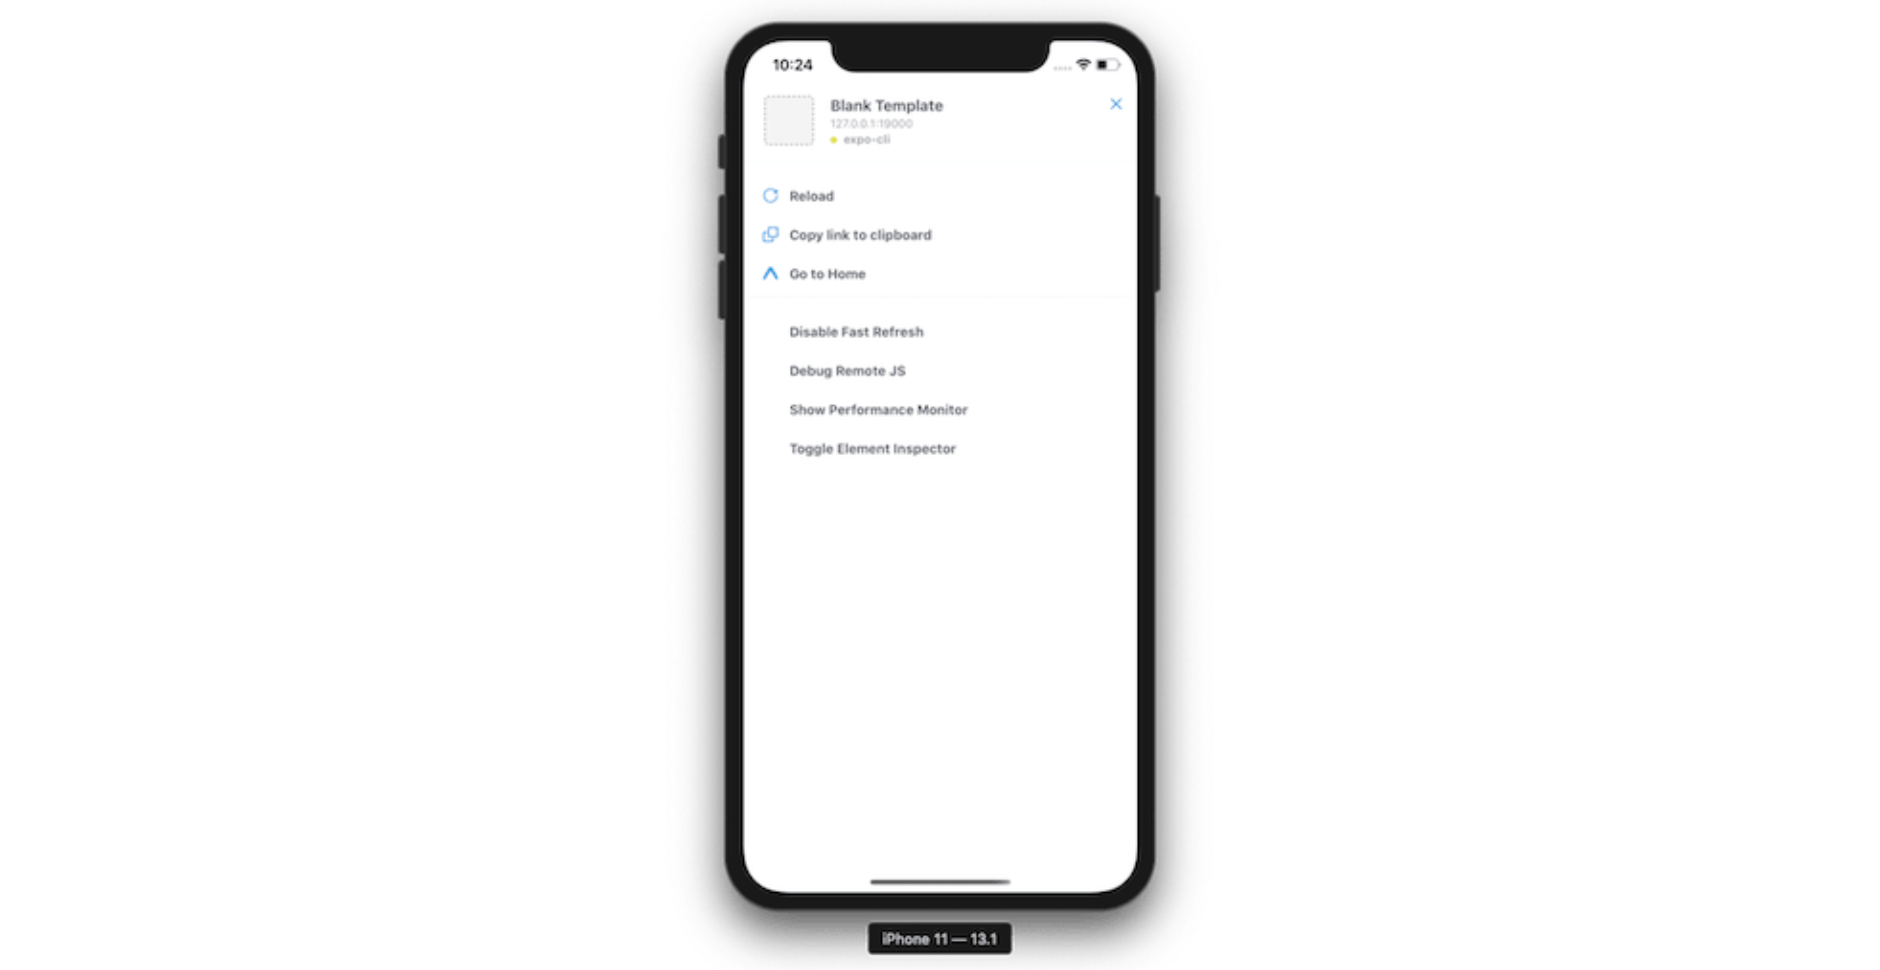
developer-menu-appearance-in-expo-client

Choose the option Debug Remote JS. A debugger like below should appear in your default web browser.
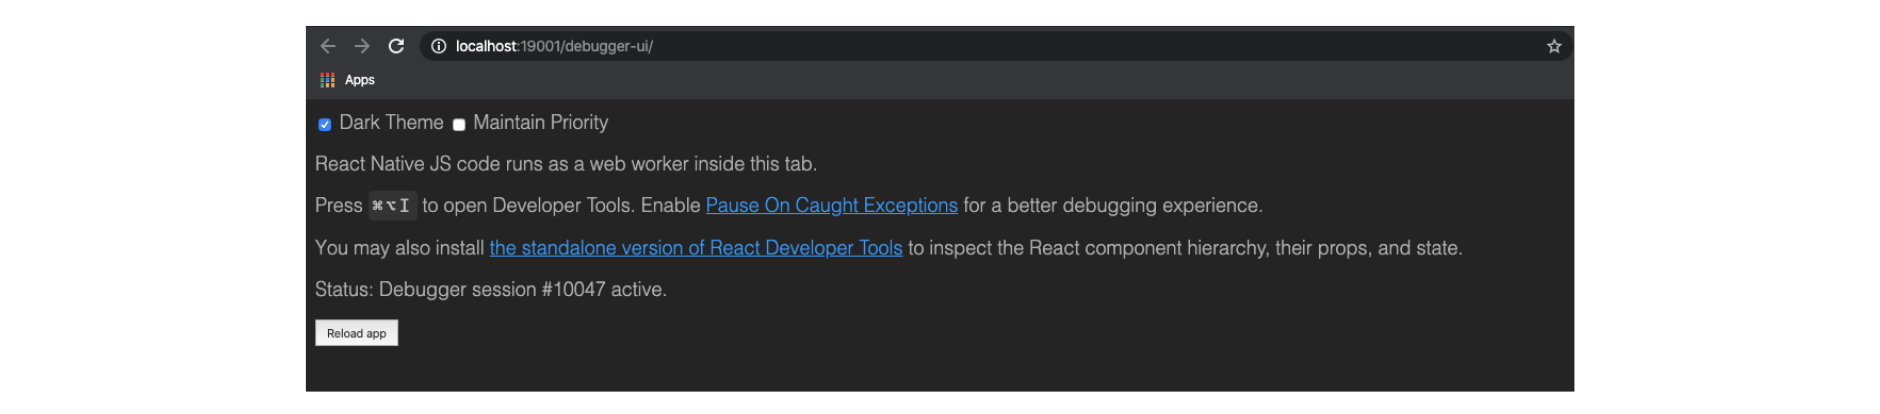
debugger-example-from-choosing-the-option-debug-remote-js

Open the Console tab from the Developer Tools of the web browser. You are going to get the following result.
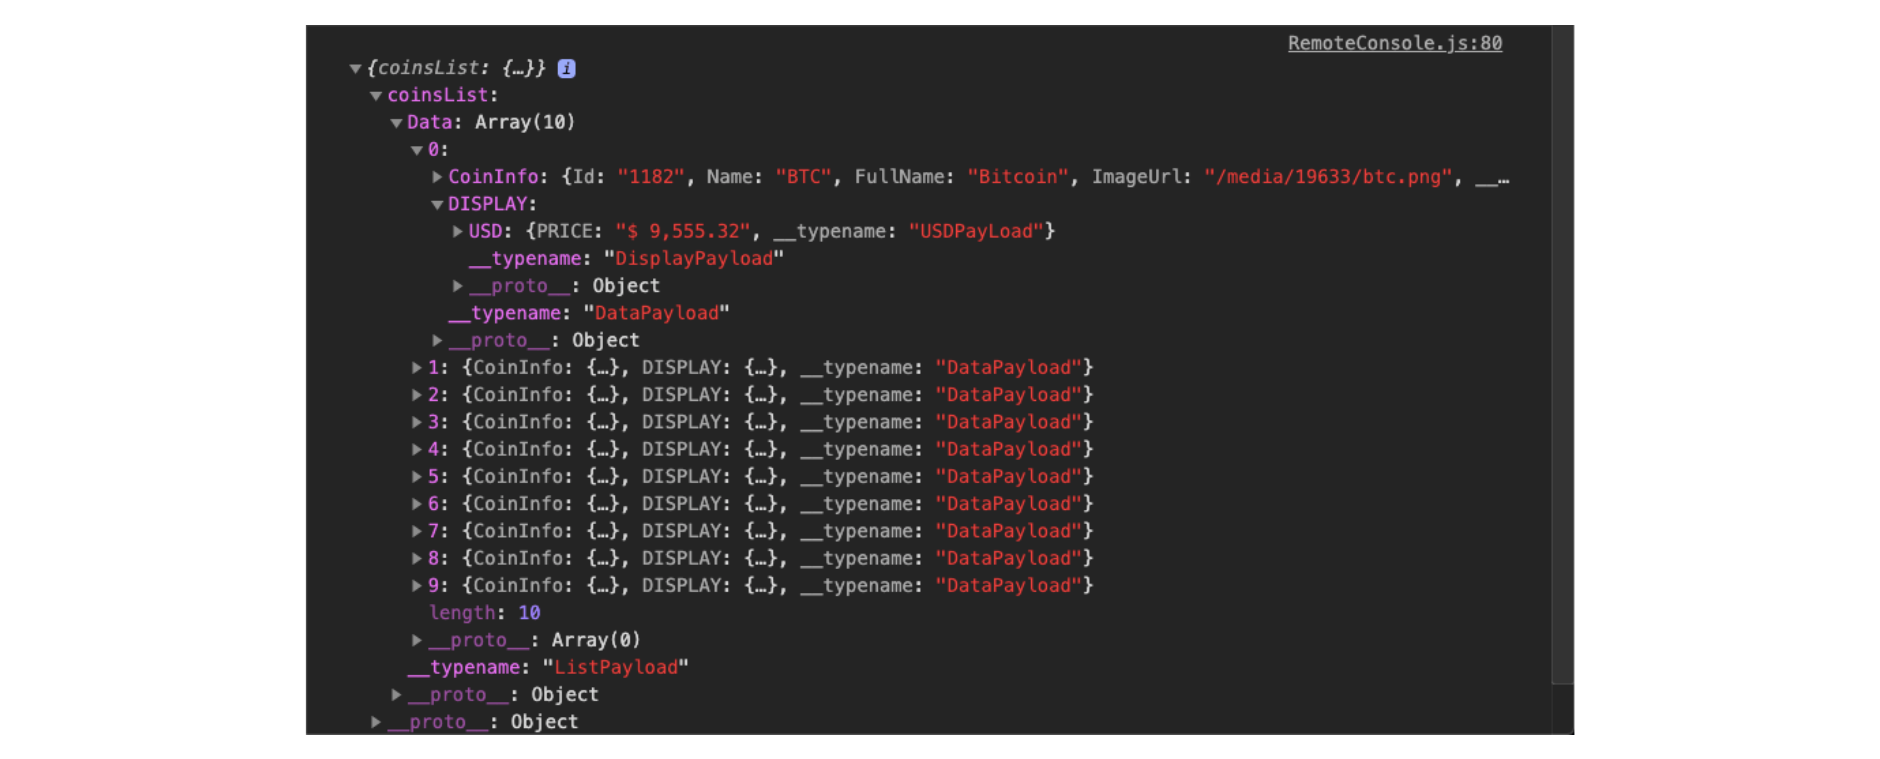
result-from-opening-the-console-tab-from-developer-tools-of-web-browser

That’s it! The Apollo integration is working and you can start displaying the data in the app.

Add an Activity Indicator while fetching results

The useQuery hook gives one property called “loading” that can be used to indicate on the device’s screen when the query is in the process of fetching the result. Using the ActivityIndicator, a loading indicator can be displayed.

Import the ActivityIndicator component from react-native in Home.js.

export default function Home({ navigation }) {
  const { loading, data } = useQuery(FETCH_COIN_LIST);

  if (loading && !data) {
    return (
      <View style={styles.loadingIndicatorContainer}>
        <ActivityIndicator size="large" color="#fff" />
      </View>
    );
  }
  return (
    <View style={styles.container}>
      <Text style={styles.boldText}>Coins List</Text>
    </View>
  );
}

const styles = StyleSheet.create({
  container: {
    flex: 1,
    backgroundColor: '#333',
    justifyContent: 'center',
    alignItems: 'center'
  },
  boldText: {
    color: '#fff',
    fontSize: 24,
    fontWeight: 'bold'
  },
  loadingIndicatorContainer: {
    flex: 1,
    backgroundColor: '#333',
    justifyContent: 'center',
    alignItems: 'center'
  }
});

Display data in a list using FlatList

To display a list of items, let us create a separate component that can be reused for a different purpose if the scope of this app gets larger. Create a new directory called src/components, and inside it, place a new file called ListItem.js.

This component is going to display the name, full name, and price of the component, all inside a touchable button that is going to navigate to the Details screen you created earlier.

With some destructuring from the incoming props coin (which is going to be passed from Home.js), add a functional component called ListItem.

import React from 'react';
import { StyleSheet, Text, TouchableOpacity, View } from 'react-native';

export default function ListItem(props) {
  const { coin, onPress } = props;
  const { CoinInfo, DISPLAY } = coin;
  const { FullName, Name } = CoinInfo;

  return (
    <TouchableOpacity
      style={styles.container}
      onPress={() => onPress && onPress(coin)}
    >
      <View style={styles.row}>
        <Text style={styles.text} numberOfLines={1}>
          {Name}
        </Text>
        <View style={styles.right}>
          <Text style={styles.text} numberOfLines={1}>
            {DISPLAY.USD.PRICE}
          </Text>
        </View>
      </View>

      <View style={styles.row}>
        <Text style={[styles.text, styles.name]} numberOfLines={1}>
          {FullName}
        </Text>
      </View>
    </TouchableOpacity>
  );
}

const styles = StyleSheet.create({
  container: {
    flex: 1,
    padding: 20
  },
  active: {
    backgroundColor: 'rgba(255,255,255,0.05)'
  },
  row: {
    flexDirection: 'row',
    justifyContent: 'space-between'
  },
  right: {
    flex: 1,
    alignSelf: 'flex-end',
    alignItems: 'flex-end'
  },
  text: {
    color: '#FFFFFF',
    fontSize: 24,
    fontWeight: '500'
  },
  name: {
    color: 'rgba(255,255,255,0.5)',
    fontSize: 16,
    fontWeight: '300'
  }
});


Now, import this component in the Home.js file. Also, import FlatList from the react-native core.

// ...
import {
  StyleSheet,
  View,
  Text,
  FlatList,
  ActivityIndicator
} from 'react-native';

import ListItem from '../components/ListItem';
//...


Next, add this FlatList component wrapped inside the root View component, like below.

<View style={styles.container}>
  <FlatList
    contentContainerStyle={styles.contentContainerStyle}
    data={data.coinsList.Data}
    keyExtractor={item => item.CoinInfo.Id.toString()}
    renderItem={({ item }) => {
      return (
        <ListItem
          coin={item}
          onPress={() => navigation.navigate('Details', { coin: item })}
        />
      );
    }}
  />
</View>


Here is the output after this step:
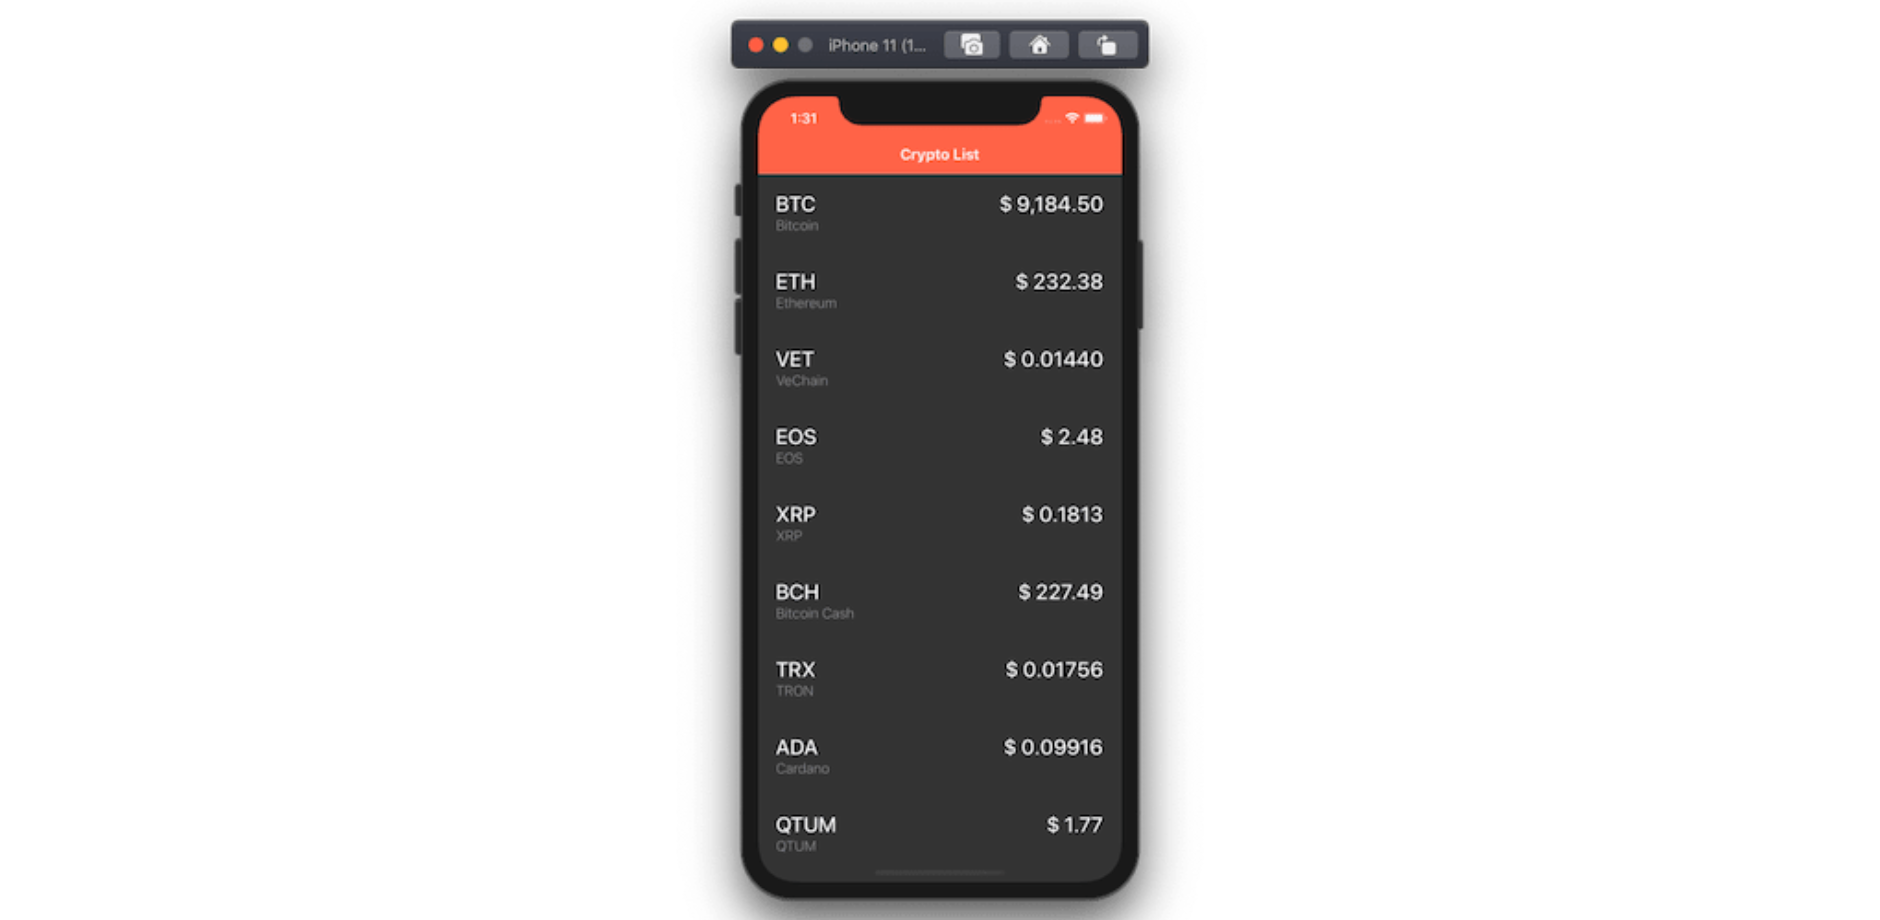
output-of-adding-FltList-component-wrapped-inside-the-root-View-component

You are also going to see the initial loading screen.
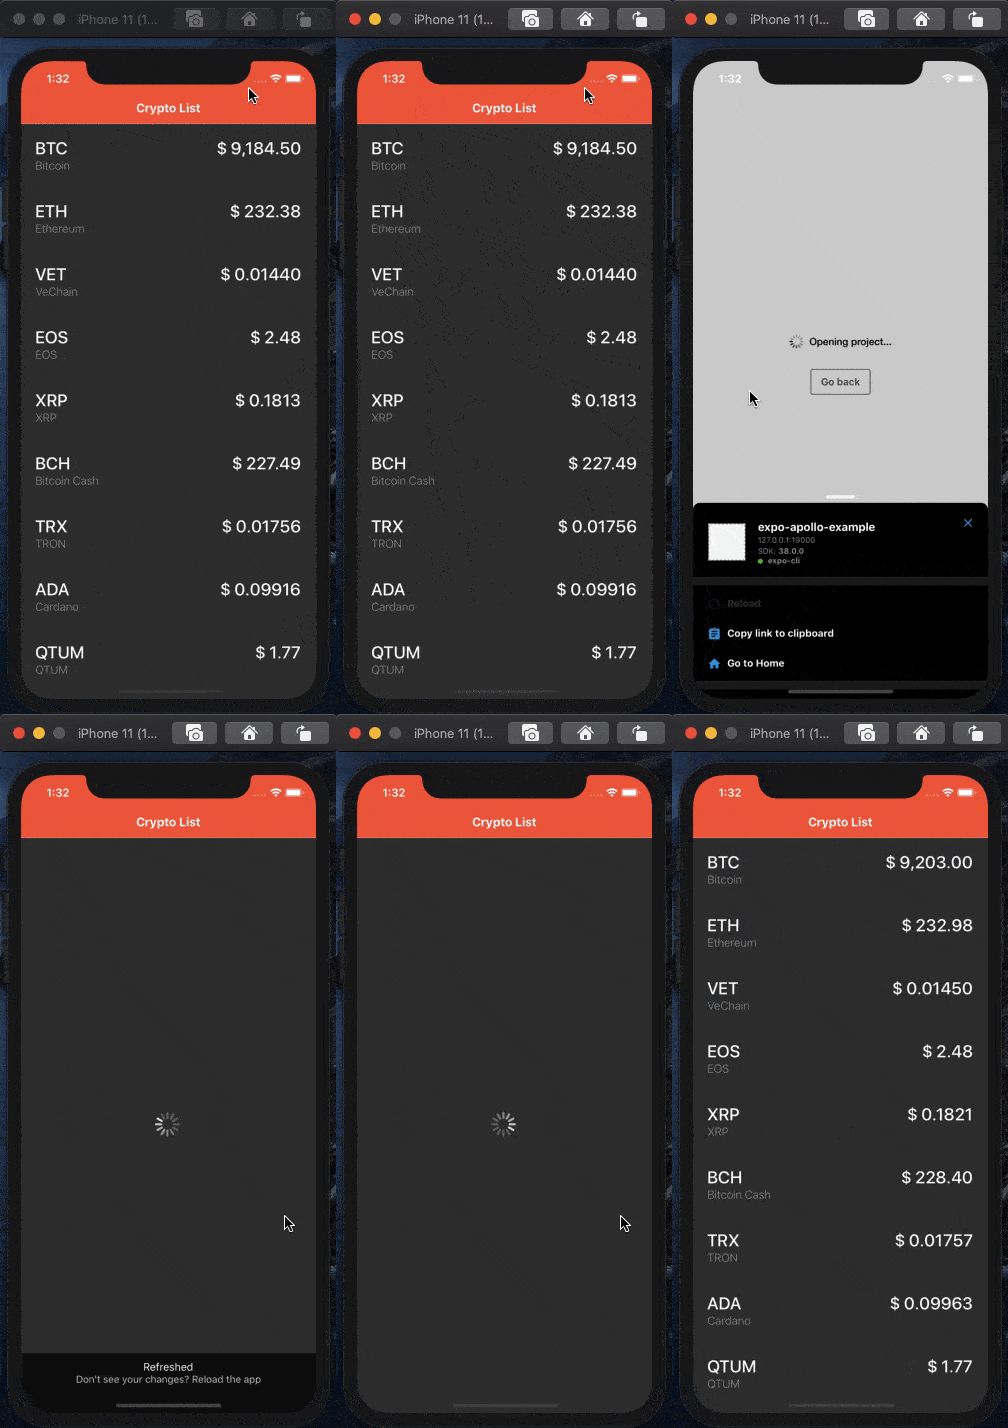
React Native Navigators Screen 11

Since all the props are being passed from the Home screen to the Details screen and the navigation pattern is working, let us set up the Details screen now. Once route.params is de-structured into an object, you can use the values from that object to get the data passed from the Home screen.

export default function Details(props) {
  const { route } = props;
  const { params } = route;
  const { coin } = params;
  const { CoinInfo, DISPLAY } = coin;
  const { FullName, Name } = CoinInfo;
  const { USD } = DISPLAY;
  const { PRICE, OPENDAY, HIGHDAY, LOWDAY, OPEN24HOUR } = USD;

  return (
    <View style={styles.container}>
      <View style={styles.header}>
        <Text numberOfLines={1} style={styles.text}>
          {Name} - {FullName}
        </Text>
        <Text style={styles.priceText} numberOfLines={1}>
          Price: {PRICE}
        </Text>
      </View>
      <View style={styles.statsContainer}>
        <View>
          <View style={styles.statRow}>
            <Text style={styles.stat} numberOfLines={1}>
              Open Day
            </Text>
            <Text style={styles.stat} numberOfLines={1}>
              {OPENDAY}
            </Text>
          </View>
          <View style={styles.statRow}>
            <Text style={styles.stat} numberOfLines={1}>
              Highest in a day
            </Text>
            <Text style={styles.stat} numberOfLines={1}>
              {HIGHDAY}
            </Text>
          </View>
          <View style={styles.statRow}>
            <Text style={styles.stat} numberOfLines={1}>
              Lowest in a day
            </Text>
            <Text style={styles.stat} numberOfLines={1}>
              {LOWDAY}
            </Text>
          </View>
          <View style={styles.statRow}>
            <Text style={styles.stat} numberOfLines={1}>
              Open in 24 hours
            </Text>
            <Text style={styles.stat} numberOfLines={1}>
              {OPEN24HOUR}
            </Text>
          </View>
        </View>
      </View>
    </View>
  );
}


Also, add the corresponding styles to this component:

const styles = StyleSheet.create({
  container: {
    flex: 1,
    backgroundColor: '#fff'
  },
  header: {
    flex: 30,
    justifyContent: 'center',
    alignItems: 'center'
  },
  text: {
    fontSize: 32,
    color: '#161616'
  },
  priceText: {
    fontSize: 24,
    color: '#161616'
  },
  statsContainer: {
    flex: 62,
    backgroundColor: '#161616'
  },
  statRow: {
    padding: 10,
    flexDirection: 'row',
    justifyContent: 'space-between'
  },
  stat: {
    color: '#fff',
    fontSize: 16,
    fontWeight: '500'
  }
});


On visiting the details of any coin in the list, the following is going to be displayed.
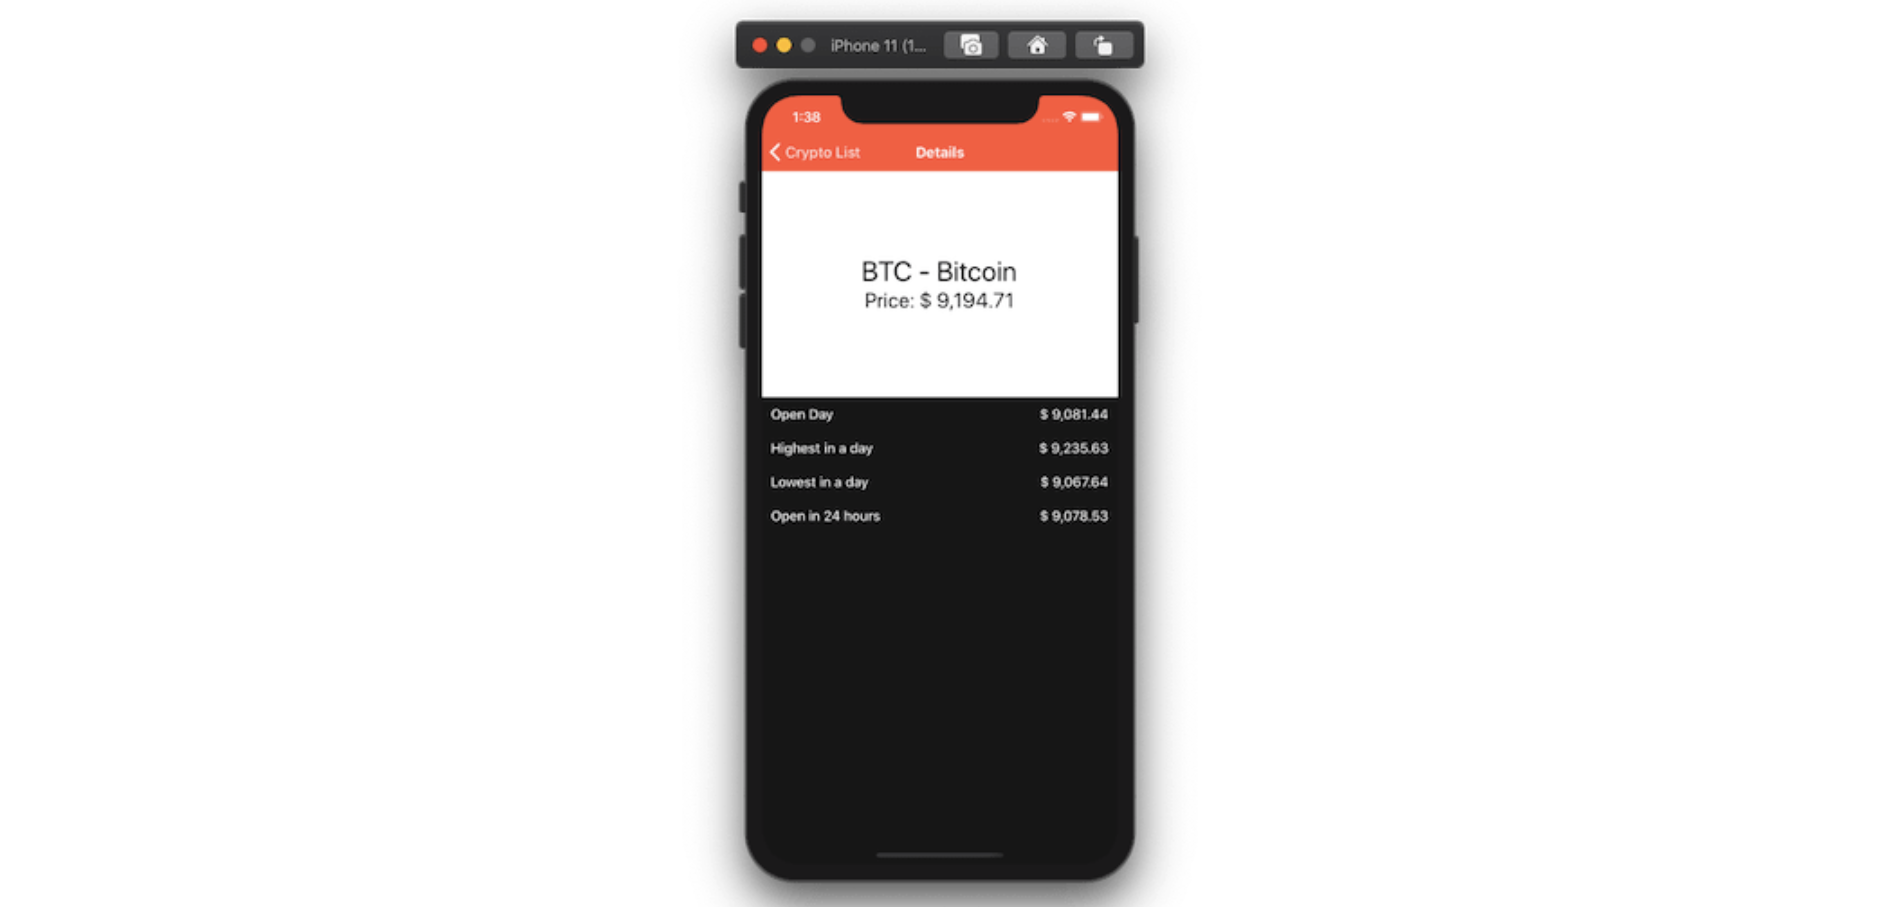
details-of-visiting-any-coin-in-the-list

Conclusion

In this tutorial, we have discussed many strategies and properties that you can apply and implement in your Stack navigator.

The first objective is to get familiar with the component-based configuration of the Stack Navigator in the latest version of the react-navigation library.

The second objective is also fulfilled, which is to use the REST endpoint and integrate the Apollo client into any API endpoint to query desired results in a React Native or Expo app and pass the data between two screens.


The Problem of Exposed Code in Healthcare Apps

The problem of exposed code in Healthcare apps comes up with the digitalization of healthcare services. It has prompted companies to release Web and mobile platforms that allow consumers to easily access a myriad of services.

However, as positive as this shift has been for companies and consumers alike, it means that extremely sensitive data, such as Protected Health Information (PHI), is now more exposed to cyberattacks.

In 2019, 33 million patients had their PHI breached or stolen, and many of them faced identity theft and fraud. Companies also incur significant costs in attack clean-up, compensations to clients, and loss of revenue due to negative press.
33-million-patients-had-their-PHI-breached-or-stolen-in-2019

Contact Tracing Apps

One very specific case of healthcare applications that has surfaced recently is contact tracing apps. These apps are being developed all over the world as a response to the COVID-19 pandemic.

In a nutshell, a contact tracing app allows people to be notified whenever someone that they were in close contact with tested positive for COVID-19 (provided that both were using the app).

The use of these apps has been surrounded by fear and controversy, especially because they handle such sensitive information. But beyond this complicated question of data privacy, there’s the matter of security.

With thousands of security vulnerabilities for attackers to exploit as well as integrity-related weaknesses that can be abused, the teams behind contact tracing apps need to put strict application security in place.

And even though only a few contact tracing apps have been released, we have already seen critical security incidents.

Scam Copycat Apps

In June 2020, security researchers found 12 fake contact tracing apps targeting citizens in Asia, Europe, and South America. These apps are copycats of official government apps, using their actual branding to trick users into trusting them.

When users install these scam apps, they covertly install malware on the device, including banking trojans that steal user credentials and personal data. Apart from financial fraud, victims can become targets of ransomware and identity theft.

These so-called low-tech attacks are based on attackers retrieving the source code of the legitimate app and deploying it somewhere else. Then, attackers distribute them using unofficial app stores and third-party apps.

Data Exfiltration

While scam copycat apps pose a significant threat, a more serious concern in healthcare applications (including contact tracing apps) is data exfiltration.

By default, once deployed, applications lack any type of integrity verification controls, and their source code is left completely exposed and unprotected.

As stated in the OWASP Mobile Top 10 project, this allows attackers to “reveal information about back-end servers; reveal cryptographic constants and ciphers; steal intellectual property; perform attacks against back-end systems; or gain the intelligence needed to perform subsequent code modification”.

By understanding how the application works, attackers get one step closer to planning/automating data exfiltration or scraping attacks.

How to Protect Healthcare Apps

With the stakes being this high in healthcare and government-backed apps, security teams must go the extra mile to ensure that attackers remain locked out.

Using current technology, the security teams behind these implementations can (and should) add protective layers to these apps’ source code. One key layer is obfuscation, a technique that transforms the source code into a new version that is extremely hard to reverse-engineer.

Another important security layer is code locks. These tie the source code to a list of allowed environments and Operating Systems and break the app when it is run outside of this list. By locking attackers out, this security layer goes a long way toward preventing low-tech copycats and scam apps.

Finally, runtime defenses must be present as an additional layer of security.

These can be set up to break app execution when there has been any type of compromise to the integrity of the app. So, whenever attackers try to debug the app or change its source code, the app will immediately break, on purpose, and make attackers lose their progress.

Final Thoughts

In times of fast digitalization, application security can’t lag behind.

Every year, attackers manage to get hold of the protected health information of millions of patients. With contact tracing apps making their debut, we’re already seeing critical security incidents that originate from unprotected source code.

Healthcare organizations must act fast to put in place vetted security systems and ensure that the source code of their apps won’t serve as a gateway to data exfiltration attacks.

We present several case studies about protecting code, namely one showing how a healthcare company has used Jscrambler to harden the source code of its apps and increase its compliance with data privacy regulations.