Category: Client-Side Security

The Importance Of Protecting Your App’s Source Code

Why should you protect your app’s source code?

If your business operations involve any type of web or mobile app, the source code of these apps likely represents an important part of your company’s intellectual property.

These apps are key pieces of a company’s competitive advantage and strategic business assets. Unwarranted access to this source code could put this competitive advantage at risk. However, this is only the tip of the iceberg.

Unprotected source code can lead to critical security issues such as automated abuse, piracy, and data exfiltration.

Every Fortune 500 company relies on JavaScript, a thriving open-source ecosystem with thousands of frameworks available that speed up the development process.

Despite the many benefits and business value associated with JavaScript, organizations need to consider the changes to their threat model when using JavaScript-based web and mobile applications. Especially regarding applications in sectors such as banking, healthcare, broadcasting, and e-commerce.

A browser must interpret JavaScript for it to work. Therefore, it becomes exposed in a way that anyone can access, read, and change.

Although the recommendation is to keep sensitive code on trusted environments such as the backend, this is often infeasible due to inherent performance issues. Companies end up running proprietary algorithms and important business logic on the exposed client-side.

Regulations and standards such as NIST and ISO 27001 mention the risks of unprotected source code, recommending that organizations put in place strict control procedures to keep them from experiencing the consequences of attacks on the source code.

Security Risks: Automated Abuse, Piracy, and Data Exfiltration


As OWASP mentions, potential attackers can take advantage of the exposed code to modify the application’s data and resources, change the system APIs, or change the contents of memory dynamically. This way, they can hijack the intended use of the code for personal or monetary gain.

One of the hijacking routes attackers can take is relying on automated abuse attacks by exploiting the web application’s functionalities to gain access or privileges through the use of bots.

These types of attacks need some source code manipulation, which is possible when JavaScript is unprotected.

The target for this type of attack is often cloud providers that offer free benefits with new accounts. Attackers will abuse the system to automate the creation of new trial accounts and use the benefits without ever having to pay for the services.

Automated attacks are troublesome because they can target new versions of the code with minimal cost, which means that they can scale up and target more and more systems.

Piracy and the OTT Industry

When it comes to piracy, attackers typically target the growing OTT industry, leaking premium content that naturally ends up causing a loss of revenue for legitimate businesses.

Aware of the problem, providers are using multiple techniques to fight pirates and trace the leaked content, but they must ensure that attackers can’t easily bypass these techniques, namely by protecting their source code.

Other examples of piracy are also commonly seen in the gaming and gambling industries, where counterfeit apps pose a threat to business integrity.

Data Exfiltration

One of the risks is data exfiltration, which probably resonates with everyone who has had to submit data such as email, name, address, credit card number, or even medical information on a website using a form.

JavaScript is the logic behind these forms. Thus, all the sensitive data passes through the client side. So the safety of the data is potentially at risk.

By leaving their JavaScript exposed, organizations make it easier for attackers to understand how their web applications work and facilitate the planning and automation of data exfiltration or scraping attacks.

This class of attacks is known for generating severe losses from a business standpoint and for breaching compliance with data privacy regulations.

When the source code is exposed, organizations make it easier for attackers to understand how their web applications work and increase their attack surface.

Secure your web and mobile applications

Secure your web and mobile applications. Start securing them during the development stage.

This includes protecting the application’s source code with multiple layers to ensure any code sent to production can prevent tampering and reverse-engineering attempts.

Plus, with the ongoing digital transformation showing no signs of slowing down, this approach can be crucial to ensuring that companies’ intellectual property and user data are protected.

Originally published in Cyber Defense Magazine.

Preventing Intellectual Property Theft with Jscrambler

Prevent intellectual property theft with Jscrambler. How and why is it important to be protected against intellectual property theft?

Intellectual property theft (also called IP theft) refers to someone illegitimately taking possession of someone else’s proprietary inventions or developments.

In the context of business, and specifically in IT, IP theft refers to a competitor or malicious actor getting access to trade secrets or proprietary algorithms to be used to the thief’s own advantage.

The acceleration of digital transformation has stimulated the development of new technologies, increasing the value of companies’ intellectual property. This creates new opportunities for attackers and scammers.

We have witnessed copycat apps going rampant in app stores, stealing business away from original developers, and fake COVID tracking apps mimicking official government apps and installing malware on the user’s device.

Most intellectual property theft occurs in countries with ambiguous IP laws, which makes enforcement difficult. But even though tackling this problem is no easy task, prevention is more beneficial for businesses than remediation.

Consequences of Intellectual Property Theft

The Commission on the Theft of American Intellectual Property points out in their IP commission Report that IP theft ends up costing affected companies around $225 billion to $600 billion. While this figure will vary from case to case and the indirect damages are difficult to estimate, it’s enough to understand the potential damages in specific examples.

Copycat Applications

In copycat applications, malicious actors steal the whole source code of the application and deploy it posing as a legitimate app. They may then monetize the application, taking advantage of the leniency that app stores are displaying, failing to crack down on copycats.

There’s a direct impact on the affected business from the loss of revenue.

The vast majority of users aren’t able to differentiate between an original app and a copycat, and so while the original app remains available in app stores (which can go on for months), the copycat app will be diverting sales. In some cases, the copycat app can also be used to distribute malware, jeopardizing the reputation of the company.

Proprietary Algorithm

A second example of IP theft relates to a competitor wanting to retrieve a proprietary algorithm.

In highly competitive sectors such as E-Commerce, companies invest in specialized algorithms to improve their conversion rate.

Competitors may go through the app’s source code to analyze the logic of these algorithms, allowing them to mimic their behavior and utilize it for their own gain.

As a result, the company that originally developed the algorithm will lose a competitive advantage that could translate into millions of dollars in revenue.

How to prevent intellectual property theft with Jscrambler

To prevent intellectual property theft in web and mobile applications, businesses need to adopt adequate measures to secure their intellectual property (i.e., their source code). But how can they secure it?

To make this easier to digest, let’s pick up our previous two examples: copycat applications and a competitor trying to retrieve a proprietary algorithm.

Tip: For a hands-on experience, feel free to try the code protection measures we will explore below on your code by using a Jscrambler free trial.

Stopping Copycat Applications

Malicious actors will try to get access to the source code of the original application to copy it and benefit from it.

To prevent that, businesses need to focus on adding strong protection to their source code to stop those malicious actors from ever being able to understand or replicate the code’s logic.

The answer to this is to apply code obfuscation along with other code protection techniques that can be used to stop third parties from trying to reuse the code. This is a security recommendation from OWASP.

Step-by-step: JavaScript Obfuscation

Conceal the code using JavaScript obfuscation, which includes a series of code transformations that turn the otherwise exposed code into a protected version that is extremely hard to understand and reverse-engineer.

To make the concealed code effectively safe from copycats, obfuscation alone isn’t enough. An obfuscated app will run just like the original code, so copycats could just replicate that code. Simple obfuscation tools fail the purpose of actually making it hard for copycats to create app replicas.

Jscrambler provides copycat protection by applying additional strong code protection techniques on top of the obfuscation, namely Code Locks and the Self-Defending layer.

Step-by-step: Code Locks

Code Locks are useful against copycats because they provide control over the environment in which the code is allowed to run.

A date lock, for example, automatically expires the code after a certain time, meaning that copycats would have to continuously retrieve fresh batches of code to avoid having broken apps.

A browser or domain lock, on the other hand, allows the locking of the original code to certain browsers or domains, which prevents the copycat from actually running.

In case the copycats attempt debugging the code to try and learn how the application works, Jscrambler’s Self-Defending feature protects functions and object literals, concealing their logic, and detects debuggers to trigger defenses that thwart reverse engineering attempts.

Stopping Competitors from Retrieving a Proprietary Algorithm

When it comes to valuable proprietary algorithms, competitors may want to try and retrieve the source code that contains them to use them to their own advantage.

To prevent that, we need to protect the source code.

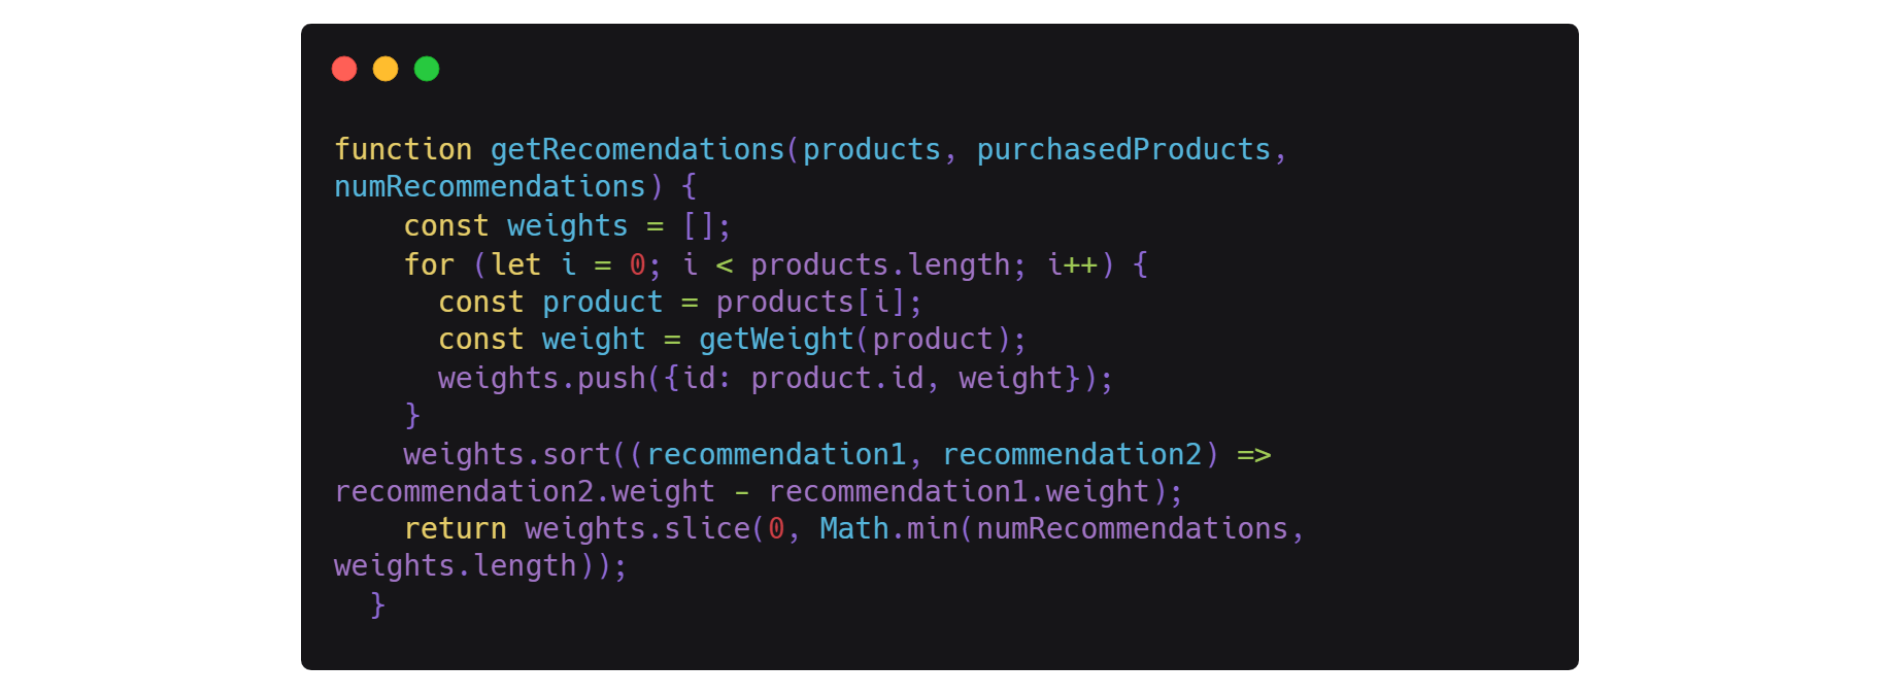
Let’s take a look at the example code below. It’s an algorithm that recommends products based on the customer’s previous purchase history.

source-code-example
Now, if this were a proprietary algorithm, naturally, we would not want to leave that code exposed to our competitors. Simply by analyzing this code, they could potentially replicate the algorithm altogether. So, our first step would be to conceal all this logic with JavaScript obfuscation, taking advantage of Jscrambler’s several transformations.

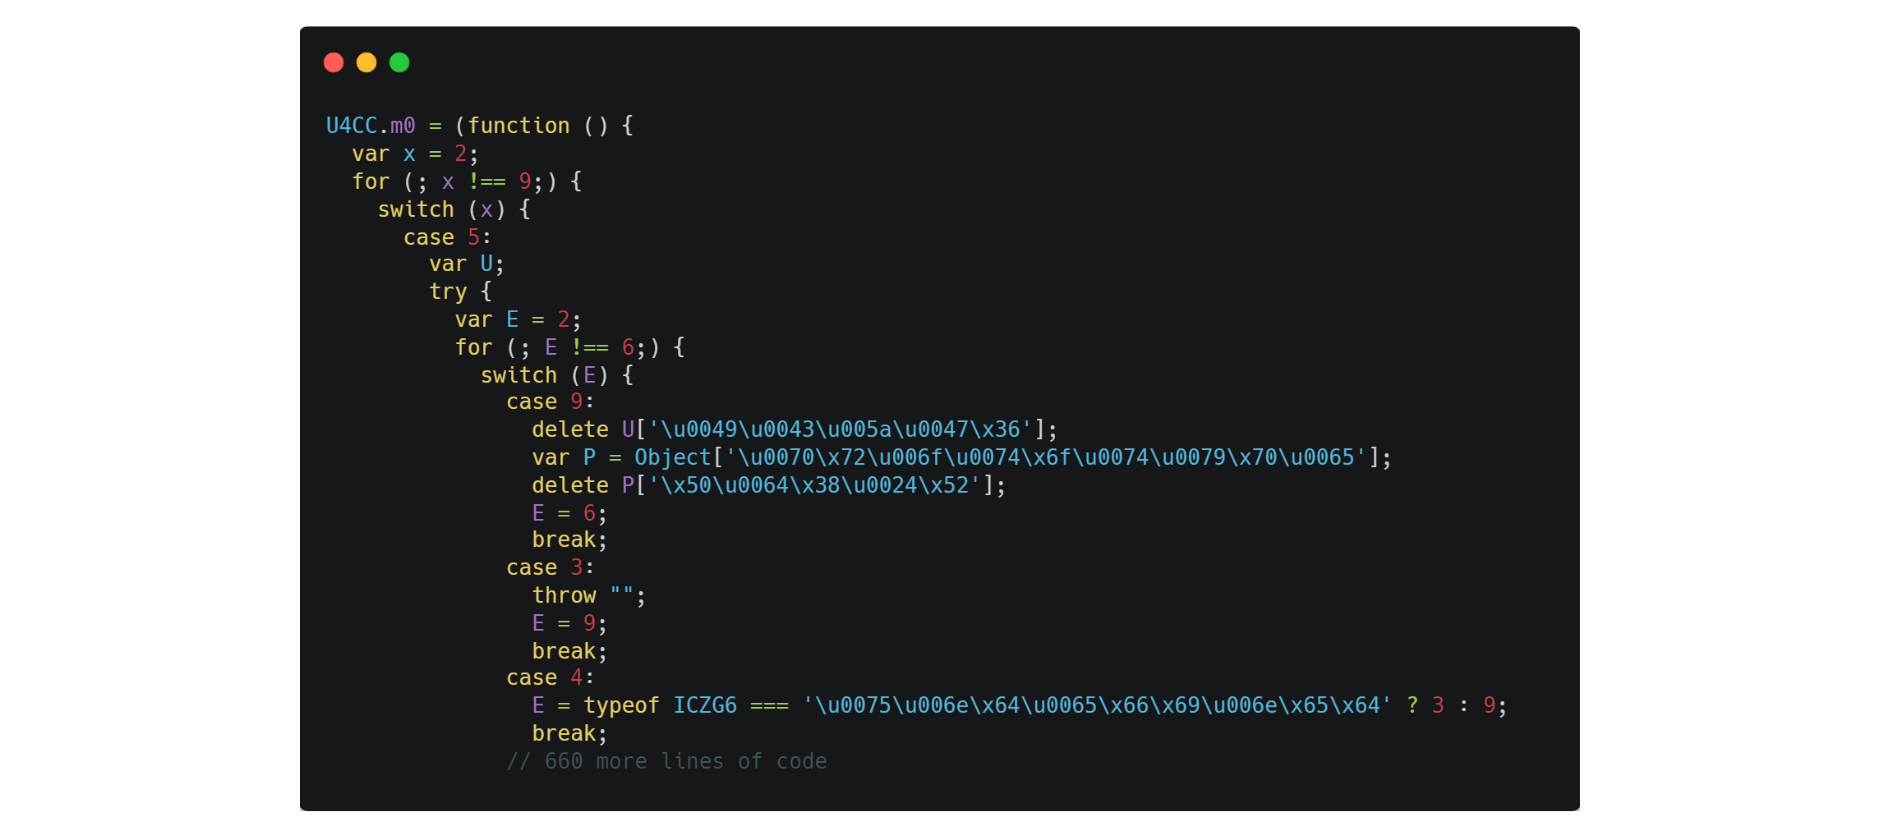
code-snippet-example-results-from-using-Jscrambler-control-flow-flattening-transformation
In the code snippet above, we can see the results of using Jscrambler’s Control Flow Flattening transformation. It flattens the flow of the program by removing the natural conditional constructs that make the code easier to read.

As a result of this single transformation, the code is already extremely hard to understand and reverse-engineer.

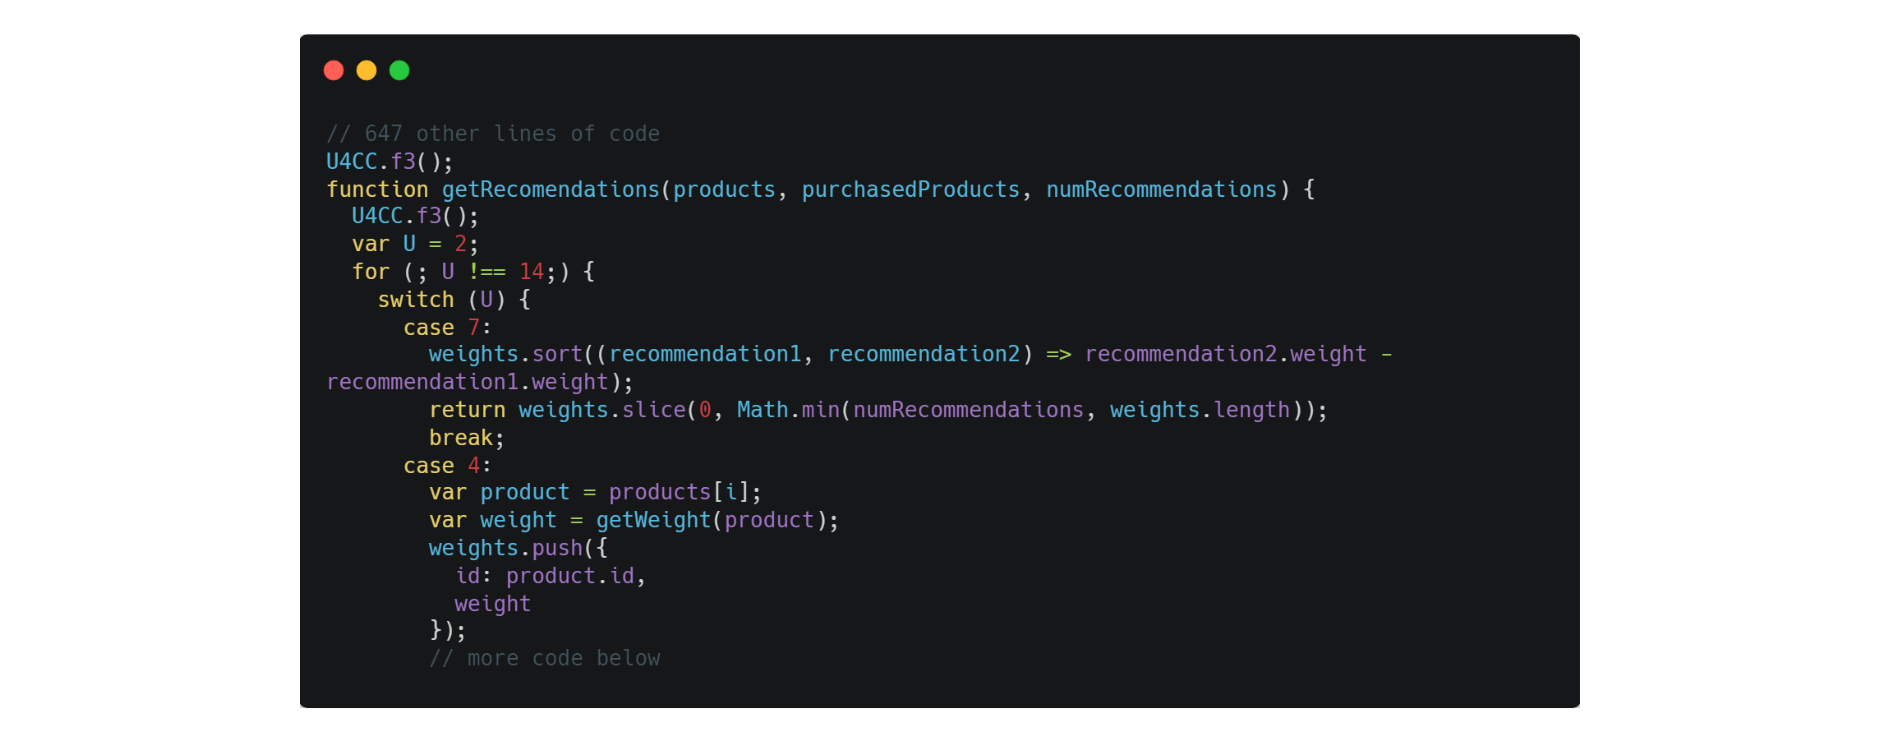
Applying a single transformation would not be enough to fully protect the code from competitors’ eyes. The Control Flow Flattening transformation used above doesn’t change any of the names, numbers, or strings that were used in the original algorithm, as we can see below.

applying-control-flow-flattening-transformation-example
As such, with Jscrambler, we combine several different transformations, including string concealing and variable masking, to conceal the logic of the source code and prevent competitors from being able to retrieve any useful information.

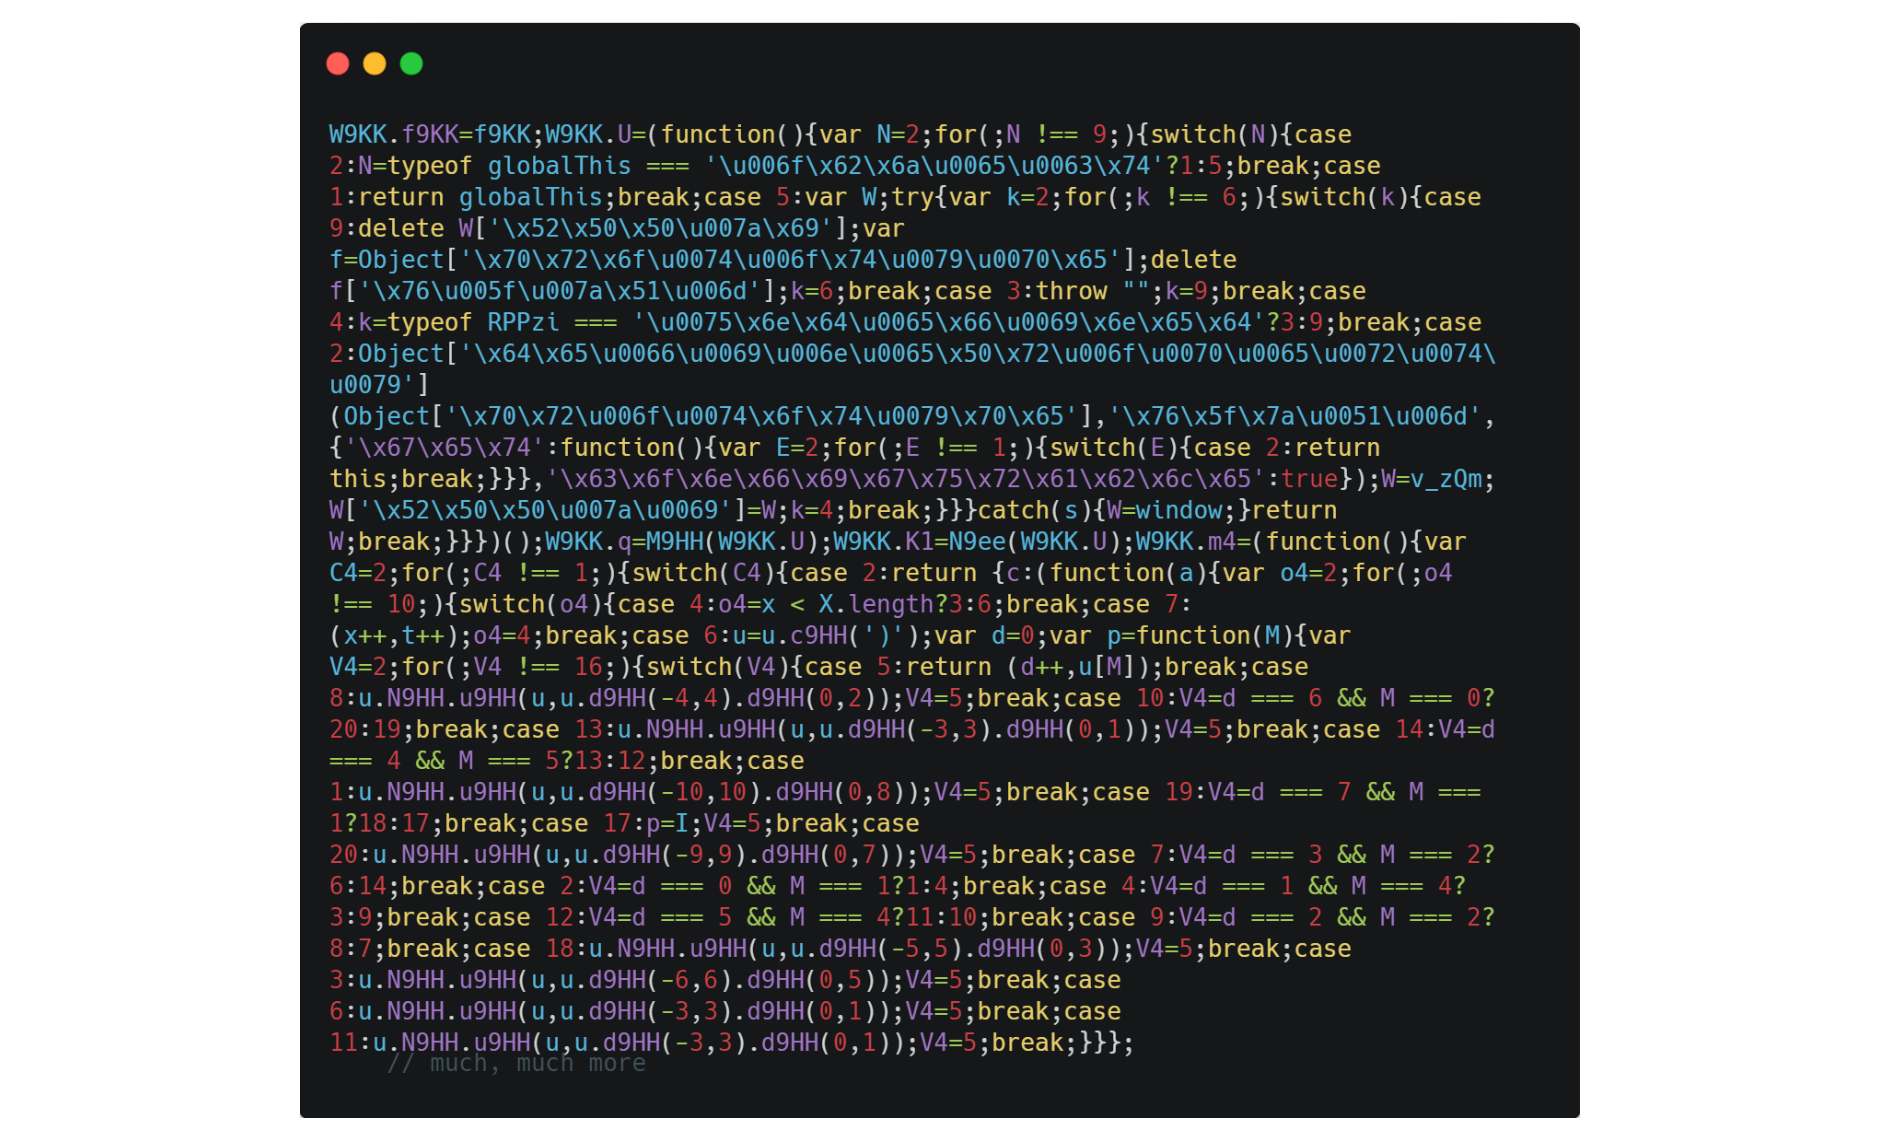
After adding 11 different obfuscation transformations from Jscrambler, we get unreadable code that is difficult to reverse-engineer by humans and reverse-engineering tools.

eleven-different-obfuscation-transformations-from-jscrambler
If you are motivated by protecting your intellectual property and keeping your algorithms safe from prying eyes, you would still want to raise the bar even higher to stop reverse engineering attempts.

By employing Jscrambler’s Self-Defending feature, your protected code will effectively mitigate any debugging or tampering attempt by triggering countermeasures at runtime, preventing dynamic code analysis. And since this is added on top of the potent obfuscation we saw before, it will also prevent static code analysis, leaving competitors completely locked out.

In case you’re only concerned about protecting specific algorithms throughout your source code, you can easily apply Jscrambler’s protection to these specific parts by using our Code Annotations feature.

Final Thoughts

As businesses become more digital and competition grows, the need to stand out is often translated into innovative digital products. Naturally, with innovation, and digital innovation specifically, we see Intellectual Property theft becoming more prevalent.

With that come the consequences that IP Theft brings to businesses, which shine a light on the fact that the cost of preventing it from ever unfolding is nowhere near the cost of trying to pick up the pieces afterward.

So, to protect their innovative proprietary algorithms, companies must protect their source code with strong obfuscation transformations, code locks, and runtime protection.

Jscrambler provides cutting-edge protection that, unlike simple obfuscation tools, is resilient to reverse-engineering both by humans and reverse engineering tools, ensuring that the code is kept away from prying eyes and can’t be redistributed.

Secure your JavaScript source code against theft and reverse engineering with a free Jscrambler trial.

How to add a Splash Screen and an App Icon in React Native

Adding a splash screen or an app icon to a React Native app can be agile. Every mobile application has a splash screen and an app icon; together, they provide the first impression. An app icon is displayed in various places, such as on an app store and on the device’s app drawer, whereas a splash screen is shown during the app startup.

In this tutorial, let’s learn how to use an excellent package called react-native-bootsplash to display a splash screen when an app starts and then learn the process of adding app icons in a React Native app.

Prerequisites to add a splash screen and an app icon in React Native with Bootsplash


To follow this tutorial, please make sure you have the following tools and utilities installed on your local development environment and have access to the services mentioned below:

  • Node.js version 12.x.x or above installed;

  • Have access to one package manager such as npm or yarn or npx;

  • react-native-cli installed, or use npx.

Note that the example app was created using React Native version 0.65.x.

The complete source code for this example is at this GitHub repo


Setup a React Native app


As an example for this tutorial, we will use a React Native project with two screens and React Navigation integrated.

To create a new React Native project and install the react-navigation dependencies, run the following command from the terminal window:

npx react-native init myAwesomeApp

# after the project directory is created
# navigate inside the directory
# and install the following dependencies

yarn add @react-navigation/native @react-navigation/native-stack react-native-safe-area-context react-native-screens 


Inside the src/ directory, create a new directory called navigation/ with a new file named RootNavigator.js. Add the following code to use the stack navigation pattern inside this file:

import * as React from 'react';
import {NavigationContainer} from '@react-navigation/native';
import {createNativeStackNavigator} from '@react-navigation/native-stack';

import HomeScreen from '../screens/HomeScreen';
import DetailScreen from '../screens/DetailScreen';

const Stack = createNativeStackNavigator();

const RootNavigator = () => {
  return (
    <NavigationContainer>
      <Stack.Navigator screenOptions={{headerShown: false}}>
        <Stack.Screen name="Home" component={HomeScreen} />
        <Stack.Screen name="Details" component={DetailScreen} />
      </Stack.Navigator>
    </NavigationContainer>
  );
};

export default RootNavigator;


Modify the App.js file:

import React from 'react';

import RootNavigator from './src/navigation/RootNavigator';

const App = () => {
  return <RootNavigator />;
};

export default App;


Now, let’s create two new screens. Start by creating a new directory called src/screens/ and inside it, add the first file with the name HomeScreen.js and the following code snippet:

import React from 'react';
import {View, Text, StyleSheet, Pressable} from 'react-native';

const HomeScreen = ({navigation}) => {
  return (
    <View style={styles.screenContainer}>
      <Text style={styles.title}>Home Screen</Text>
      <Pressable
        style={styles.buttonStyle}
        onPress={() => navigation.navigate('Details')}>
        <Text style={styles.buttonTextStyle}>Go To Detail Screen</Text>
      </Pressable>
    </View>
  );
};

const styles = StyleSheet.create({
  screenContainer: {
    flex: 1,
    justifyContent: 'center',
    alignItems: 'center',
    backgroundColor: '#fff',
  },
  title: {
    fontSize: 32,
  },
  buttonStyle: {
    height: 54,
    width: '80%',
    marginTop: 32,
    borderRadius: 8,
    alignItems: 'center',
    justifyContent: 'center',
    backgroundColor: '#2EE59D',
    shadowRadius: 5,
    shadowOpacity: 0.7,
    shadowColor: 'rgba(46, 229, 157, 0.5)',
    shadowOffset: {
      width: 0,
      height: 3,
    },
  },
  buttonTextStyle: {
    color: '#fdfdfd',
    fontWeight: '700',
  },
});

export default HomeScreen;


Now, add the second screen component file, DetailScreen.js, and the following code snippet:

import React from 'react';
import {View, Text, StyleSheet, Pressable} from 'react-native';

const DetailScreen = ({navigation}) => {
  return (
    <View style={styles.screenContainer}>
      <Text style={styles.title}>Detail Screen</Text>
      <Pressable
        style={styles.buttonStyle}
        onPress={() => navigation.navigate('Home')}>
        <Text style={styles.buttonTextStyle}>Go To Home Screen</Text>
      </Pressable>
    </View>
  );
};

const styles = StyleSheet.create({
  screenContainer: {
    flex: 1,
    justifyContent: 'center',
    alignItems: 'center',
    backgroundColor: '#fff',
  },
  title: {
    fontSize: 32,
  },
  buttonStyle: {
    height: 54,
    width: '80%',
    marginTop: 32,
    borderRadius: 8,
    alignItems: 'center',
    justifyContent: 'center',
    backgroundColor: '#2EE59D',
    shadowRadius: 5,
    shadowOpacity: 0.7,
    shadowColor: 'rgba(46, 229, 157, 0.5)',
    shadowOffset: {
      width: 0,
      height: 3,
    },
  },
  buttonTextStyle: {
    color: '#fdfdfd',
    fontWeight: '700',
  },
});

export default DetailScreen;


With the boilerplate setup done, let’s now build the apps for iOS and Android.

For iOS, run the following command:

npx react-native run-ios


For Android, run the following command:

npx react-native run-android


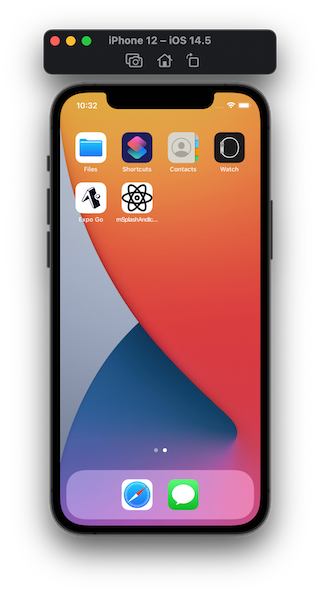
Here is what the example app looks like in its current form: Notice that the splash screen and the app icon are defaults that come with React Native.

example of how app looks like in its current form as the splash screen and the app icon are defaults that come with React Native

We are picking an icon from Flaticon.com for the example app.

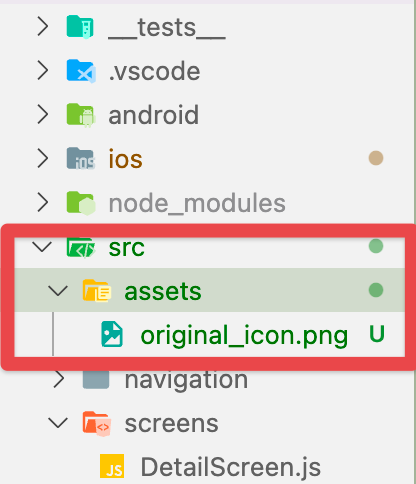
After creating the original app icon, save it inside the directory src/assets/ and name the file original_icon. (Note: You can name the original icon file as per your requirements.)

save the app icon inside the directory src/assets/ and name the file original_icon

Tip: Make sure your initial app logo is 1024x1024px.


Installing react-native-bootsplash


The initial step is to install the react-native-bootsplash package and then generate assets using it.

Open the terminal window and execute the following command to install the package:

yarn add react-native-bootsplash

# or if using npm
npm install react-native-bootsplash


Next, for iOS, execute the command to install pods.

npx pod-install ios


Tip: If you use a React Native version lower than 0.60, please follow the instructions to link the package manually.

Next, add the following script to the package: json file under the “scripts” section:

"scripts": {
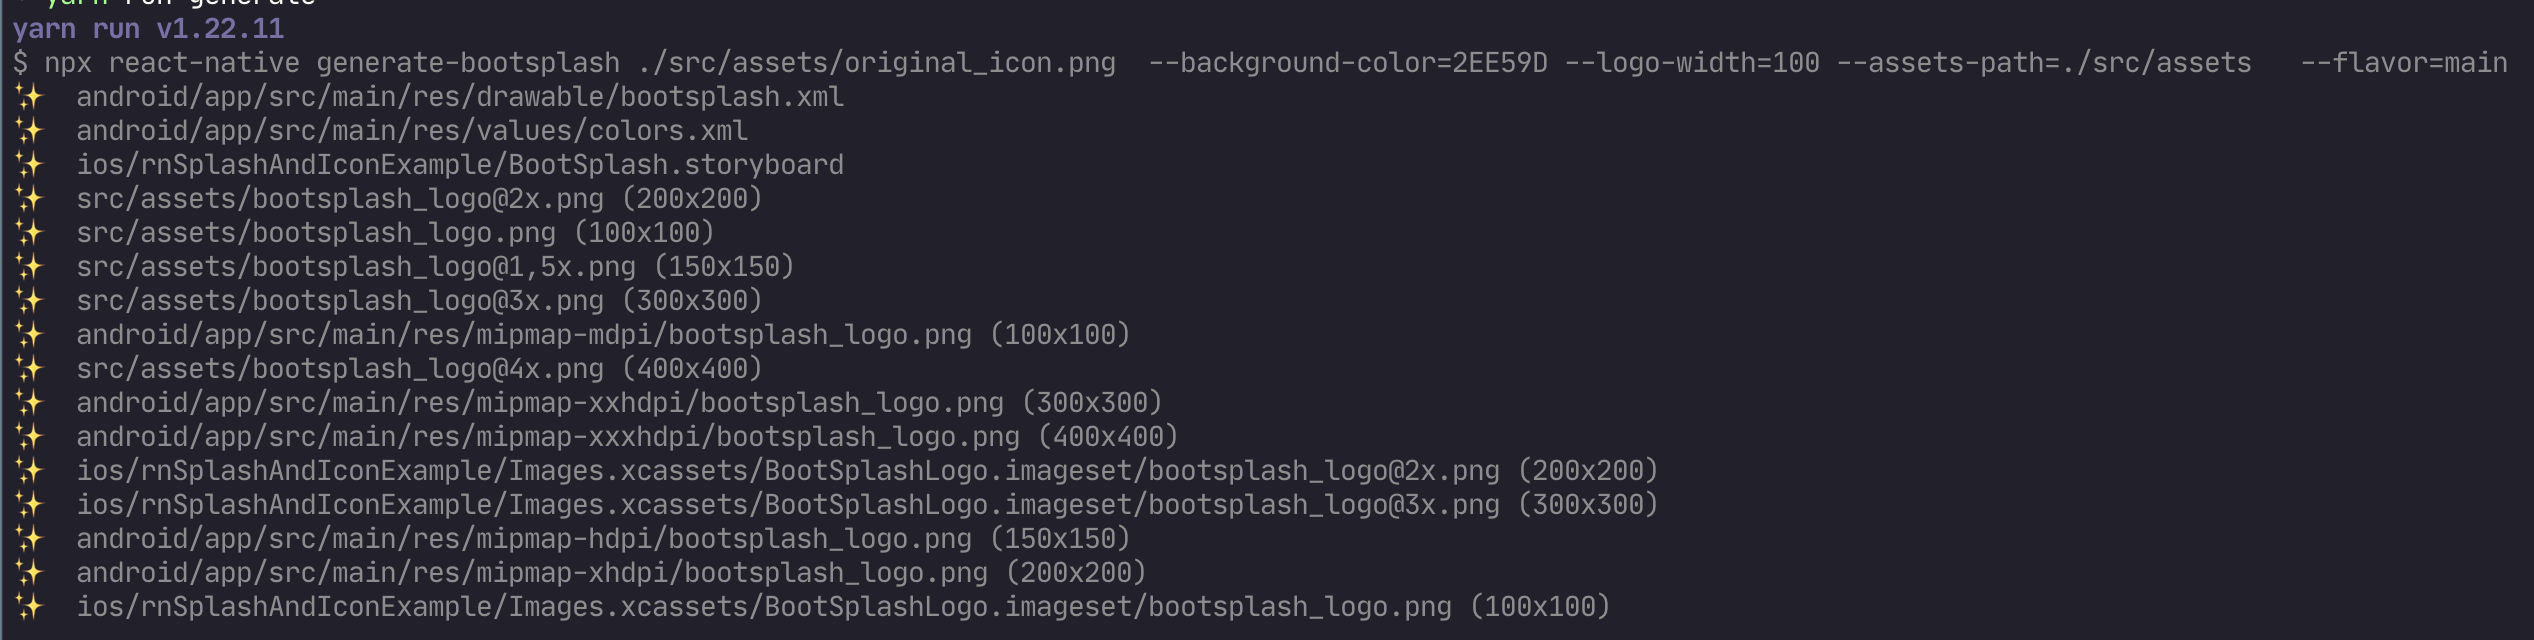
  "generate": "npx react-native generate-bootsplash ./src/assets/original_icon.png --background-color=2EE59D   --logo-width=100 --assets-path=./src/assets --flavor=main"
}


Here is how each option is described:

  • generate-bootsplash is the command to generate the assets.

  • ./src/assets/original_icon.png is the path to the original icon file. The path may vary depending on where you save the file in your React Native project.

  • –background-color=hexadecimal_value is a color value in hexadecimal format. The color here is used as the background color of the splash screen.

  • –logo-width=100 is the width of the logo. This is a default value provided by the package

  • assets-path is the path to the assets directory.

  • flavor is an Android-only option. Let’s pass the value main here to target the default version of the Android app. You can learn more about Build Variants on Android here.

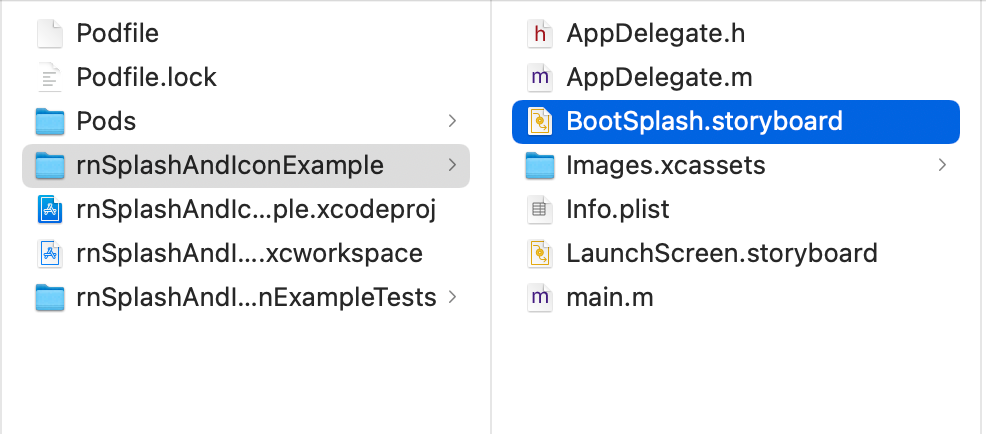
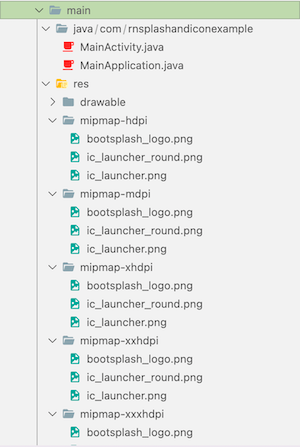
This will generate assets in the path specified for the option assets-path, a storyboard called BootSplash.storyboard file inside the ios/app-name directory, as well as generate assets for the Android app inside different sub-directories of the android/app/src/main/res folder.

splash screen assets path specified for the option assets-path

Android requires five different sizes for different screen pixel densities. Icons for lower resolution are created automatically from the baseline (mdpi). Refer to the table below for more information on pixel densities:

Resolution

Density

Pixel units

mdpi (Baseline)

160 dpi

hdpi

240 dpi

1.5×

xhdpi

320 dpi

xxhdpi

480 dpi

xxxhdpi

640 dpi


Adding splash screen on iOS


Start by opening the file ios/app-name.xcodeproj in Xcode.

open the file ios/app-name.xcodeproj in Xcode


Then, drag the file BootSplash.storyboard under the Project directory in the Xcode file manager on the left side of the Xcode from the path ios/app-name/ directory.

bootsplash file manager


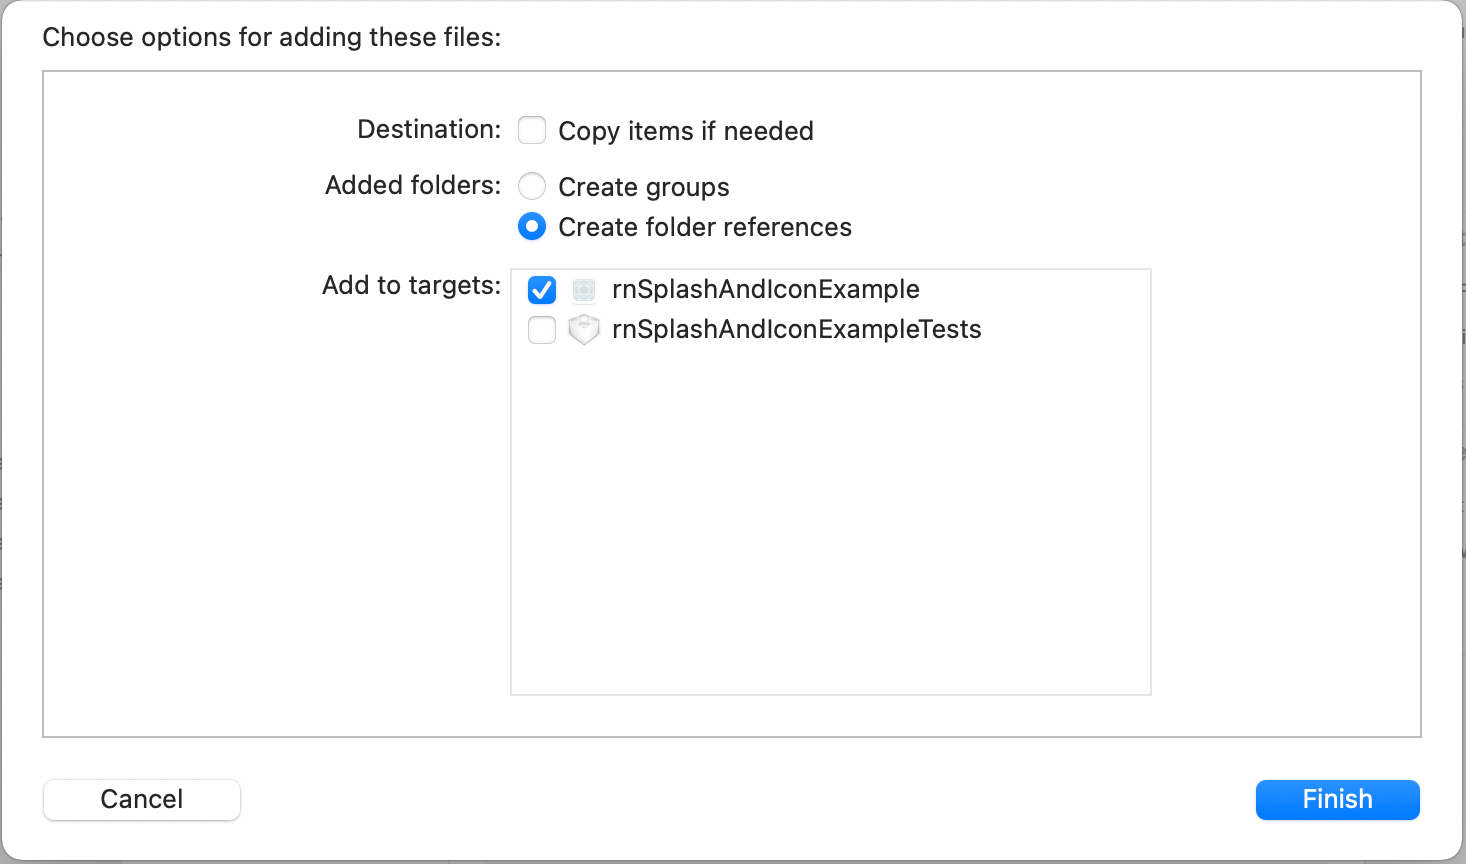
After dragging it, Xcode will prompt you to create a folder reference. First, make sure that under the Add to Targets option, the app name is selected. Then click the Finish button.

splash screen ios


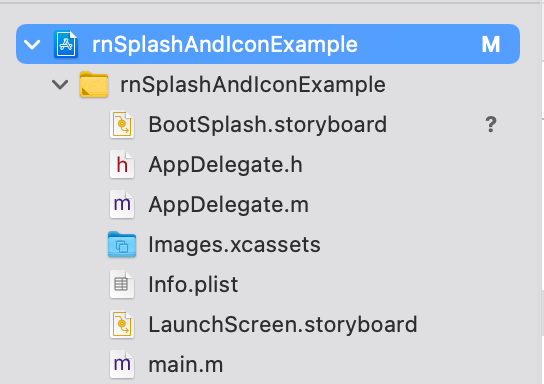
The BootSplash.storyboard file will now be represented in the file manager as shown below:

bootsplash storyboard is represented in this file manager


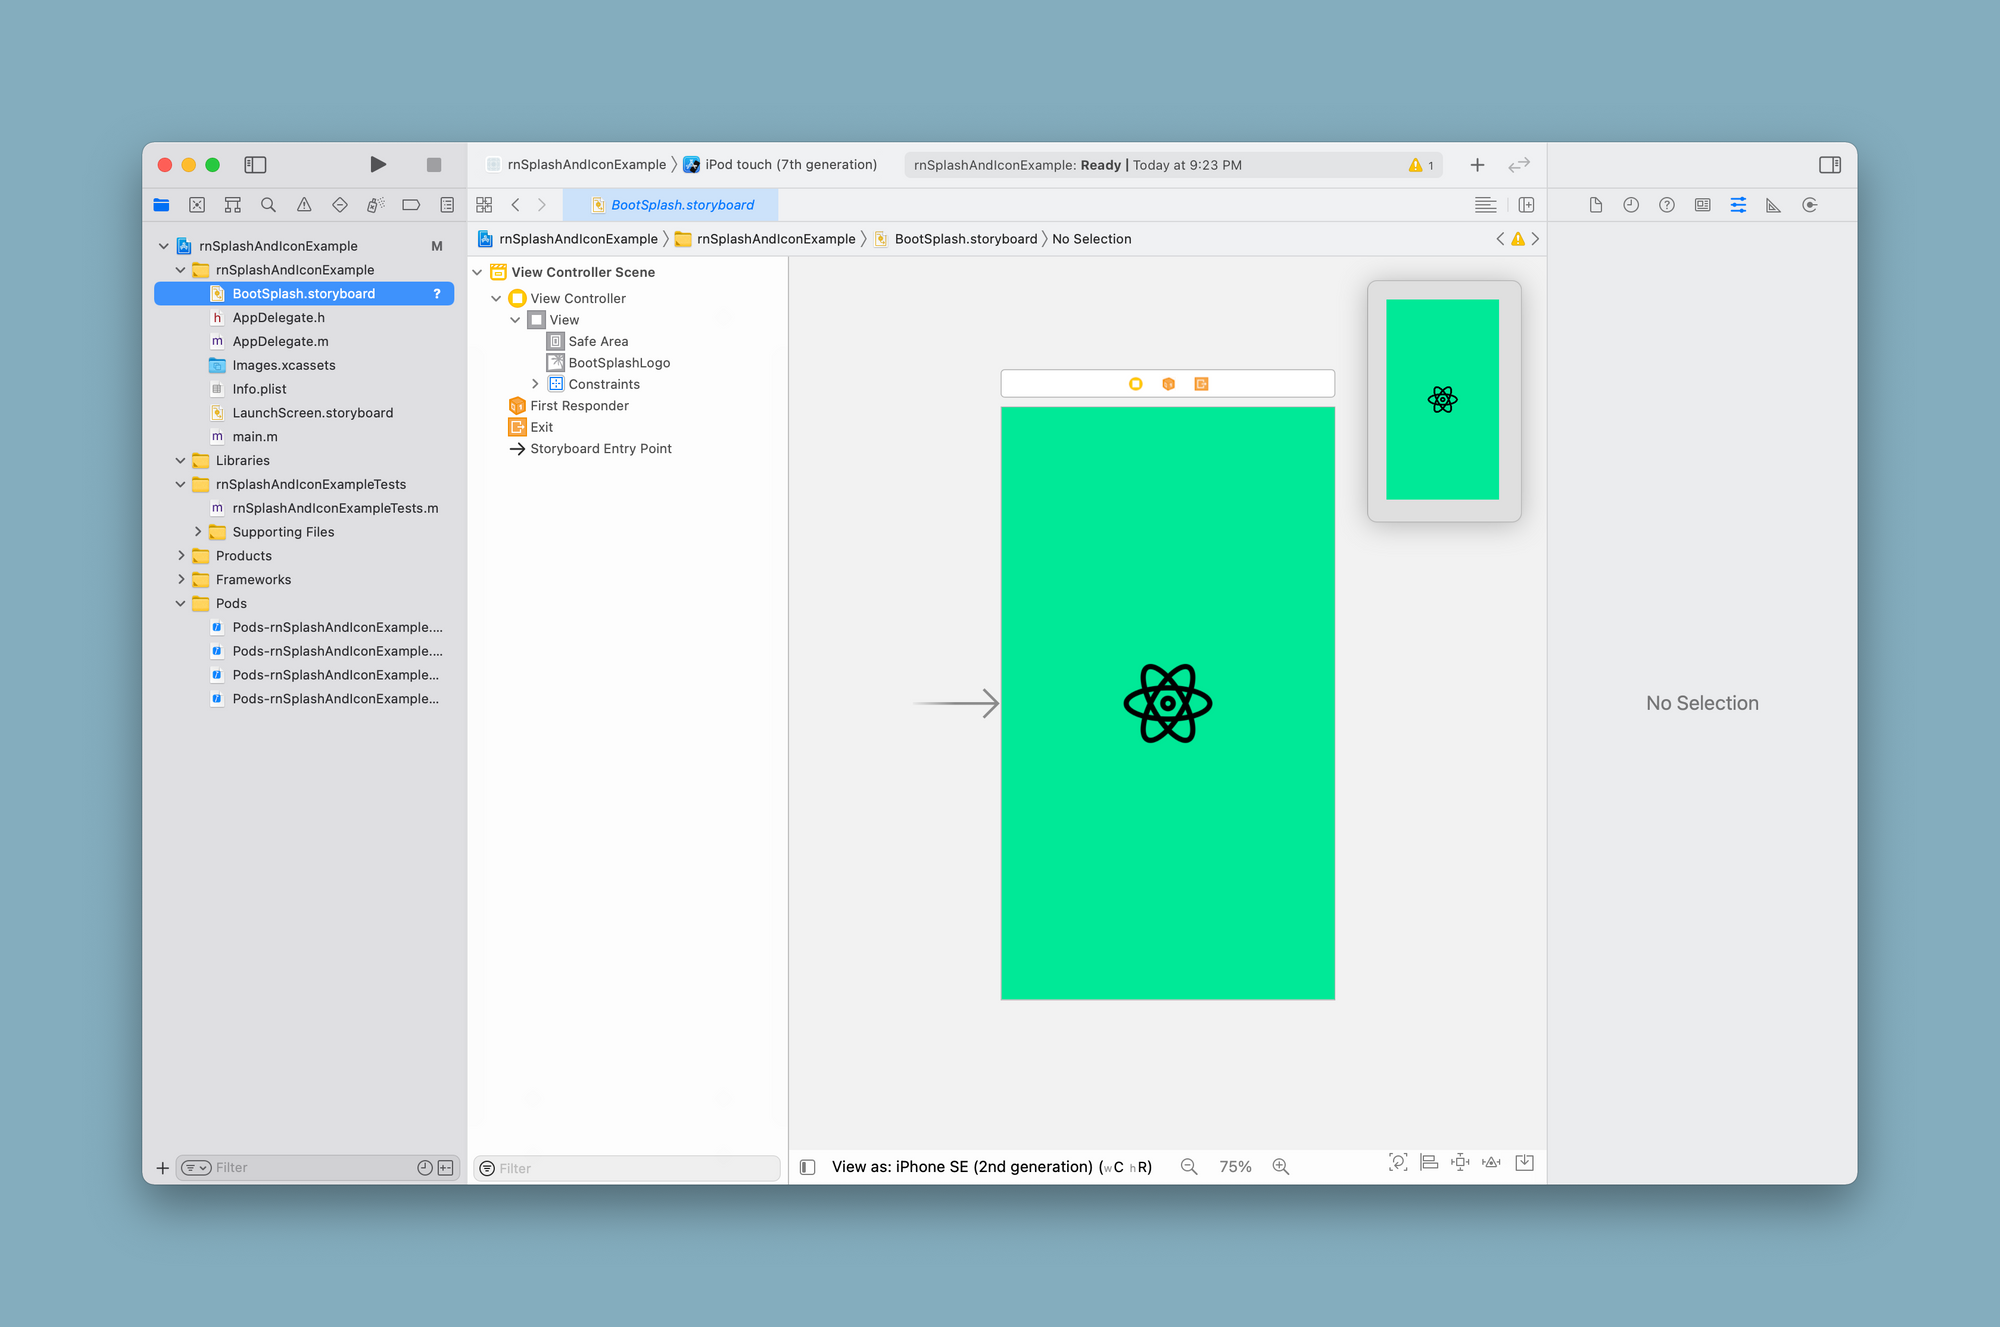
Click on the BootSplash.storyboard file to verify that the background color was added when generating assets.

verify background color when generating assets


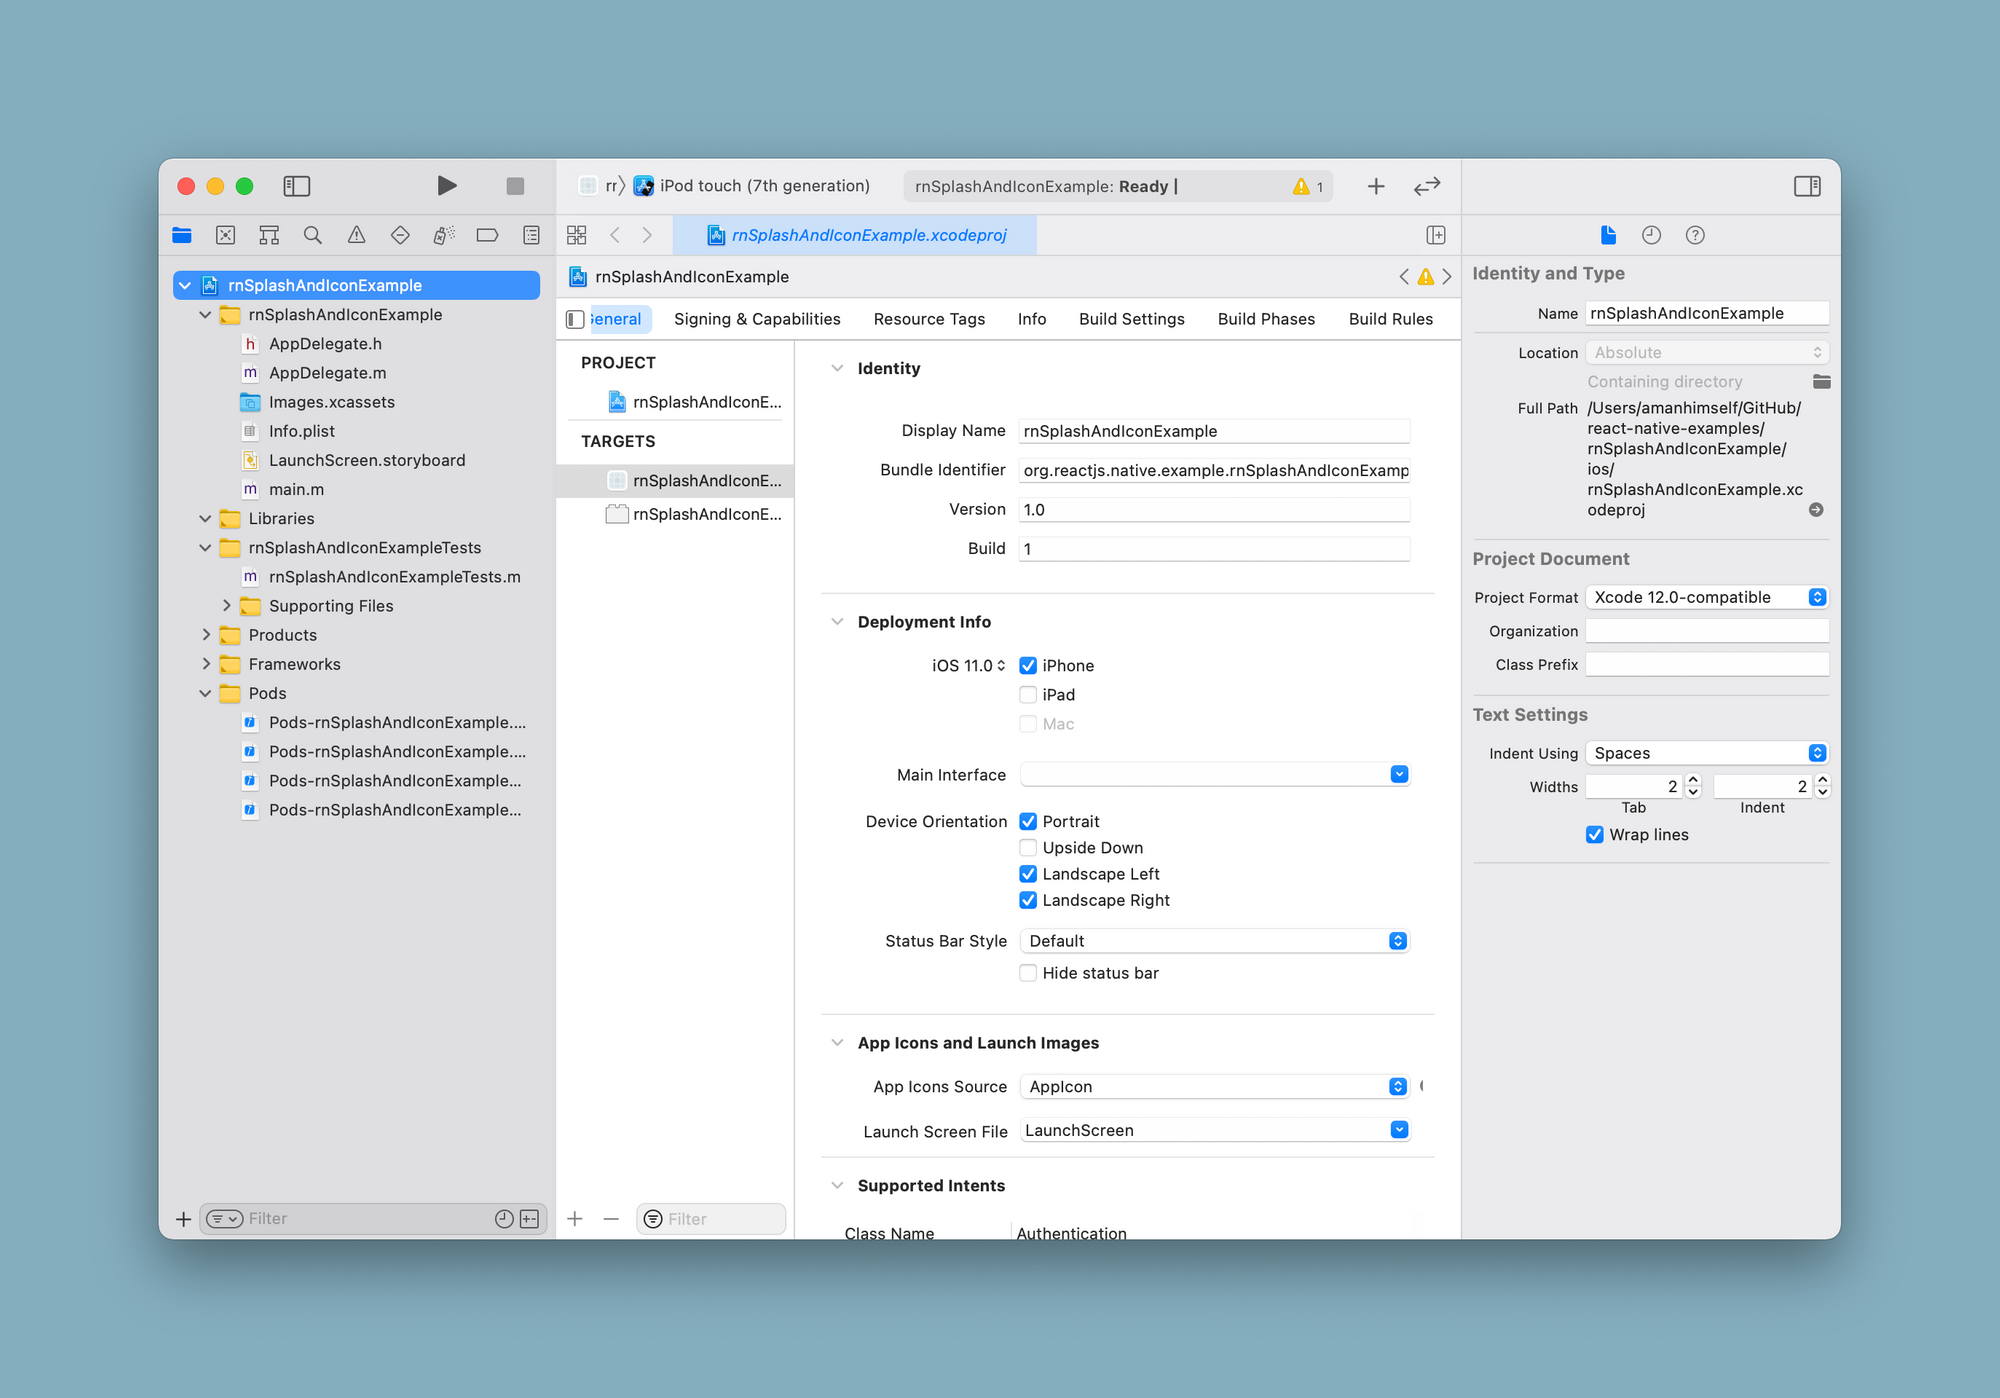
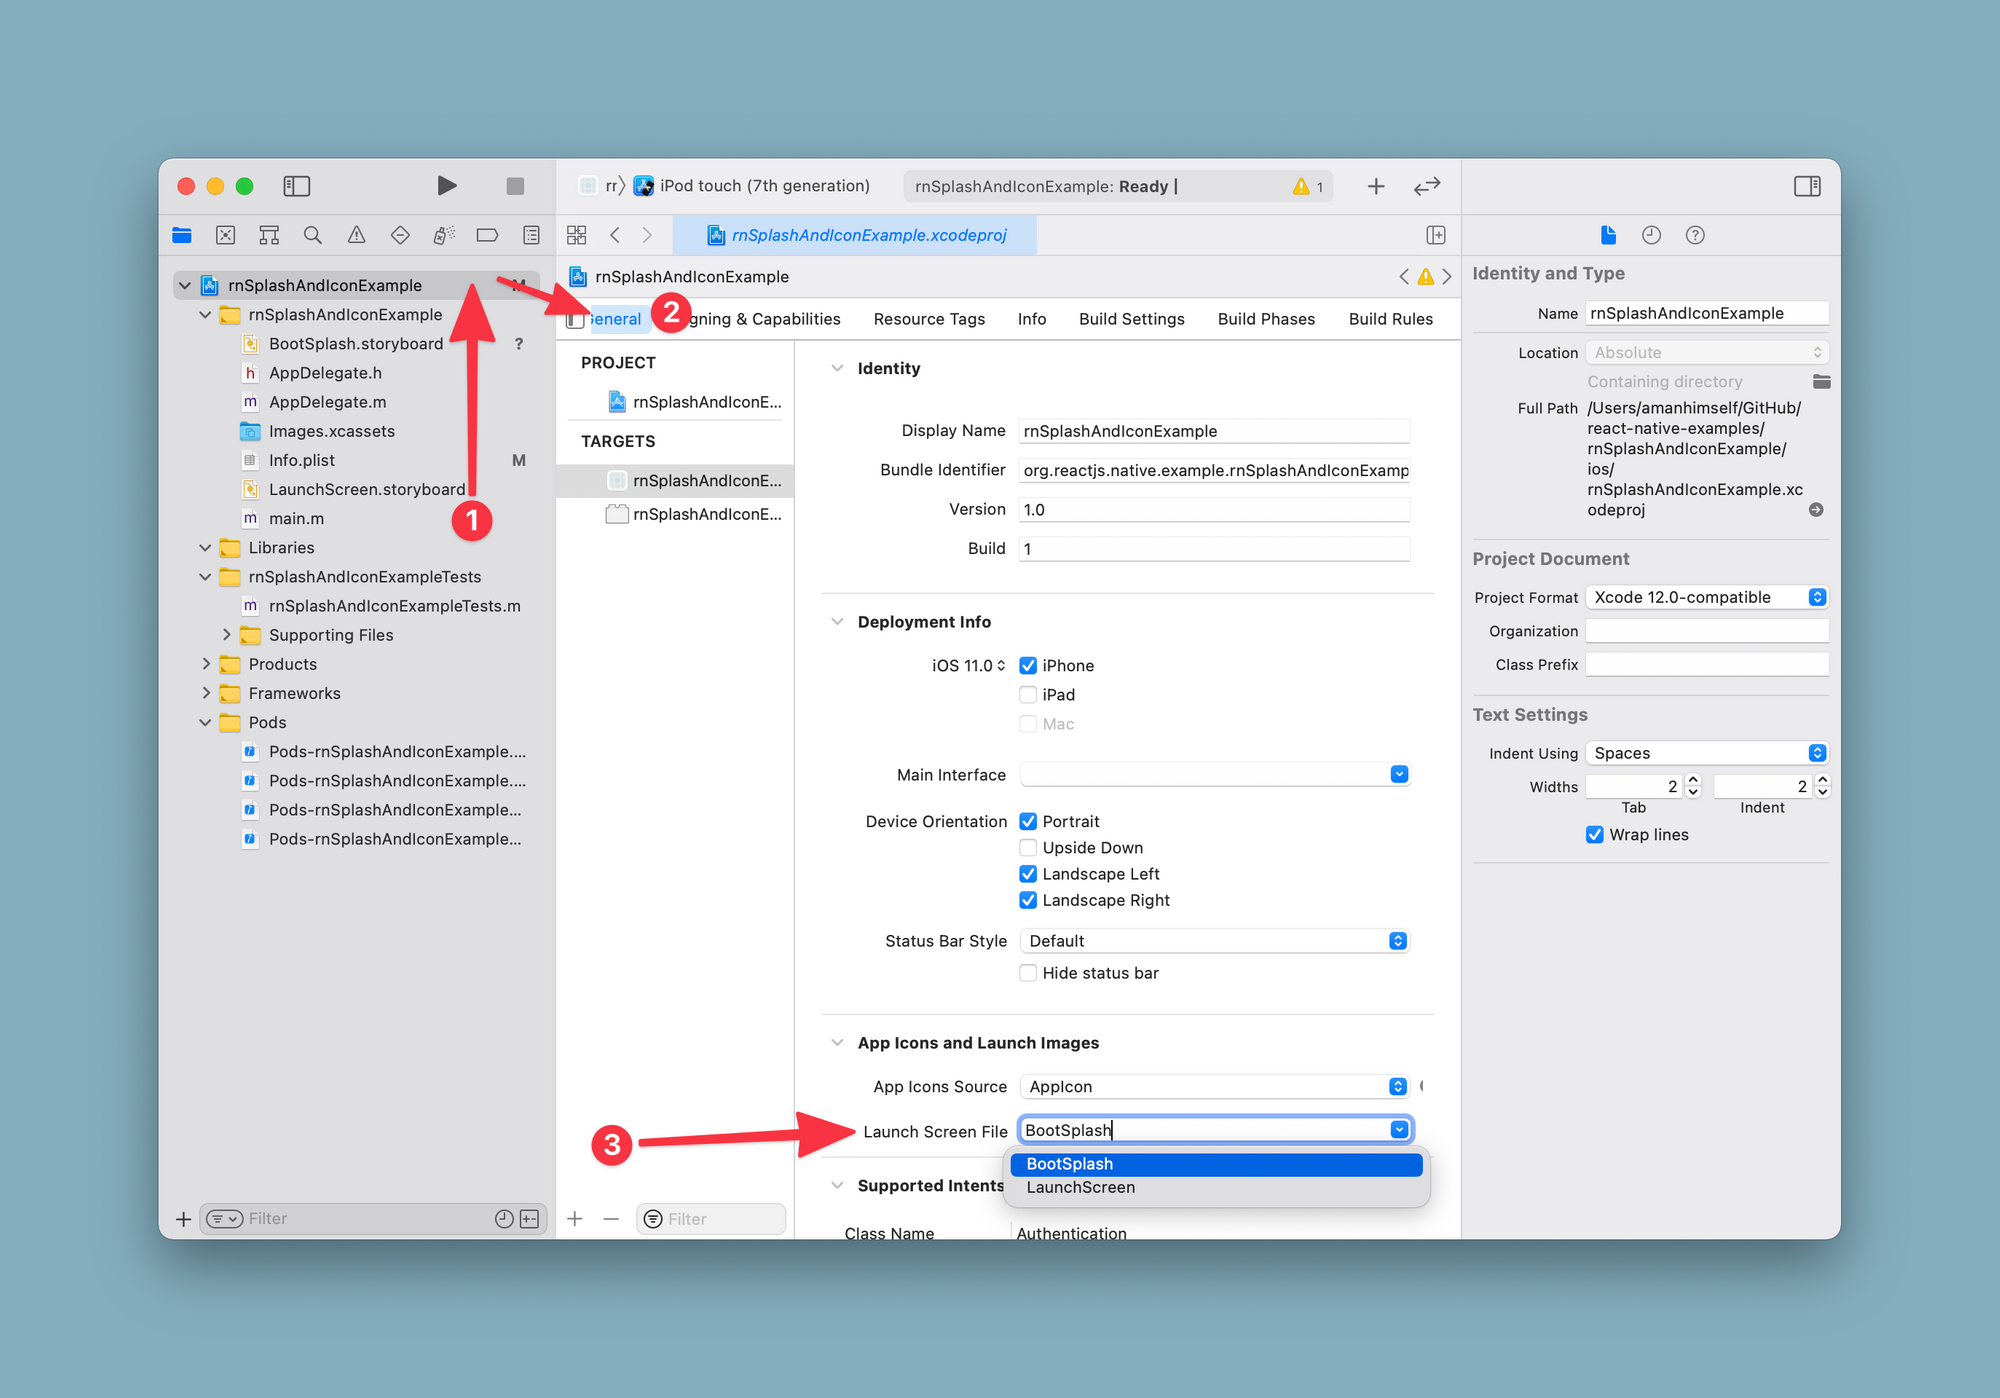
Select the Xcode project from the file manager and select BootSplash from the dropdown menu next to Launch Screen File.

select the Xcode project from the file manager and select BootSplash from the dropdown menu next to Launch Screen File.


Now, open the ios/app-name/AppDelegate.m file and add the import to the following header reference:

#import "AppDelegate.h"

#import <React/RCTBridge.h>
#import <React/RCTBundleURLProvider.h>
#import <React/RCTRootView.h>

#import "RNBootSplash.h" // <- add this


In the same file, add the following line to initialize the BootSplash:

@implementation AppDelegate

- (BOOL)application:(UIApplication *)application didFinishLaunchingWithOptions:(NSDictionary *)launchOptions
{
  // ... other statements
   [RNBootSplash initWithStoryboard:@"BootSplash" rootView:rootView];
  return YES;
}


Adding splash screen on Android


Start by modifying the android/app/src/main/java/com/app-name/MainActivity.java file.

package com.rnsplashandiconexample;

import com.facebook.react.ReactActivity;

// ----- Add the following imports --------
import android.os.Bundle;
import com.zoontek.rnbootsplash.RNBootSplash;

public class MainActivity extends ReactActivity {

  /**
   * Returns the name of the main component registered from JavaScript. This is used to schedule
   * rendering of the component.
   */
  @Override
  protected String getMainComponentName() {
    return "rnSplashAndIconExample";
  }

  // ----- Add the following --------
  @Override
    protected void onCreate(Bundle savedInstanceState) {
    super.onCreate(savedInstanceState);
    RNBootSplash.init(R.drawable.bootsplash, MainActivity.this);
  }
}


Then, modify the android/app/src/main/res/values/styles.xml file:

<resources>

    <style name="AppTheme" parent="Theme.AppCompat.DayNight.NoActionBar">
        <item name="android:textColor">#000000</item>
    </style>

    <!-- Add the following lines (BootTheme should inherit from AppTheme) -->
    <style name="BootTheme" parent="AppTheme">
      <!-- set the generated bootsplash.xml drawable as activity background -->
      <item name="android:background">@drawable/bootsplash</item>
    </style>

</resources>


Next, modify the android/app/src/main/AndroidManifest.xml file by removing the original “intent-filter” tag and its contents. Replace it by adding android_exported=”true” and creating a new activity element to use the theme created in the previous step.

<activity
        android_name=".MainActivity"
        android_label="@string/app_name"
        android_configChanges="keyboard|keyboardHidden|orientation|screenSize|uiMode"
        android_launchMode="singleTask"
        android_windowSoftInputMode="adjustResize"
        android_exported="true">  <!--- Add this -->
</activity>

<!-- Then, add the following lines -->
<activity
      android_name="com.zoontek.rnbootsplash.RNBootSplashActivity"
      android_theme="@style/BootTheme"
      android_launchMode="singleTask">
      <intent-filter>
        <action android_name="android.intent.action.MAIN" />
        <category android_name="android.intent.category.LAUNCHER" />
      </intent-filter>
</activity>


Control how to display a splash screen when the navigator is mounted


You can control the behavior of the splash screen to display until all the children of React Navigation’s NavigationContainer are mounted for the first time. This can be done by using a prop on the NavigationContainer called onReady.

Modify the RootNavigator.js file by importing the react-native-bootsplash and adding the prop onReady.

// after other import statements
import RNBootSplash from 'react-native-bootsplash';

const RootNavigator = () => {
  return (
    <NavigationContainer onReady={() => RNBootSplash.hide()}>
      {/* Rest remains same */}
    </NavigationContainer>
  );
};


Testing the splash screen configuration


The last step to seeing the splash screen in action is to run the build command for both iOS and Android.

Open the terminal window and run the command to build the app for iOS and Android:

# for iOS
npx react-native run-ios

# for Android
npx react-native run-android


Here is the output after this step:

splash screen after testing the splash screen configuration


Adding app icon to iOS app


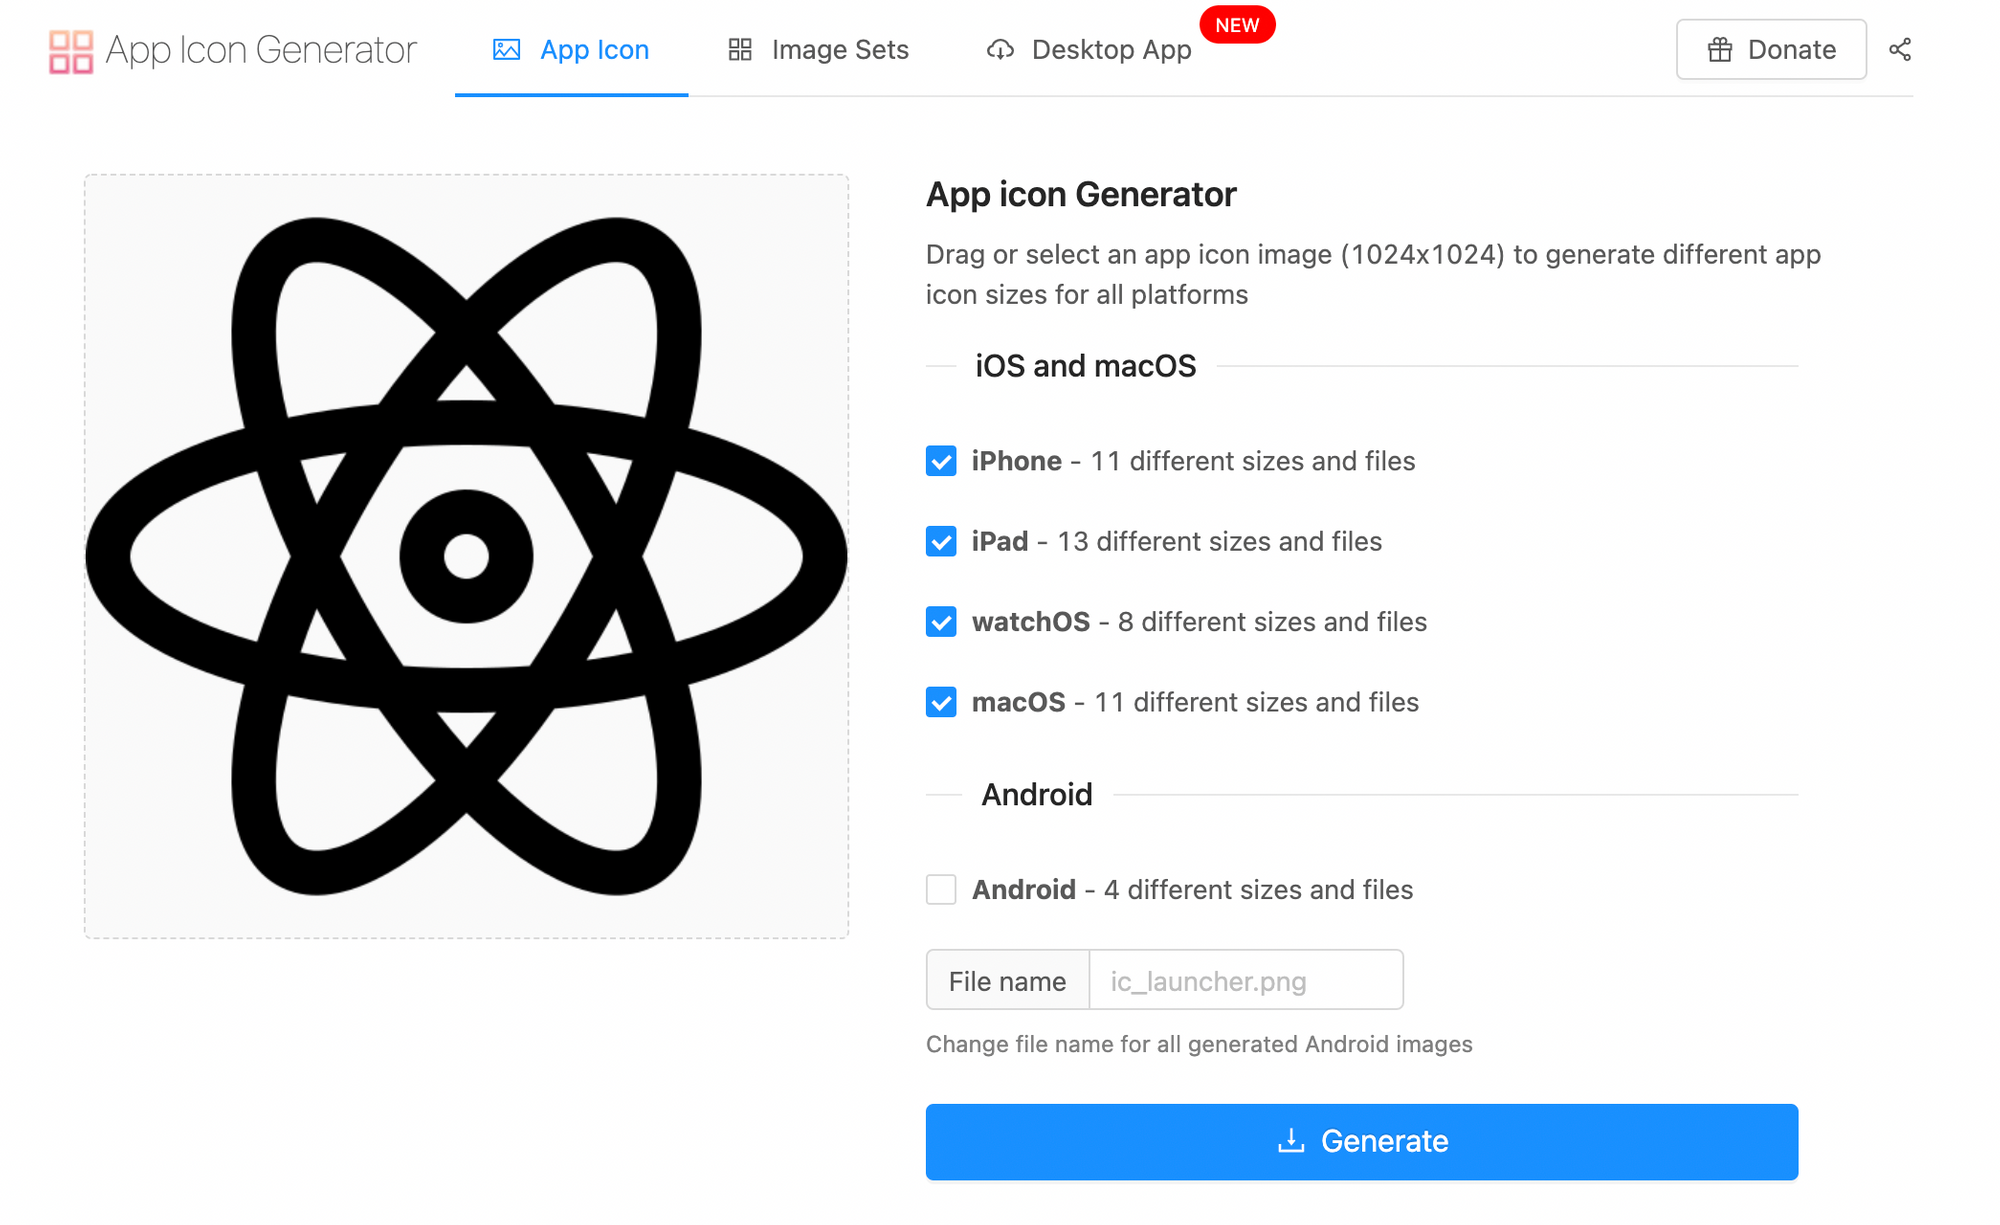
To generate assets for different iOS devices, I am using a free app icon generator called appicon.co.

using the free app icon generator called appicon to generate the image for the app icon to this tutorial

After generating all the image assets, you will be able to download them in a zip file.

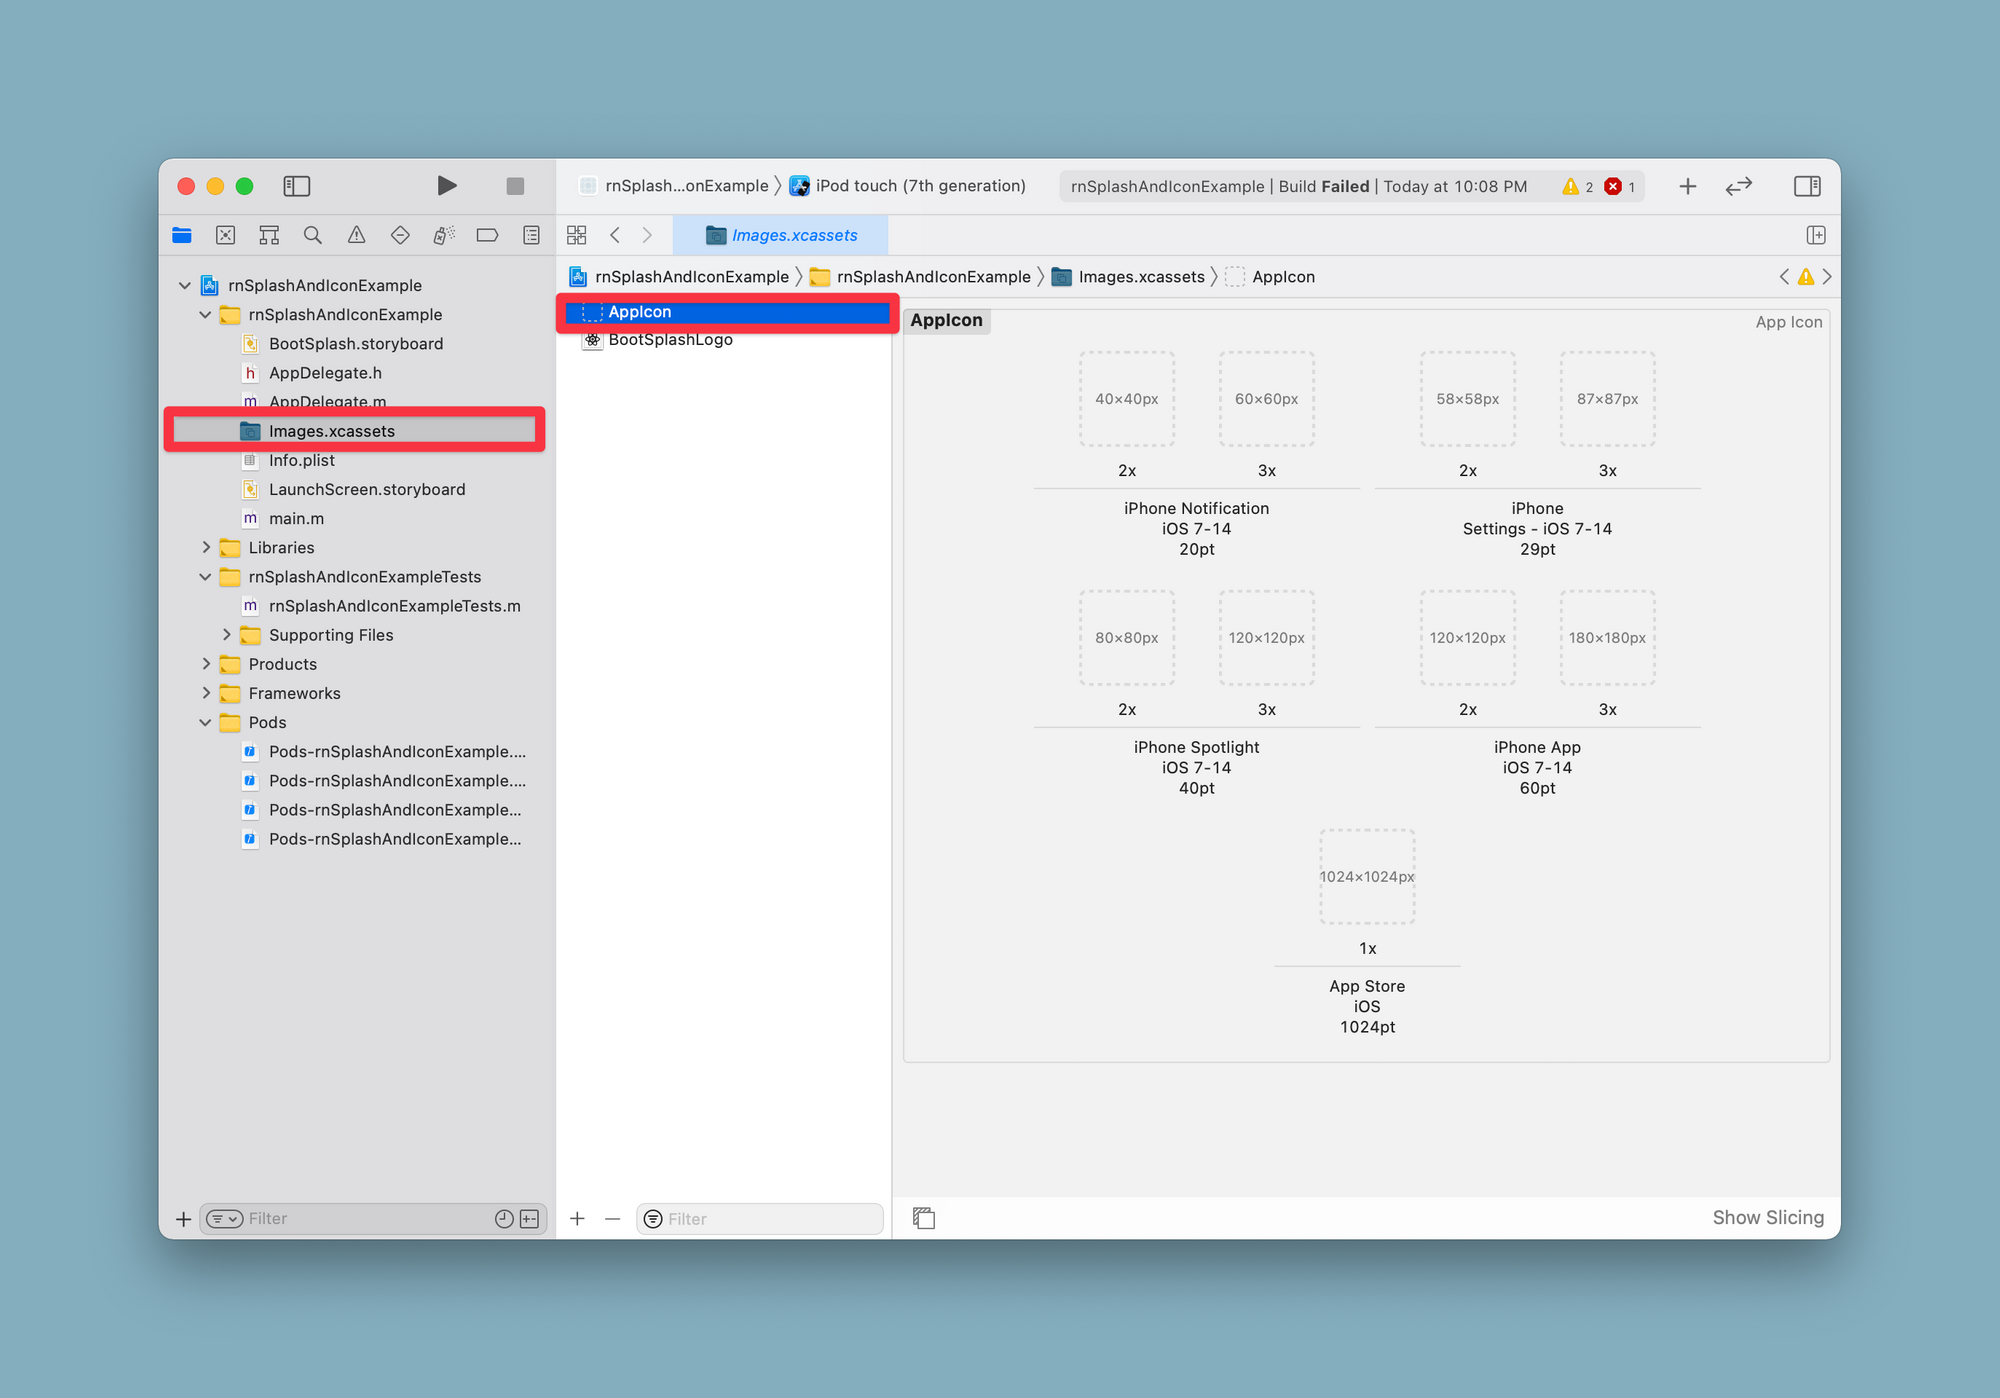
Uploading an app icon for iOS follows the same process as using native iOS development. Open the file ios/app-name.xcodeproj in Xcode. Select the Image.xcassets from the file manager. Then select the AppIcon.

app icon Xcode, downloading the generated image assets in a zip file


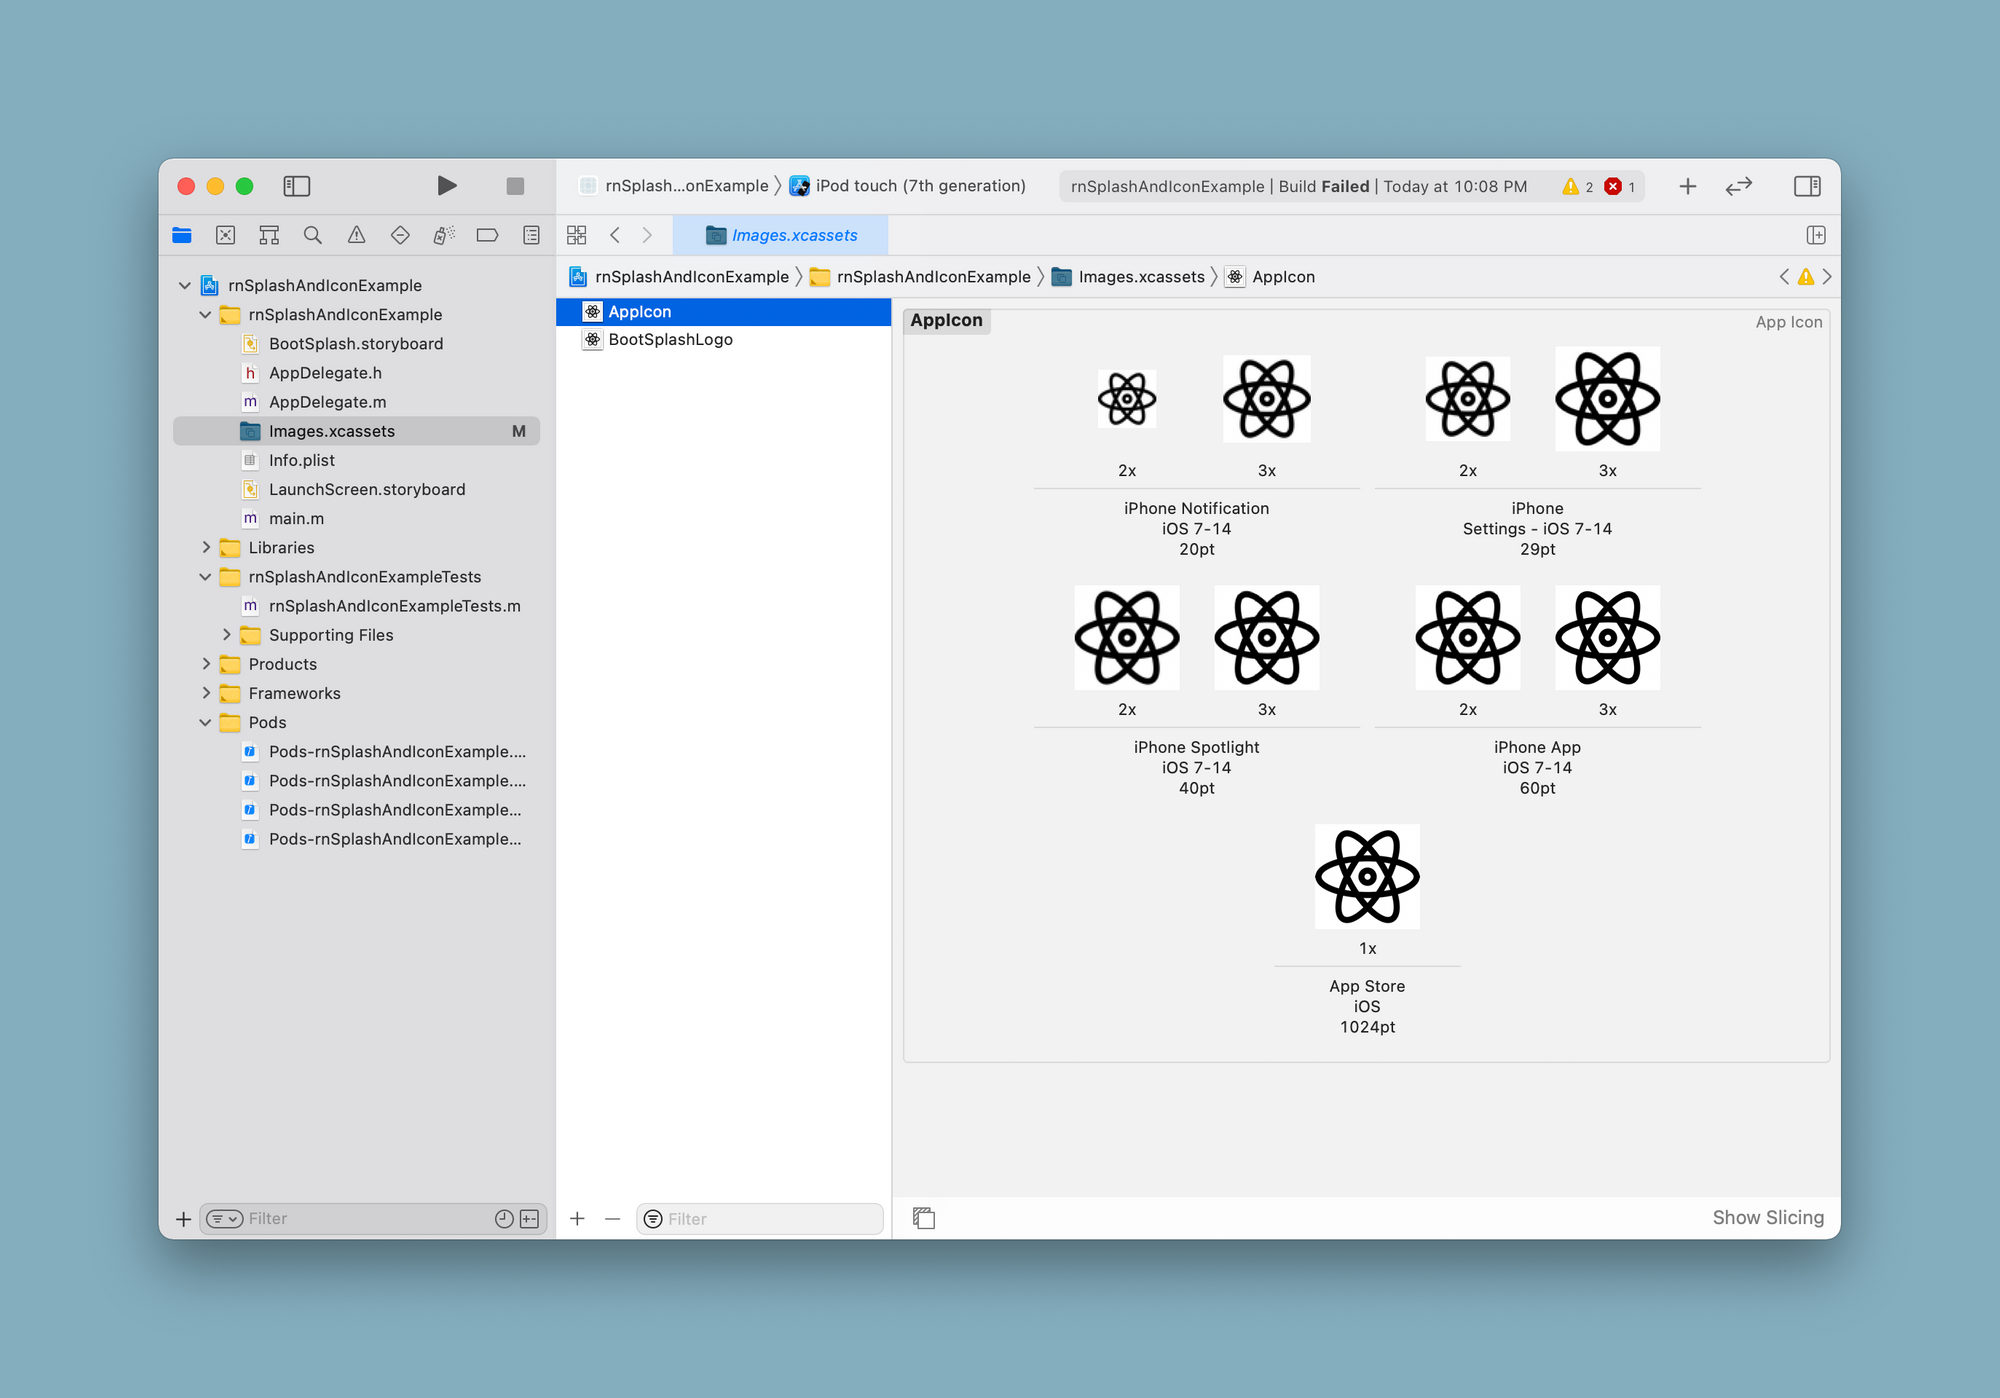
Drag and drop all the required image assets after downloading and unzipping them from appicon.co. Place the images as per the necessary pixel densities. After you are done, here is how the Xcode might look like:

Xcode result after drag and drop all the required image assets


Open a terminal window and run the command to build an app for iOS:

npx react-native run-ios


After the rebuild, the app icon will display.

app icon iOS being displayed


Adding app icon to Android app


The leverage react-native-bootsplash package generates all the app icons for Android and stores them in the multiple sub-directories under the android/app/src/main/res directory.

app icon directory

The simple way here is to replace the default values for the properties android:icon and android:roundIcon in the android/app/src/main/AndroidManifest.xml file to point to the bootsplash_logo file name.

 <application
      android_name=".MainApplication"
      android_label="@string/app_name"
      // modify the two lines below
      android_icon="@mipmap/bootsplash_logo"
      android_roundIcon="@mipmap/bootsplash_logo"
      // ----------------------------
      android_allowBackup="false"
      android_theme="@style/AppTheme">


After this modification, rebuild the Android app using the following command from a terminal window:

npx react-native run-android

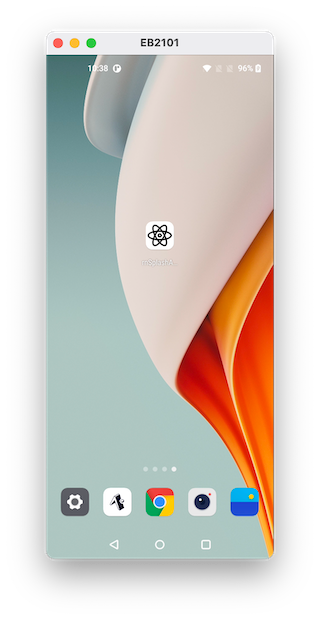
After the rebuild, the app icon will display.

jscrambler blog app icon

Conclusion about the React Native tutorial


Once you get the hang of this process, it doesn’t take much time. Those are all the necessary steps to add a splash screen and an app icon to a React Native app.

For more advanced usage of react-native-bootsplash please check its official documentation here on GitHub. There are some advanced strategies explained there, including animating the splash screen.

Finally, don’t forget to pay special attention if you’re developing commercial React Native apps that contain sensitive logic. You can protect them against code theft, tampering, and reverse engineering. To do this, read our guide about how to protect reach native apps by integrating Jscrambler into React Native’s build process.

Complete source code for this example is at this GitHub repo

Jscrambler Raises $15 Million in Series A Funding To Rewrite The Rules Of Website Security

We are thrilled to announce that Jscrambler has just raised $15 million in Series A financing to continue rewriting website security in a round led by Ace Capital Partners and with participation from existing investors Sonae IM and Portugal Ventures.

This funding will play a crucial role in expanding our marketing and sales resources in the U.S. and European markets, where we already have a strong presence, and in reinforcing and accelerating the product roadmap to meet our customers’ expanding requirements.

We are also announcing that Pedro Abreu has joined Jscrambler as an independent board member. Currently COO at Exabeam and with 20+ years of experience in the cybersecurity industry from companies such as McAfee and ForeScout, Pedro Abreu will make a key contribution to our vision, roadmap, and product-market fit.

Addressing a Global Cybersecurity Threat

Over the last few years, we have witnessed steady growth in software supply chain attacks. But it was in December 2020 that it became a global concern after the news of a software supply chain attack targeting SolarWinds that allowed attackers to deploy multiple payloads like spyware and leak confidential data from companies that used the platform, including some U.S. federal entities. This prompted a global call for improved supply chain cybersecurity, namely from the U.S. and U.K. governments.

Attackers have been pivoting these attacks to the web.

Through web supply chain attacks, they exploit companies’ reliance on third-party code to launch massive attacks that leak sensitive user data and tamper with the user experience. And because these attacks are highly scalable, they can infect millions of websites in parallel.

Current browser native defenses and traditional security approaches fail to address these weaknesses in the web supply chain, allowing attackers to remain undetected for months.

Web App Client-Side Protection is one of the key categories in application security, and Jscrambler is recognized by Gartner as a leader in this space.

Jscrambler is addressing this client-side security blind spot by monitoring and protecting every website component, starting with the source code itself and monitoring and controlling the behavior of all code running on the website.

Getting to a New Stage

After having established itself as the standard in client-side web security with cutting-edge technology that protects the source code of web and mobile applications for thousands of enterprises across the globe, Jscrambler seeks to reach another groundbreaking stage in its product offering development.

Continuing a strong R&D investment that spans over a decade, this funding will also drive an integrated solution that ensures website owners can protect the client-side to secure user data, mitigate fraud and user hijacking, and improve compliance with regulations (GDPR, CCPA, PSD2, HIPAA, PCI DSS, among others) through a transparent, frictionless deployment.

“We are at a critical turning point in web security. This year’s streak of high-profile software supply chain attacks has put everyone on guard against the massive damages inflicted when attackers breach critical applications of private and public organizations,” said Rui Ribeiro, Jscrambler co-founder, and CEO. “We anticipated this trend years ago and are successfully delivering differentiated technology and expertise to solve client-side attacks, enabling us to win over demanding customers, from Fortune 500 companies to SMEs alike. This investment and the addition of Pedro Abreu as a board member are precisely what we needed to drive expansion while still shaping the forefront of application security.”

With a solid foothold in the U.S. and European markets, Jscrambler seeks to accelerate its growth in these geographies where demand is ramping up fast.

“There is a clear, growing need for disruptive web technology, and we are extremely impressed with Jscrambler’s solution and its successful adoption with top-tier enterprise customers across multiple verticals,” said Augustin Blanchard, executive director at Ace Capital Partners. “We strongly believe that this new investment by Ace Capital Partners will fuel this growth, enabling the world’s biggest enterprises to find in Jscrambler, a promising and already established European leader in its market, the answer to all their challenges in terms of client-side security and application shielding.”

“This new funding round speaks volumes about the disruptive technology that Jscrambler has consolidated in the market,” said Carlos Moreira da Silva, partner at Sonae IM. “The challenging times people and businesses are facing have reinforced the need to explore improved digital experiences, namely within the e-commerce and banking markets. Positioned at the intersection of application security and online fraud detection, Jscrambler is and will continue to benefit greatly from market tailwinds, by helping organizations secure their online assets and their users’ data.”

Looking Ahead

This is truly one of the most important days in Jscrambler’s history. Our thank you to our team of talented and dedicated employees and to all our investors, advisors, partners, and clients who keep pushing us forward.

We will keep breaking barriers in Application Security, shaping the future of the whole industry, and keeping billions of website users secure.

To learn more about how we can help address your company’s use case or if you want to explore possible partnership opportunities with Jscrambler, contact us and our client-side security experts.

Jscrambler Recognized In Gartner’s Hype Cycle for Application Security 2021

Gartner, the world’s leading research and advisory company, has recognized Jscrambler as a Sample Vendor in the Hype Cycle for Application Security 2021.

Jscrambler’s code integrity enables companies to protect critical business logic (such as proprietary algorithms), enforce license agreements, and prevent JavaScript code from being debugged or tampered with.

Jscrambler Webpage Integrity is a comprehensive solution for detecting and blocking malicious behavior in real-time on the client-side of web applications. This enables companies to prevent more sophisticated client-side threats like Magecart and data exfiltration.

“Being recognized by Gartner is yet another step that corroborates our efforts when it comes to pushing the Application Security Industry forward. We are grateful for the recognition and above all, we are grateful to be able to help companies secure their projects and users from online frauds as well as other client-side threats.”.

Rui Ribeiro, co-founder and CEO of Jscrambler

Read the full press release.

Jscrambler is trusted by Fortune 500 and major companies in sectors such as Finance, Broadcasting, Software Development, E-Commerce, and Gaming.

Gartner Disclaimer

Gartner does not endorse any vendor, product, or service depicted in its research publications and does not advise technology users to select only those vendors with the highest ratings or other designations.

Gartner’s research publications consist of the opinions of Gartner’s research organization and should not be construed as statements of fact. Gartner disclaims all warranties, expressed or implied, with respect to this research, including any warranties of merchantability or fitness for a particular purpose.

How to Protect Your Source Code With GitLab and Jscrambler

In this tutorial, we explore the importance of protecting client-side application code at runtime and guide you through implementing it in your GitLab instance using the integration with Jscrambler.

Development teams are building, testing, and shipping code faster than ever. We know security plays a role in the early stages of the DevOps workflow. However, these security controls are concerned with bugs or vulnerabilities during development. Be ahead.

The importance of runtime code protection

With web and mobile applications dealing with increasingly sensitive data, addressing the application’s attack surface requires considering additional threats not directly linked to vulnerabilities.

This has been covered in NIST, ISO 27001, and some of the latest iterations of OWASP guides, such as the Mobile Application Security Verification Standard.

These information security standards highlight that attackers who gain unwarranted access to the application’s source code may be able to retrieve proprietary code, find ways to bypass app restrictions, and even make more progress while planning or automating data exfiltration attacks.

Companies must implement an additional security layer (on top of application security best practices) to tackle the threats of tampering and reverse engineering of an application’s source code.

Getting started with GitLab and Jscrambler

A robust code protection approach must include multiple layers to raise the bar for reverse-engineering and tampering attempts. Jscrambler achieves this through code protection techniques, including obfuscation, code locks, runtime protection, and threat monitoring.

Let’s see how you can easily set up this layered source code protection using Jscrambler in your GitLab instance.

What do you need for the Jscrambler integration?

Make sure that you meet the following prerequisites:

  • A JavaScript-based project can protect JavaScript-based web and hybrid mobile apps.

  • A Jscrambler account.

  • A GitLab instance where the Jscrambler integration will run.

How to configure Jscrambler

The first step in this integration is to define the Jscrambler code protection techniques you want to use.

The best way to do this is through the Jscrambler web app. You can select one of the pre-defined templates or pick techniques individually.

Review the Jscrambler first-use guide for further instructions. Download Jscrambler’s JSON configuration file by clicking the download button next to the Application Settings.

How to download Jscrambler’s JSON configuration


Place the file downloaded in your project’s root folder and rename it to .jscramblerrc. Open the file and remove the access and secret keys from this configuration file by removing the following lines:

 "keys": {
   "accessKey": "***********************",
   "secretKey": "***********************"
 },


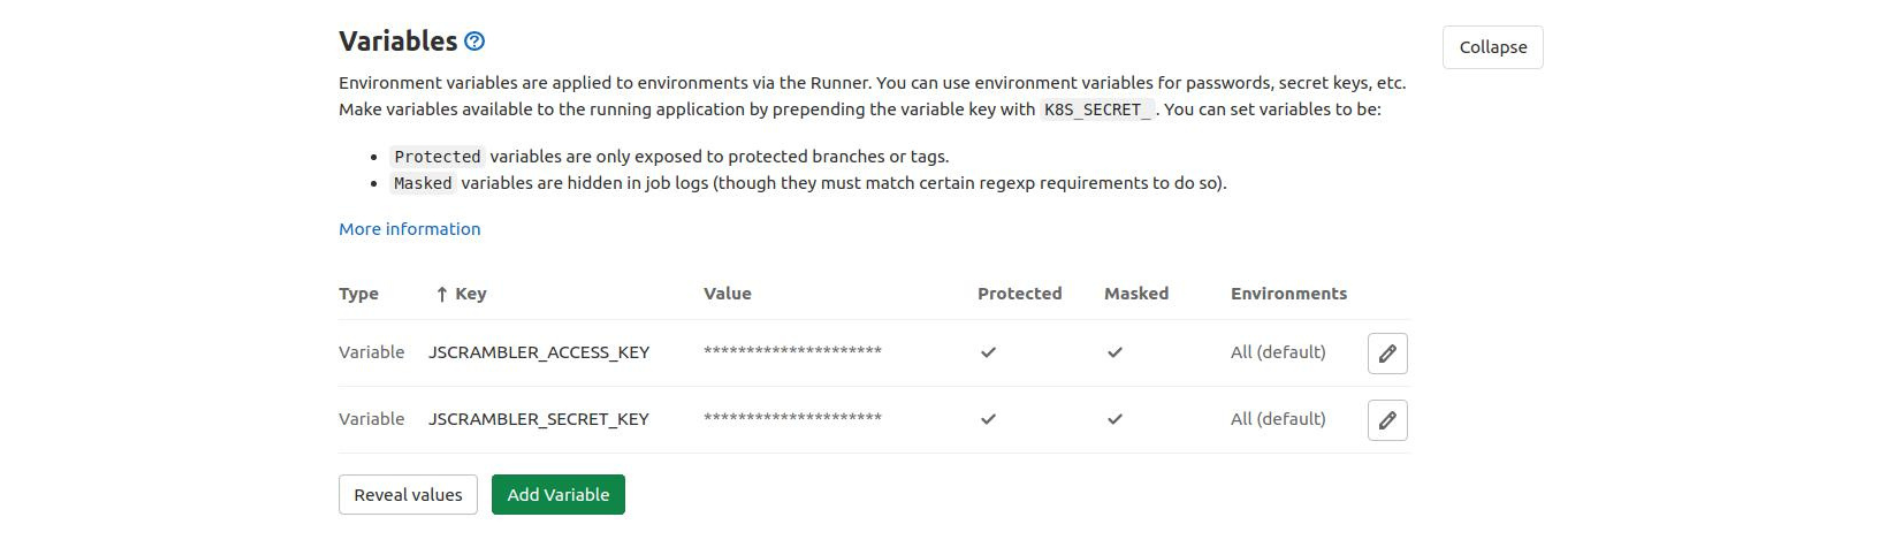
This will prevent hardcoding API keys, which could pose security issues. Store these API keys using the GitLab CI environment variables.

score-Jscrambler-API-keys-in-GitLab


Finally, score Jscrambler’s API keys in GitLab, and that’s all you need from Jscrambler’s side.

Configuring a Jscrambler job inside GitLab CI

Start by checking that you have placed the .gitlab-ci.yml file at the root of your project.

Inside, you will need to define your build stage, as well as add a new project stage, as shown below:

stages:
 - build
 - protect
 # - deploy
 # ...


The build stage should be configured as follows:

build:production:
 stage: build
 artifacts:
   when: on_success
   paths:
     - build
 script:
   - npm i
   - npm run build


This configuration will run the npm run build command, which is a standard way of building your app to production, placing the resulting production files in the /build folder.

Plus, it ensures that the /build folder becomes available as a GitLab CI artifact so that it can be used later in other jobs.

Make sure you set the build commands and build folder according to your project, as these may vary.

Configure the protection stage as shown below:

build:production:obfuscated:
 stage: protect
 before_script:
   - npm i -g jscrambler
 dependencies:
   - build:production
 artifacts:
   name: "$CI_JOB_NAME"
   when: on_success
   paths:
     - build
   expire_in: 1 week
 script:
   # By default, all artifacts from previous stages are passed to each job.
   - jscrambler -a $JSCRAMBLER_ACCESS_KEY -s $JSCRAMBLER_SECRET_KEY -o ./ build/**/*.*


This stage starts by installing the Jscrambler npm package globally. Next, it is configured to execute Jscrambler at the end of each new production build process.

You will want to ensure that Jscrambler is the last stage of your build process because Jscrambler transforms the source code extensively and can also add anti-tampering protections. The app’s functionality may break if you change the files after they have been protected by our software.

This protection stage is configured to access the Jscrambler API keys that have been loaded as GitLab environment variables. The output of the protection is placed into the same or build folder and made available as a GitLab CI artifact for posterior use (e.g., a deploy job).

While this example shows how to use the Jscrambler CLI client to protect the code, Jscrambler is compatible with other API clients, such as Grunt, Gulp, Webpack, Ember, and Metro (React Native).

You can configure your deployment stage as usual, which should access the contents of the build folder and ensure your protected files are available in a live production environment.

Checking the protection result

As a final (optional) step, you might want to check out the live app and see what its source code looks like. You can do that easily by using a browser debugger and opening the files from the “Sources” tab.

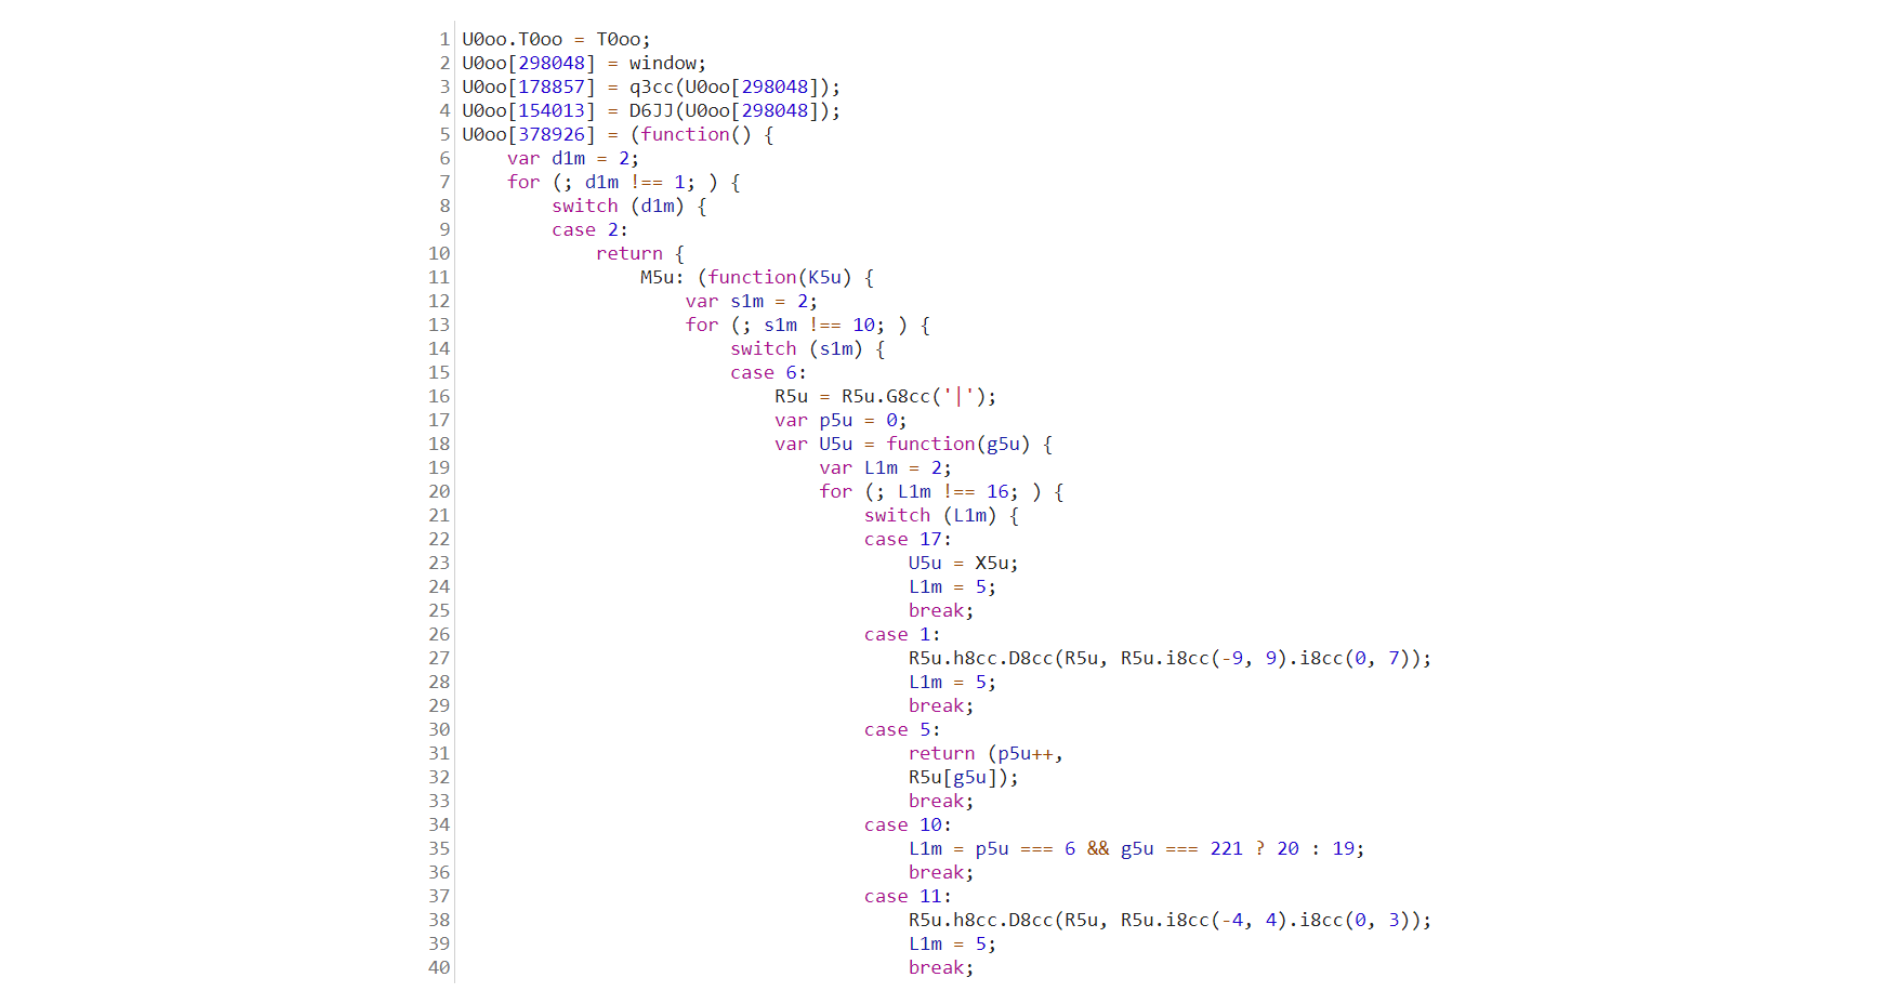
The protected code should look completely unintelligible, similar to the one shown below.
Example-of-murky-source-code-protected-by-Jscrambler

If you are using Jscrambler’s anti-debugging transformations, your browser debugger will likely crash or derail the app’s execution. This is intended behavior, which is very useful to prevent reverse-engineering of the code.

Final thoughts

Setting up this integration between Jscrambler and GitLab is very straightforward. JavaScript source code is protected by Jscrambler before deployment through a new protection stage.

Jscrambler goes well beyond JavaScript obfuscation since it provides runtime protection techniques such as self-defending and self-healing, which provide anti-tampering and anti-debugging capabilities, as well as code locks.

Watch a Product Demo

More of a video person? Watch the demo to protect your source code using GitLab and Jscrambler.

Originally published on the GitLab blog.

How To Protect Next.js Apps with Jscrambler

A possible way to protect Next.js apps against client-side attacks is to integrate Jscrambler into your Next.js app development workflow. Protect your JavaScript source code from obfuscation to code lock measures.

Next.js is an open-source React-based framework built on Node.js to develop web apps. It includes handy features, including hybrid static and server rendering, TypeScript support, and route pre-fetching.

Next.js is among the most popular JavaScript back-end frameworks (behind Express).

Today, we will look at how you can integrate Jscrambler into your Next.js app development workflow. This allows you to protect your JavaScript source code through advanced obfuscation, code locks, anti-tampering, and anti-debugging.

Prerequisites
To integrate Jscrambler into your Next.js build process, there are two things we must do first:

  1. Creating a Next.js app.

  2. Configuring Jscrambler.

Let’s go through those steps.

Creating Your Next.js Application

If you are not experienced with Next.js yet, check out their Create a Next.js App tutorial before moving forward. We will be using this example app in our integration tutorial. Let’s install it.

git clone https://github.com/JscramblerBlog/nextjs-jscrambler-integration-tutorial.git


Install all app dependencies using npm:

cd nextjs-jscrambler-integration-tutorial
npm i


The (simplified) base project structure of our Next.js application is as follows:

nextjs-jscrambler-integration-tutorial/
|-- package-lock.json
|-- package.json
|-- README.md
|-- .next
| |-- static/
| | |-- chunks/
| | | |-- pages/
|-- node_modules/
|-- pages/
|-- public/
  • Package.json contains all the configurations related to npm, such as dependencies, versions, and scripts.

  • The page’s directory features all the source code of the application. The sources are then built and packed into the .next/static/ directory. This is where our protected HTML and JavaScript files will be placed after the build.

  • The public directory contains all publicly accessible files, such as images.


We can run a development server to ensure the app is running.

npm run dev


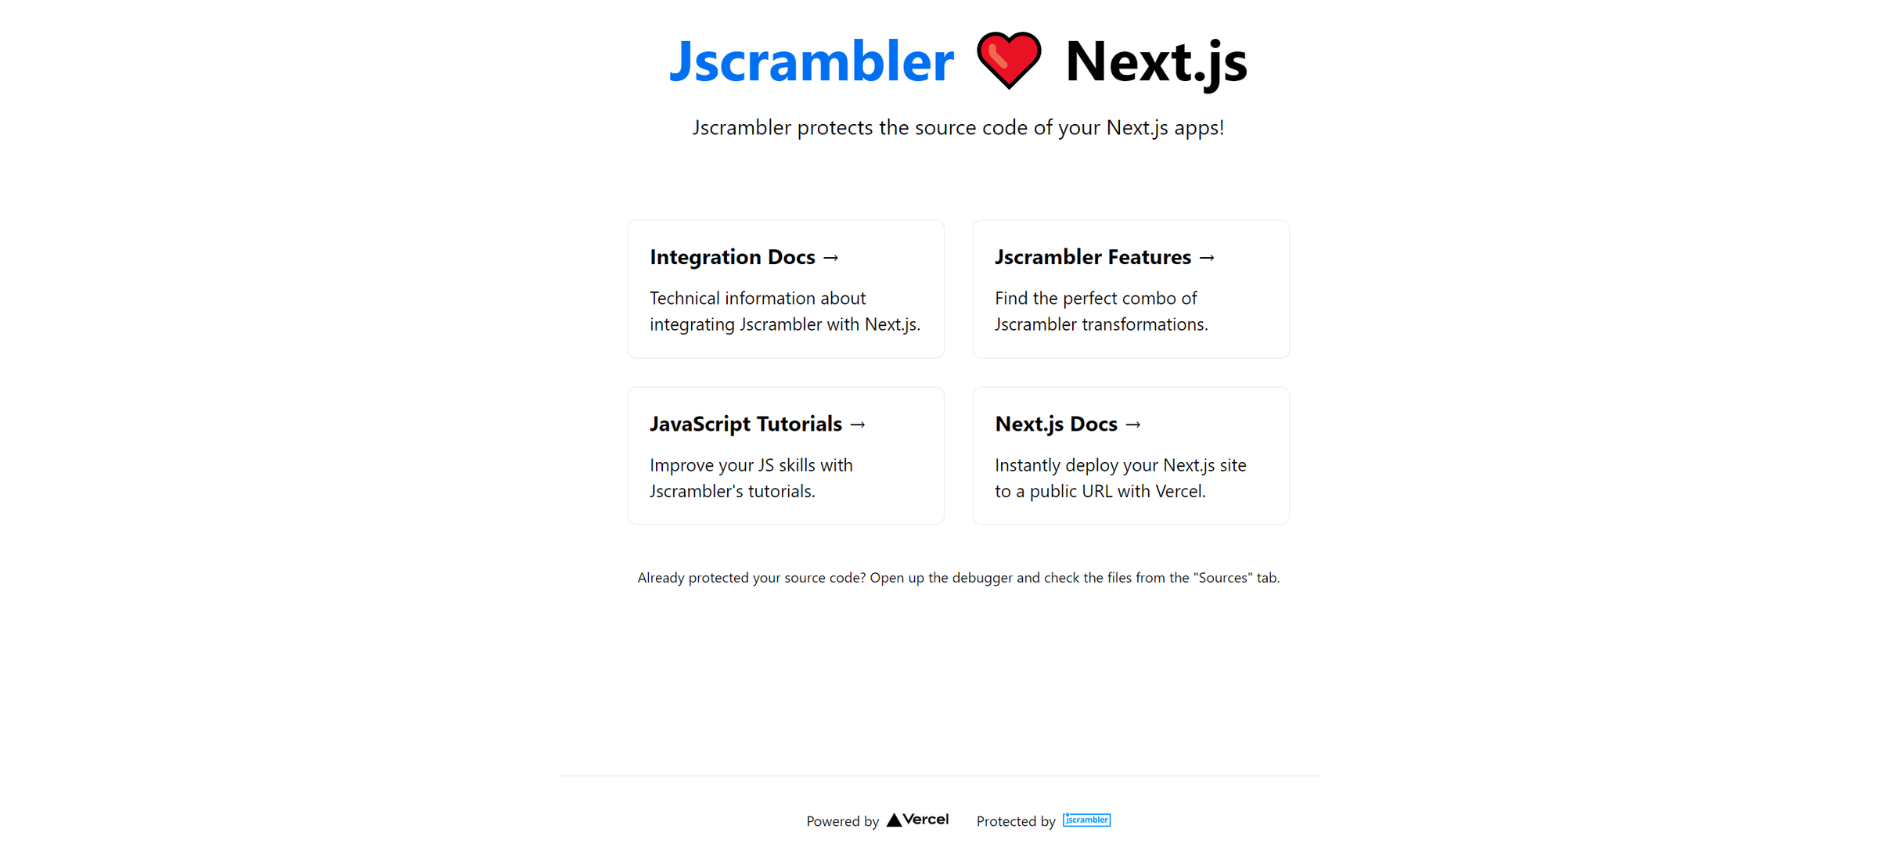
You will get an URL in the console with the development server, and after opening it, you should see the app running, as shown below.
example-Jscrambler-integration-with-Next.js-app

And this is pretty much it in terms of our Next.js app. Move forward to protecting it with Jscrambler.

Configuring Jscrambler

If you don’t have a Jscrambler account, create one.

Jscrambler’s configurations will reside inside a single file:.jscramblerrc. As such, create this file to specify which transformations we wish to use.

The quickest way to achieve this is via the Jscrambler Web App. Once there, create a new app.

Check the Templates and Fine-Tuning tabs to select the template or transformations you want to use to protect your code. We’ll be selecting the Obfuscation template. If you need help with these steps, please refer to our guide about how to use CLI.

Download a JSON file with all this configuration, which will be used only for quickly getting the required settings.

Create a new file named .jscramblerrc in the Next.js project’s root folder.

Open the jscrambler.json file we just downloaded and copy all its contents to the .jscramblerrc file. After that, add two new sections to .jscramblerrc, which are filesSrc and filesDest (see below).

Your final .jscramblerrc file should look like this:

{
 "keys": {
   "accessKey": <ACCESS_KEY_HERE>,
   "secretKey": <SECRET_KEY_HERE>
 },
 "applicationId": <APP_ID_HERE>,
 "filesSrc": [
   "./.next/**/*.html",
   "./.next/**/*.js"
 ],
 "filesDest": "./",
"params": [
    {
      "name": "objectPropertiesSparsing"
    },
    {
      "name": "variableMasking"
    },
    {
      "name": "whitespaceRemoval"
    },
    {
      "name": "identifiersRenaming",
      "options": {
        "mode": "SAFEST"
      }
    },
    {
      "name": "globalVariableIndirection"
    },
    {
      "name": "dotToBracketNotation"
    },
    {
      "name": "stringConcealing"
    },
    {
      "name": "functionReordering"
    },
    {
      "options": {
        "freq": 1,
        "features": [
          "opaqueFunctions"
        ]
      },
      "name": "functionOutlining"
    },
    {
      "name": "propertyKeysObfuscation",
      "options": {
        "encoding": [
          "hexadecimal"
        ]
      }
    },
    {
      "name": "regexObfuscation"
    },
    {
      "name": "booleanToAnything"
    }
  ],
  "areSubscribersOrdered": false,
  "useRecommendedOrder": true,
  "jscramblerVersion": "<7.X>",
  "tolerateMinification": true,
  "profilingDataMode": "off",
  "useAppClassification": true,
  "browsers": {}
}


Because we got this information directly via the Jscrambler Web App, our accessKey, secretKey, and applicationId fields are already filled.

The params section specifies the transformations that will be used to protect your Next.js app. These can be hand-picked by you in the Web App or set manually.

You can change filesSrc to match the files you need or want to protect. For our example and all Next.js apps, we recommend protecting the.html and.js files.

Integrating Jscrambler in the Build Process

Using the CLI is likely the most common way to generate your build. We will use our boilerplate app to showcase how to integrate Jscrambler into the build process.

The first step of our integration with Jscrambler is installing the Jscrambler API Client. Simply run:

npm i jscrambler --save-dev


To integrate Jscrambler into our application’s build process via the CLI, we need to create a CLI hook in the scripts section of package.json. The section should look like this:

  "scripts": {
    "dev": "next dev",
    "build": "next build && jscrambler",
    "start": "next start"
  },


The specific “build”: “next build && jscrambler” hook will trigger the jscrambler command after the build process is finished.

For this command to be executable, we need to make sure that the .jscramblerrc file that we created before is in our project’s root folder.

We are now ready to protect our code and build our application via the CLI.

npm run build


This will create the protected production files on .next/static/.

And you’re done! Now all your HTML and JavaScript files are protected with Jscrambler against code theft and reverse engineering. You can fine-tune your protections to manage eventual performance hits.

Testing the Protected Next.js App

As a final step, let’s check if the app is running successfully with the newly protected source code.

npm run start


Open the URL provided in the console, and it will open up a server with the production files.

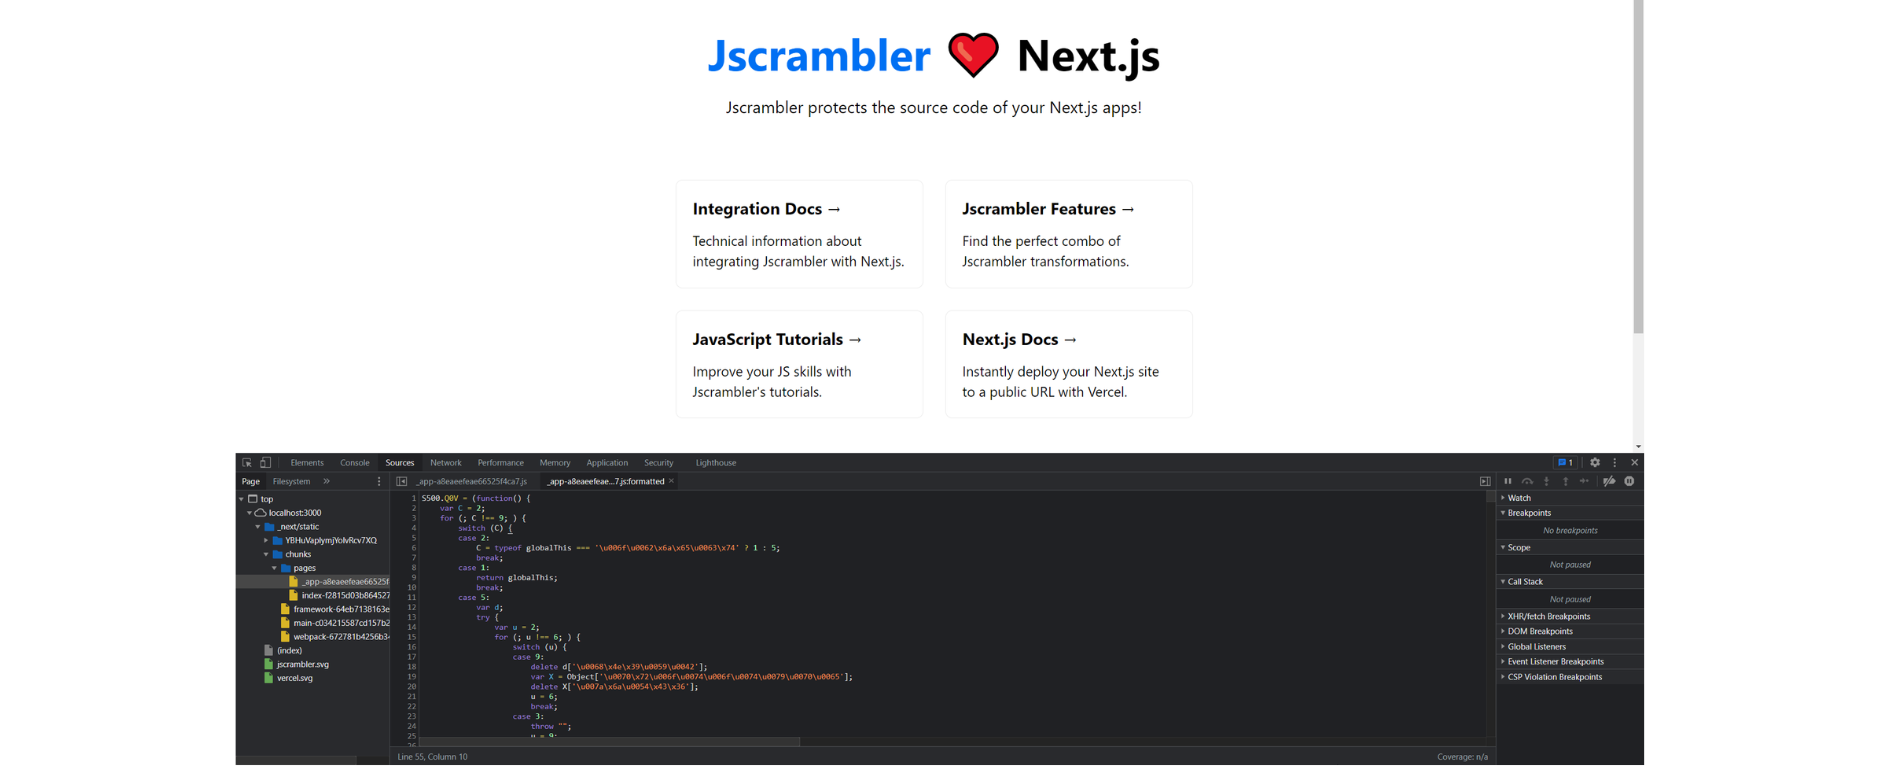
Check what your protected code looks like. You can achieve this by opening the browser’s debugger and opening the files from the “Sources” tab. The protected code should look like this:

protected-code-example-after-integrating-Jscrambler-in-next-js-app

Conclusion

Next.js has been a rising star in the web development ecosystem. This framework brings several welcome features for developers, making it much easier to release production-ready applications.

Are you building Next.js applications with sensitive logic and want to prevent reverse-engineering, licensing violations, and tampering?

A security solution such as Jscrambler is a must.

Integrating Jscrambler into the Next.js build process is simple and enables protecting your code with the most sophisticated polymorphic obfuscation, code locks, and self-defensive capabilities.

This all comes with premium support. Contact us if you have any questions!

Build a Simple Game in Vanilla JS With the Drag and Drop API

We will walk you through creating a simple game in Vanilla JS with the drag-and-drop API elements.

The JavaScript language lives in a browser. In other words, a web browser has a separate part inside called the JavaScript engine. This engine can understand and run JS code.

There are many other separate parts that, together, make up the browser. These parts are different Browser APIs, also known as Web APIs.

The JS engine facilitates the execution of the JS code we write. Writing JS code allows developers to access functionalities in the browser that are exposed to us via Browser APIs.

What Is a Web API?

Web APIs are known as browser features. The most popular of these various browser features, at least for JavaScript developers, is the browser console.

The Console API allows us to log out the values of variables in our JavaScript code. We can manipulate values in our JS code and log out these values to verify that a specific variable holds a specific (expected) value at a certain point in the thread of execution, which is great for debugging. If you’ve spent time with the JS language, this should all be pretty familiar.

What beginner JavaScript developers do not comprehend is the big picture of the browser having a large number of these browser features built-in and accessible to us via various JavaScript facade methods: they look like they’re just a part of the language itself but are facades for features outside of the JS language itself. Examples of widely used Web APIs are the DOM API, the Canvas API, the Fetch API, etc.

The JavaScript language is set up in such a way that we won’t infer that the functionality we are using is a browser feature. For example, when we say:

let heading = document.getElementById('main-heading');


We are hooking into a browser feature, but there is no way of knowing this since it looks like regular JS code.

The Drag and Drop Web API

To understand how the Drag and Drop API works, and to effectively use it, all we have to do is know some of the basic concepts and methods it needs.

Similar to how most front-end developers are familiar with the example from the previous section (namely, document.getElementById), we need to learn:

  • The basic concepts of the Drag and Drop Web API;

  • A few basic methods and commands.


The first important concept related to the Drag and Drop API is the concept of source and target elements.

Source and Target Elements

There are built-in browser behaviors that determine how certain elements will behave when a user clicks and drags them onto the viewport.

For example, if we try click-dragging the intro image of this tutorial, we’ll see a behavior it triggers: the image will be displayed as a semi-transparent thumbnail on the side of our mouse pointer, following the mouse pointer for as long as we hold the click.

The mouse pointer also changes to the following style:

cursor: grabbing;


We’ve just shown an example of an element becoming a source element for a drag-and-drop operation. The target of such an operation is known as the target element.

Before we cover an actual drag-and-drop operation, let’s have a quick revision of events in JS.

Events in JS: A Quick Revision

We could go as far as saying that events are the foundation on which all our JavaScript code rests. As soon as we need to do something interactive on a web page, events come into play.

In our code, we listen for mouse clicks, mouse hovers (mouseover events), scroll events, keystroke events, and document-loaded events.

We also write event handlers that take care of executing some JavaScript code to handle these events.

We say that we listen for events firing and that we write event handlers for the events being fired.

Describing a Drag and Drop Operation

The HTML and CSS

Let’s go through a minimal drag-and-drop operation.

We’ll describe the theory and concepts behind this operation as we go through each step.

The example is as easy as can be: there are two elements on a page. They are styled as boxes. The first one is a little box, and the second one is a big box.

To make things even easier to comprehend, let’s “label” the first box as “source”, and the second one as “target”:

<div id="source">Source</div>
<div id="target">Target</div>
<style>
    #source {
        background: wheat;
        width: 100px;
        padding: 20px;
        text-align: center;
    }

#target {
    background: #abcdef;
    width: 360px;
    height: 180px;
    padding: 20px 40px;
    text-align: center;
    margin-top: 50px;
    box-sizing: border-box;
}
</style>


A little CSS caveat above: to avoid the added border width increasing the width of the whole target div, we’ve added the CSS property-value pair of box-sizing: border-box to the #target CSS declaration.

Thus, the target element has a consistent width, regardless of whether our drag event handlers are running or not. The output of this code is fairly straightforward:
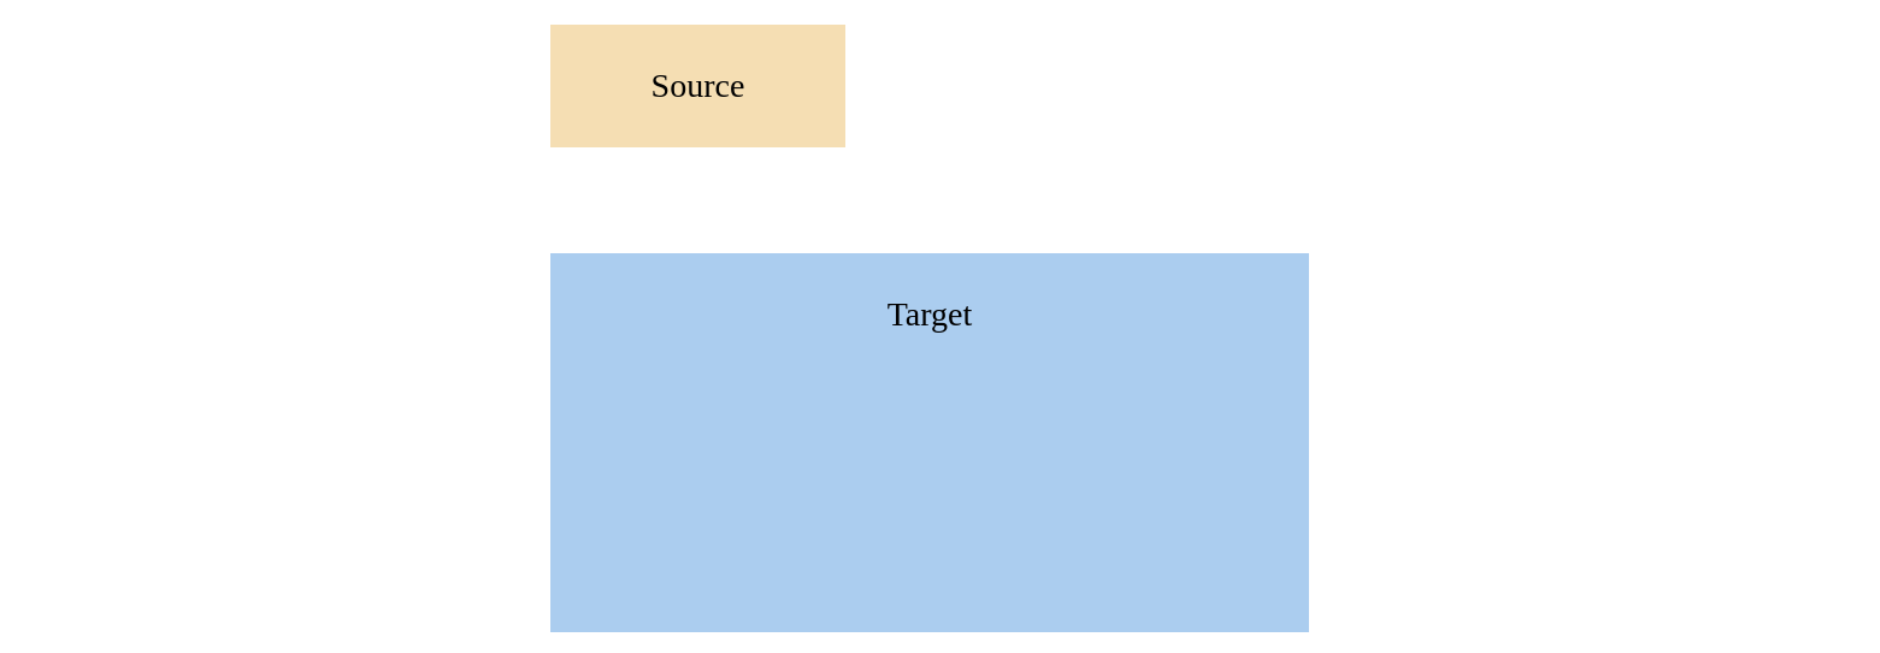
output-of-drag-and-drop-operation

Convert the “Plain” HTML Element Into a Drag and Drop Source Element

To do this, we use the draggable attribute, like so:

<div id="source" draggable="true">Source</div>


What this little addition does is change the behavior of the element. Before we added the draggable attribute, if a user clicked on the Source div, they’d likely just highlight the text of the div (i.e., the word Source) as if they were planning to select the text before copying it.

However, with the addition of the draggable attribute, the element changes its behavior and behaves exactly like a regular HTML IMG element, we even get that little grabbed cursor⁠, giving an additional signal that we’ve triggered the drag-and-drop functionality.

Capture Drag and Drop Events

There are 8 relevant events in this API:

  1. drag

  2. dragstart

  3. dragend

  4. dragover

  5. dragenter

  6. dragleave

  7. drop

  8. dragend


During a drag-and-drop operation, a number of the above events can be triggered, maybe even all of them. However, we still need to write the code to react to these events using event handlers.

Handling the Dragstart and Dragend Events

We can begin writing our code easily. To specify which event we’re handling, we’ll just add an on prefix.

For example, in our HTML code snippet above, we’ve turned a “regular” HTML element into a source element for a drag-and-drop operation. Let’s now handle the dragstart event, which fires as soon as a user has started dragging the source element:

let sourceElem = document.getElementById('source');
sourceElem.addEventListener('dragstart', function (event) {
    confirm('Are you sure you want to move this element?');
})


All right, so we’re reacting to a dragstart event, i.e., we’re handling the dragstart event.

Now that we know we can handle the event, let’s react to the event firing by changing the styles of the source element and the target element.

let sourceElem = document.getElementById('source');
let targetElem = document.getElementById('target');
sourceElem.addEventListener('dragstart', function (event) {
    event.currentTarget.style = "opacity:0.3";
    targetElem.style = "border: 10px dashed gray;";
})


Now, we’re handling the dragstart event by making the source element see-through, and the target element gets a big dashed gray border so that the user can more easily see what we want them to do.

It’s time to undo the style changes when the dragend event fires (i.e., when the user releases the hold on the left mouse button):

sourceElem.addEventListener('dragend', function (event) {
    sourceElem.style = "opacity: 1";
    targetElem.style = "border: none";
})


Here, we’ve used a slightly different syntax to show that there are alternative ways of updating the styles on both the source and the target elements. For this tutorial, it doesn’t really matter what kind of syntax we choose to use.

Handling the Dragover and Drop Events

It’s time to deal with the dragover event. This event is fired from the target element.

targetElem.addEventListener('dragover', function (event) {
    event.preventDefault();
});


All we’re doing in the above function is preventing the default behavior (which is opening as a link for specific elements).

In a nutshell, we’re setting the stage for being able to perform some operations once the drop event is triggered.

Here’s our drop event handler:

targetElem.addEventListener('drop', function (event) {
    console.log('DROP!');
})


Currently, we’re only logging out the string DROP! to the console. This is good enough since it’s proof that we’re going in the right direction.

Note: Notice how some events are emitted from the source element, and some other events are emitted from the target element. In our example, the sourceElem element emits the dragstart and dragend events, and the targetElem emits the dragover and drop events.

Next, we’ll use the dataTransfer object to move the source element onto the target element.

Utilize The dataTransfer Object

The dataTransfer object lives in an instance of the Event object, which is built into any event. We don’t have to “build” the event object. We can simply pass it to the anonymous event handler function since functions are “first-class citizens” in JS (meaning: we can pass them around like any other value). This allows us to pass anonymous functions to event handlers, such as in the example we just saw in the previous section.

In that piece of code, the second argument we passed to the addEventListener() method is the following anonymous function:

function(event) {
  console.log('DROP!');
}


An event argument is a built-in object, an instance of the Event object. This event argument comes with a number of properties and methods, including the dataTransfer property⁠, which itself is an object.

In other words, we have the following situation (warning: pseudo-code ahead!):

event: {
…,
dataTransfer: {…},
stopPropagation: function(){…},
preventDefault: function(){…},
…,
…,
}


The important thing to conclude from the above structure is that the event object is just a JS object holding other values, including nested objects and methods. The dataTransfer object is just one such nested object that comes with its own set of properties and methods.

In our case, we’re interested in the setData() and getData() methods on the dataTransfer object.

The setData() and getData() Methods on The dataTransfer Object

To be able to successfully “copy” the source element onto the target element, we have to perform a few steps:

  1. We need to hook into an event handler for an appropriate drag-and-drop related event, as it emits from the source object;

  2. Once we’re hooked into that specific event (i.e. once we’ve completed the step above), we’ll need to use the event.dataTransfer.setData() method to pass in the relevant HTML, which is, of course, the source element;

  3. We’ll then hook into an event handler for another drag-and-drop event. This time, an event that’s emitting from the target object;

  4. Once we’re hooked into the event handler in the previous step, we’ll need to get the data from step two, using the following method: event.dataTransfer.getData().


That’s all there is to it! To reiterate, we’ll:

  1. Hook into the dragstart event and use the event.dataTransfer.setData() to pass in the source element to the dataTransfer object;

  2. Hook into the drop event and use the event.dataTransfer.getData() to get the source element’s data from the dataTransfer object.


So, let’s hook into the dragstart event handler and get the source element’s data:

sourceElem.addEventListener('dragstart', function(event) {
event.currentTarget.style="opacity:0.3";
targetElem.style = "border: 10px dashed gray;";
event.dataTransfer.setData('text', event.target.id);
})


Next, let’s pass this data on to the drop event handler:

targetElem.addEventListener('drop', function(event) {
console.log('DROP!');
event.target.appendChild(document.getElementById(event.dataTransfer.getData('text')));
})


We could rewrite this as:

targetElem.addEventListener('drop', function(event) {
console.log('DROP!');
const sourceElemData = event.dataTransfer.getData('text');
const sourceElemId = document.getElementById(sourceElemData);
event.target.appendChild(sourceElemId);
})


Regardless of how we decide to do this, we’ve completed a simple drag-and-drop operation, from start to finish. Let’s use the Drag and Drop API to build a game.

Write a Simple Game Using the Drag and Drop API

In this section, we’ll build a very, very, simple game. We’ll have a row of spans with jumbled lyrics to a famous song.

The user can now drag and drop the words from the first row onto the empty slots in the second row, as shown below.
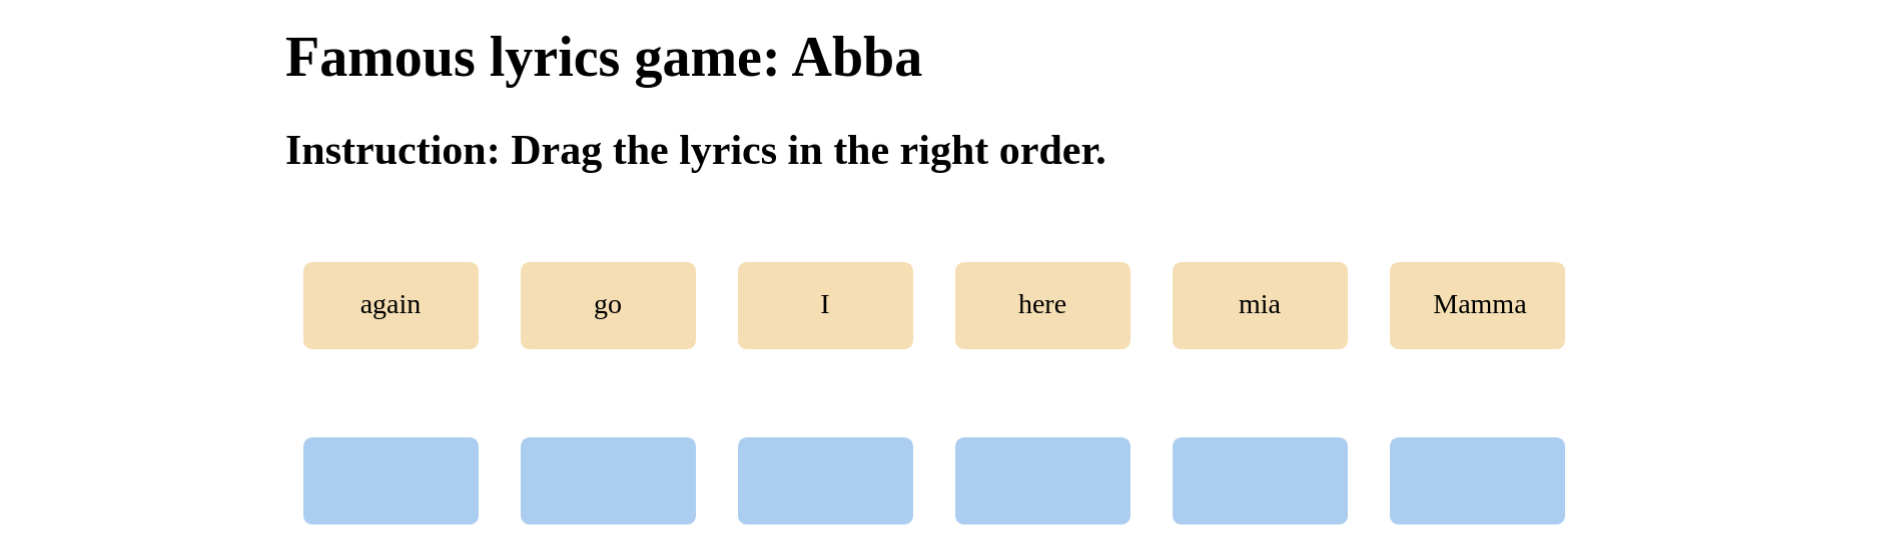
drag-and-drop-words-onto-empty-slots-example


The goal of the game is to place the lyrics in the correct order. Begin by adding some HTML structure and CSS styles to our game.

Adding The game’s HTML and CSS

<h1>Famous lyrics game: Abba</h1>
<h2>Instruction: Drag the lyrics in the right order.</h2>
<div id="jumbledWordsWrapper">
  <span id="again" data-source-id="again" draggable="true">again</span>
  <span id="go" data-source-id="go" draggable="true">go</span>
  <span id="I" data-source-id="I" draggable="true">I</span>
  <span id="here" data-source-id="here" draggable="true">here</span>
  <span id="mia" data-source-id="mia" draggable="true">mia</span>
  <span id="Mamma" data-source-id="Mamma" draggable="true">Mamma</span
</div>
<div id="orderedWordsWrapper">
  <span data-target-id="Mamma"></span>
  <span data-target-id="mia"></span>
  <span data-target-id="here"></span>
  <span data-target-id="I"></span>
  <span data-target-id="go"></span>
  <span data-target-id="again"></span>
</div>


The structure is straightforward. We have static h1 and h2 tags. Then, we have the two divisions:

  • jumbledWordsWrapper, and

  • orderedWordsWrapper


Each of these wrappers holds a number of span tags—one span tag for each word. The span tags in the orderedWordsWrapper don’t have any text inside; they’re empty.

We’ll use CSS to style our game, as follows:

body {
  padding: 40px;
}
h2 {
  margin-bottom: 50px;
}
#jumbledWordsWrapper span {
  background: wheat;
  box-sizing: border-box;
  display: inline-block;
  width: 100px;
  height: 50px;
  padding: 15px 25px;
  margin: 0 10px;
  text-align: center;
  border-radius: 5px;
  cursor: pointer;  
}
#orderedWordsWrapper span {
  background: #abcdef;
  box-sizing: border-box;
  text-align: center;
  margin-top: 50px;
}


Next, we’ll add some behavior to our game using JavaScript.

Adding Our Game’s JavaScript Code

We’ll start our JS code by setting a couple of variables and logging them out to make sure we’ve got proper collections:

const jumbledWords = document.querySelectorAll('#jumbledWordsWrapper > span');
const orderedWords = document.querySelectorAll('#orderedWordsWrapper > span');
console.log('jumbledWords: ', jumbledWords);
console.log('orderedWords: ', orderedWords);


The output on the console is as follows:

"jumbledWords: " // [object NodeList] (6)
["<span/>","<span/>","<span/>","<span/>","<span/>","<span/>"]
"orderedWords: " // [object NodeList] (6)
["<span/>","<span/>","<span/>","<span/>","<span/>","<span/>"]


Now that we’re sure that we’re capturing the correct collections, let’s add an event listener to each of the members in the two collections.

On all the source elements, we’ll add methods to handle the dragstart event firing:

jumbledWords.forEach(el => {
  el.addEventListener('dragstart', dragStartHandler);
})
function dragStartHandler(e) {
  console.log('dragStartHandler running');
  e.dataTransfer.setData('text', e.target.getAttribute('data-source-id'));
  console.log(e.target);
}


On all the target elements, we’ll add methods to handle all the relevant drag-and-drop events, namely:

  • dragenter

  • dragover

  • dragleave

  • drop


The code that follows should be familiar:

orderedWords.forEach(el => {
  el.addEventListener('dragenter', dragEnterHandler);
  el.addEventListener('dragover', dragOverHandler);
  el.addEventListener('dragleave', dragLeaveHandler);
  el.addEventListener('drop', dropHandler);
})

function dragEnterHandler(e) {
  console.log('dragEnterHandler running');
}

function dragOverHandler(e) {
  console.log('dragOverHandler running');
  event.preventDefault();
}

function dragLeaveHandler(e) {
  console.log('dragLeaveHandler running');
}

function dropHandler(e) {
  e.preventDefault();
  
  console.log('dropHandler running');
  
  const dataSourceId = e.dataTransfer.getData('text'); 
  const dataTargetId = e.target.getAttribute('data-target-id');
  console.warn(dataSourceId, dataTargetId);

  if(dataSourceId === dataTargetId) {
    console.log(document.querySelector([dataTargetId]));
    e.target.insertAdjacentHTML('afterbegin', dataSourceId);
  }
}


In the dropHandler() method, we’re preventing the default way that the browser handles the data that comes in.

Next, we’re getting the dragged element’s data and saving it in dataSourceId, which will be the first part of our matching check. Next, we get the dataTargetId so that we can compare it to the dataSourceId.

If dataSouceId and dataTargetId are equal, that means that our custom data attributes hold matching values, and thus we can complete the addition of the specific source element’s data into the specific target element’s HTML.

Adding CSS Code For Better UX

Let’s start by inspecting the complete JS code, made slimmer by the removal of all redundant console.log() calls.

const jumbledWords = document.querySelectorAll('#jumbledWordsWrapper > span');
const orderedWords = document.querySelectorAll('#orderedWordsWrapper > span');

jumbledWords.forEach(el => {
  el.addEventListener('dragstart', dragStartHandler);
})
orderedWords.forEach(el => {
  el.addEventListener('dragenter', dragEnterHandler);
  el.addEventListener('dragover', dragOverHandler);
  el.addEventListener('dragleave', dragLeaveHandler);
  el.addEventListener('drop', dropHandler);
})

function dragStartHandler(e) {
  e.dataTransfer.setData('text', e.target.getAttribute('data-source-id'));
}

function dragEnterHandler(e) {
}

function dragOverHandler(e) {
  event.preventDefault();
}

function dragLeaveHandler(e) {
}

function dropHandler(e) {
  e.preventDefault();
  
  const dataSourceId = e.dataTransfer.getData('text'); 
  const dataTargetId = e.target.getAttribute('data-target-id');

  if(dataSourceId === dataTargetId) {
    e.target.insertAdjacentHTML('afterbegin', dataSourceId);
  }
}


As you can verify above, we’ve removed all the console.log() invocations, and thus some of our event handler functions are now empty.

That means these functions are ready to receive corresponding CSS code updates. Additionally, due to the updates in style to the dragStartHandler() method, we’ll also need to add a brand new source element’s event listener for the dragend event.

We’ll start by adding another event listener to the jumbledWords collection:

jumbledWords.forEach(el => {
  el.addEventListener('dragstart', dragStartHandler);
  el.addEventListener('dragend', dragEndHandler);
})


And we’ll update the two event handler function definitions too:

function dragStartHandler(e) {
  e.dataTransfer.setData('text', e.target.getAttribute('data-source-id'));
  e.target.style = 'opacity: 0.3';
}
function dragEndHandler(e) {
  e.target.style = 'opacity: 1';
}


Next, we’ll update the styles inside the dragEnterhandler() and the dragLeaveHandler() methods.

function dragEnterHandler(e) {
  e.target.style = 'border: 2px dashed gray; box-sizing: border-box; background: whitesmoke';
}
function dragLeaveHandler(e) {
  e.target.style = 'border: none; background: #abcdef';
}


We’ll also go around some styling issues by updating the if condition inside the dropHandler() method:

  if(dataSourceId === dataTargetId) {
    e.target.insertAdjacentHTML('afterbegin', dataSourceId);
    e.target.style = 'border: none; background: #abcdef';
    e.target.setAttribute('draggable', false);
  }

Preventing Errors

We’ve set up our JS code so that it checks if the values are matching for the data-source-id of the jumbledWordsWrapper div and the data-target-id of the orderedWordsWrapper div.

This check in itself prevents us from dragging any other word onto the correct place⁠—except for the matching word.

However, we have a bug: there’s no code preventing us from dragging the correct word into the same span inside the orderedWordsWrapper multiple times.

Here’s an example of this bug:
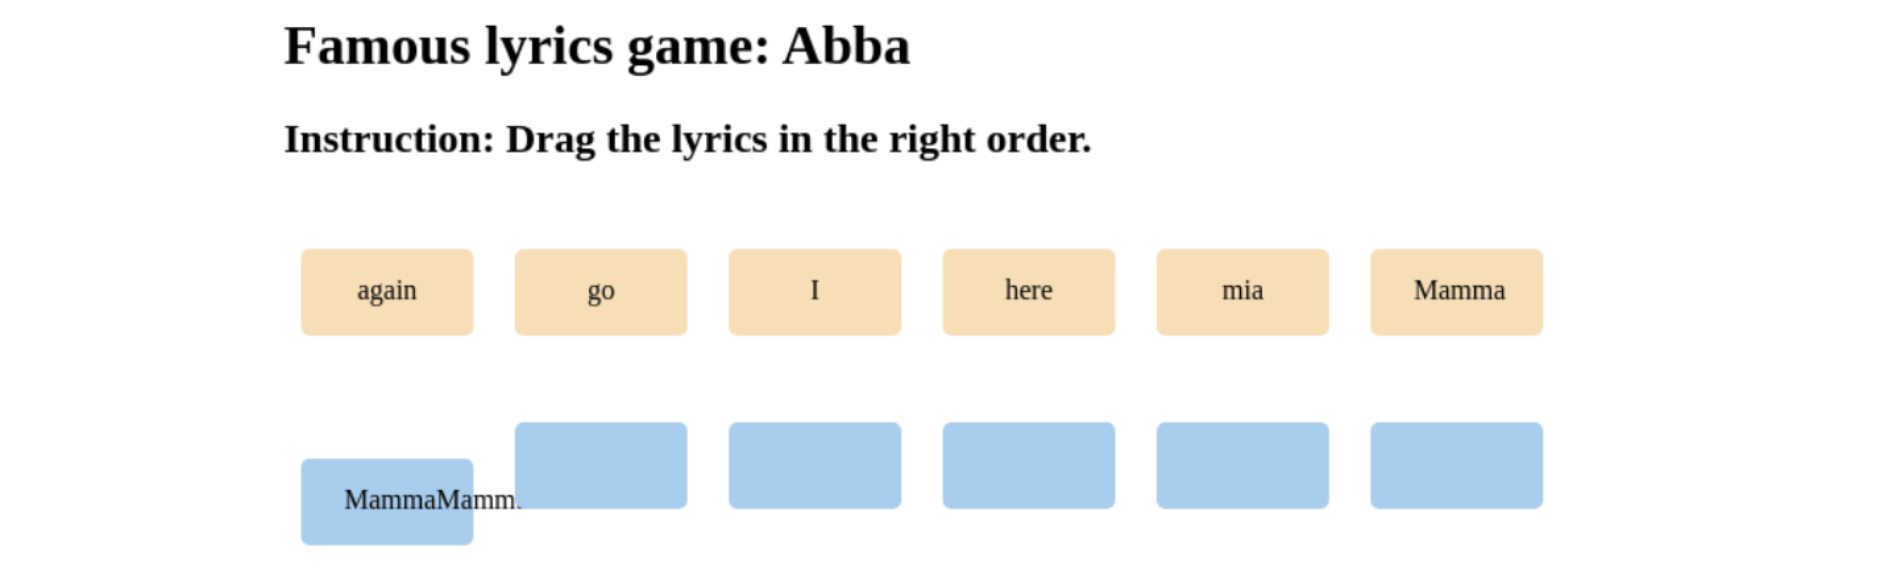
build-a-game-in-Vanilla-JS-no-code-preventing-bugs

Obviously, this is a bug that we need to fix. Luckily, the solution is easy: we’ll just get the source element’s data source-id, and we’ll use it to build a string, which we’ll then use to run the querySelector on the entire document.

This will allow us to find the one source span tag whose text node we used to pass it to the correct target slot. Once we do that, all we need to do is set the draggable attribute to false (on the source span element), thus preventing the already-used source span element from being dragged again.

  if(dataSourceId === dataTargetId) {
    e.target.insertAdjacentHTML('afterbegin', dataSourceId);
    e.target.style = 'border: none; background: #abcdef';
    
    let sourceElemDataId = 'span[data-source-id="' + dataSourceId + '"]';
    let sourceElemSpanTag = document.querySelector(sourceElemDataId);


Additionally, we can give our source element the styling to indicate that it’s no longer draggable. A nice way to do it is to add another attribute: a class attribute. We can do this with setAttribute syntax, but here’s another approach, using Object.assign():

    Object.assign(sourceElemSpanTag, {
      className: 'no-longer-draggable',
    });


The above syntax allows us to set several attributes, and thus we can also set draggable to false as the second entry:

    Object.assign(sourceElemSpanTag, {
      className: 'no-longer-draggable',
      draggable: false,
    });


Of course, we also need to update the CSS with the no-longer-draggable class:

.no-longer-draggable {
  cursor: not-allowed !important;
  background: lightgray !important;
  opacity: 0.5 !important;
}


We have an additional small bug to fix: earlier in the tutorial, we defined the dragEnterHandler() and the dragLeaveHandler() functions.

The former function sets the styles on the dragged-over target to a dotted border and a pale background, which signals a possible drop location.

The latter function reverts these styles to the border: none; background: #abcdef. However, our bug occurs if we drag and try to drop a word in the wrong place. This happens because the dragEnterHandler() event handler gets called as we drag over the wrong word, but since we never trigger the dragLeaveHandler()⁠—instead, we triggered the dropHandler() function⁠—the styles never get reverted.

The solution for this is really easy: we’ll just run the dragLeaveHandler() at the top of the dropHandler() function definition, right after the e.preventDefault(), like this:

function dropHandler(e) {
  e.preventDefault();
  dragLeaveHandler(e); 


Now our simple game is complete. Here’s the full JavaScript code:

const jumbledWords = document.querySelectorAll('#jumbledWordsWrapper > span');
const orderedWords = document.querySelectorAll('#orderedWordsWrapper > span');

jumbledWords.forEach(el => {
  el.addEventListener('dragstart', dragStartHandler);
  el.addEventListener('dragend', dragEndHandler);
})
orderedWords.forEach(el => {
  el.addEventListener('dragenter', dragEnterHandler);
  el.addEventListener('dragover', dragOverHandler);
  el.addEventListener('dragleave', dragLeaveHandler);
  el.addEventListener('drop', dropHandler);
})

function dragStartHandler(e) {
  e.dataTransfer.setData('text', e.target.getAttribute('data-source-id'));
  e.target.style = 'opacity: 0.3';
}
function dragEndHandler(e) {
  e.target.style = 'opacity: 1';
}

function dragEnterHandler(e) {
  e.target.style = 'border: 2px dashed gray; box-sizing: border-box; background: whitesmoke';
}

function dragOverHandler(e) {
  event.preventDefault();
}

function dragLeaveHandler(e) {
  e.target.style = 'border: none; background: #abcdef';
}

function dropHandler(e) {
  e.preventDefault();
  dragLeaveHandler(e); 
  
  const dataSourceId = e.dataTransfer.getData('text'); 
  const dataTargetId = e.target.getAttribute('data-target-id');
  
  if(dataSourceId === dataTargetId) {
    e.target.insertAdjacentHTML('afterbegin', dataSourceId);
    e.target.style = 'border: none; background: #abcdef';
    
    let sourceElemDataId = 'span[data-source-id="' + dataSourceId + '"]';
    let sourceElemSpanTag = document.querySelector(sourceElemDataId);
    
    Object.assign(sourceElemSpanTag, {
      className: 'no-longer-draggable',
      draggable: false,
    });
  }
  
}

Final Thoughts

Even though our game is finished, this doesn’t have to be the end of the road!

It’s always possible to further improve our code. There are many additional things that can be done here. We could, for example:

  • Add a start and end screen.

  • Add a counter that would count the number of attempts.

  • Add a countdown timer that would not limit the number of attempts, but rather the time available for us to complete our puzzle game.

  • Add more questions.

  • Add a leaderboard (we’d need to persist our data somehow).

  • Refactor the logic of our game so that we can keep the questions and the order of words in a simple JS object.

  • Fetch the questions from a remote API.


There are always more things to learn and more ways to expand our apps. However, all of the above-listed improvements are beyond the scope of this tutorial.

The fun of coding lies in the fact that you can try things on your own. Try to implement some of these improvements and make this game your own.

To secure your JavaScript source code against theft and reverse-engineering, you can try Jscrambler for free.


How Your Code Dependencies Expose You To Web Supply Chain Attacks

We will walk you through the risks of code dependencies when it comes to web supply chain attacks.

As the demand for faster product development continues to grow, developers increasingly rely on code snippets from external sources, especially JavaScript libraries and frameworks. This results in an average web application with more than 1,000 modules, also known as code dependencies.

What does the increased use of third-party code mean in terms of security?

JavaScript: the first language of the web

We have seen the technologies used for creating web products develop rapidly, and JavaScript has become the predominant language of the Web.

JavaScript is part of 97% of modern websites, and every single Fortune 500 company is using it. They rely specifically on npm. It is a JavaScript package ecosystem built globally by millions of developers.

What was the main driver for JavaScript’s success?

The JavaScript open-source community really started to thrive after the Node.js environment was released back in 2009. This started the trend of creating reusable code pieces, usually called modules or packages, that could be shared by different projects.

With the development of this ecosystem, we have seen fully functional front-end frameworks and libraries like React and Angular appear. This has increased the speed of development, not only for Web apps but also for mobile and desktop apps, with frameworks like React Native, Ionic, and NativeScript.

Companies could not miss out on the opportunity to cut product development time by relying on peer-reviewed third-party modules. Also, as the community-built modules became more specific and started satisfying more needs, it became less and less necessary to develop every piece of code in-house.
The use of third-party code became standard in the Web development scheme, and now the average website has more than 1000 code dependencies.
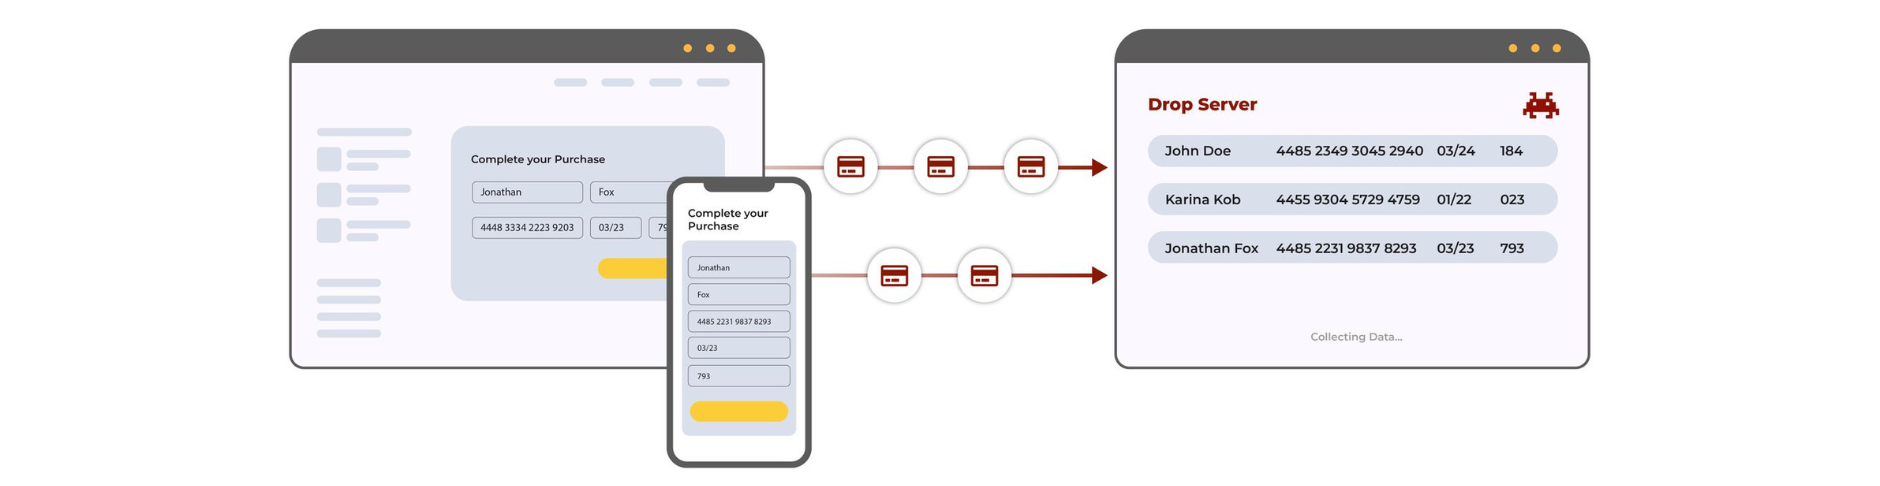
Code Dependencies Expose You To Web Supply Chain Attacks

Despite its benefits for product development, the use of third-party code raises some security concerns.

A 2019 study by researchers from the Technical University of Darmstadt found that each code dependency that companies use contains, on average, 80 dependencies of its own.

While simply multiplying this figure by the 1,000 transient dependencies of the average web app is not accurate by itself (different packages often share the same dependencies), we can safely conclude that, just by getting to the second level of the web supply chain, we are already dealing with many thousands of code dependencies.

The overall finding was concerning.
If 20 high-profile developer accounts are compromised by attackers, half of the ecosystem is breached. In other words, a global web supply chain attack could attack hundreds of thousands of private and public organizations worldwide.

It is clear that, by relying so heavily on third-party code, companies are left with zero control and visibility over the code they are using and its behaviors. This low-visibility scenario is ideal for attackers to thrive, specifically through web supply chain attacks.

In a web supply chain attack, attackers target the supply chain of websites and all of their third and fourth parties. This approach allows for easier and more scalable attacks. For instance, if an attacker manages to modify a weaker third-party provider, they can basically inject arbitrary code into the website and do what they want.

There’s no privilege separation in JavaScript development, which makes it particularly dangerous to have arbitrary code running on your website. This means that all pieces of third-party code have the same privileges as code that is developed internally, so they are free to do anything on your website.

They can add additional code to the web page, hidden in plain sight, for example, to display a fake popup for phishing purposes or to redirect the user to websites containing malware. With that, attackers can then leak any data they collect and send it to a drop server under their control.

magecart-example-collecting-data-for-data-leakage

You can imagine the consequences of allowing attackers easy access to the credentials or PII of your users. With strict regulations like GDPR and CCPA, this is a clear violation of users’ privacy rights.

When you add the fact that supply chain attacks often go unnoticed for weeks or even months, as we saw in the case of the Magecart web skimming group attack on British Airways in 2018, companies are left with devastating consequences.

Safely Integrating Third-Party Code

The bottom line is that third-party code isn’t going anywhere, as it is still one of the most valuable assets for competitive product development. But the key to mitigating the risks associated with externally sourced code is learning how to safely integrate it.

This requires development teams and security teams to reduce code dependencies when possible and put in place webpage monitoring to gain visibility and control over the behavior of all code running on the client side.

Gaining this level of visibility is essential for companies to regain control over their web supply chain. And to thoroughly achieve the desired level of security, they need to do it continuously at runtime.

Take the first step to achieving full website visibility and control. Get started with Jscrambler’s Webpage Integrity solution. This will allow you to get valuable insights into what scripts are running on your website and what suspicious connections they are making.

Magecart Attacks in eCommerce: Road to Mitigation

Dive into the strategies of companies like Amazon, Etsy, Mercado Livre, and ASOS to protect their users against Magecart attacks in eCommerce.

The COVID-19 pandemic has propelled eCommerce forward and increased the number of people buying online.

The cyber attackers are taking advantage of the increased eCommerce sales and preying on major companies since more users shopping online directly translates to a bigger potential payoff for attackers that target sensitive user data.

How can eCommerce companies fight off attackers and protect their websites?

Understand how eCommerce companies can mitigate Magecart web skimming attacks and protect their users.

What are Magecart Attacks?


Magecart is a collective of cybercriminal groups that inject digital credit card skimmers on eCommerce and payment websites. These groups have been active since 2015 but have gained momentum from 2018 onward.

In a Magecart attack, attackers inject the skimmer (through malicious JavaScript code) into a company’s payment page.

This code collects credit card details whenever a user submits them in a form (formjacking) and sends them to attacker-controlled drop servers. During this process, neither the end-user nor the company had any awareness that the attack had taken place.

Attackers may gain access to the victim’s website in two typical ways:

First-party attack

The skimmer directly places the malicious code on the payment page in a first-party attack, having access to the targeted website.

Third-party attack

Third-party attack: Injecting the malicious code through a third-party provider that the victim company is using (such as a live chat tool, analytics service, or code dependency).

Third-party Magecart attacks

Third-party Magecart attacks are critical because they don’t require a first-party server breach or direct access to the company’s website.

They target weaker third parties, which often have fewer resources dedicated to security. And because that (infected) third-party code has all the same permissions as all the other code on a website, it can readily tamper with any payment forms, collect all submitted data, and send it to the attackers’ servers without ever being detected by Web Application Firewalls.

web-application-firewalls-detecting-infect-thirf-party-code

The bottom line is that thanks to this client-side security blindspot companies have, attackers can orchestrate attacks that are scalable and that require lower effort when compared to directly breaching a major company’s first-party server.

Road to Mitigation: Visibility and Control


When we talk about mitigating Magecart web skimming attacks, there are two main points we need to consider: visibility and control.

Given that Magecart web skimmers often begin their attack by infecting third-party providers instead of their actual target website, we can see why eCommerce companies need complete visibility over their web supply chain.

Visibility is one of the first steps companies should take to limit the risk of Magecart attacks ever taking place.

Control comes after visibility, or mitigating possible attacks that may arise by blocking the infected website resource and blocking the leakage of credit card data to attackers’ servers.

Only by combining these two processes will companies achieve a security-in-depth approach on the client side.

How can companies choose a security solution that provides the needed visibility and control?

How to assess a security product


Step 1: Complete website inventory

An adequate Magecart mitigation solution should provide companies with a complete website inventory.

This will ensure they have visibility into the scripts and network connections that take place in any given user session, while also making it easier to learn which behaviors are normal and which ones are malicious. It is crucial to fight off the client-side security blind spot associated with third-party code.

Step 2: Real-time visibility

After the website inventory overview, it’s critical to have real-time visibility of how each individual script is behaving on their website.

This visibility allows companies to detect suspicious behaviors, such as a known script suddenly starting to tamper with a payment form (Magecart web skimming attack) or attempting to send data out to an unknown domain (data leakage). Considering that Magecart web skimming attacks remain active for 22 days on average before being detected, this real-time visibility can improve incident response and contain possible data leaks.

Step 3: Control

Because visibility is half of the response needed for a security-in-depth approach, companies need complete control over the behavior of each script.

Effective control means being able to restrict specific allowed or disallowed behaviors in real-time so that any attempt at malicious activity (e.g., leaking user data, showing a popup on top of the website) is blocked, stopping the attack from happening.

To achieve this level of control, companies need to look for solutions that allow a flexible rule-based approach that blocks all malicious activity on the client side.

Approaches based on a Content Security Policy (CSP) are limited since they lack this level of granularity and can be easily bypassed.

Since Magento mitigation is a complex topic and mainstream security solutions aren’t capable of preventing these attacks, it’s important that eCommerce companies know how to assess a security product based on technical requirements.

To do that, they must perform tests to ensure that the solution meets those requirements. For an in-depth explanation of what tests are needed, check out our Magecart mitigation checklist.

Conclusion


Although Magecart mitigation is a complex issue, companies can fight it off by fixing their client-side security blindspot with adequate security solutions.

The sooner they start addressing the security weaknesses of their web supply chain, the better they will be able to protect their users in the long run and ensure compliance with data protection regulations such as GDPR and CCPA and standards such as PCI DSS.

By adopting a solution that is behavior-based and that runs in real-time, companies will gain the required visibility and control over the behavior of their website’s scripts. That allows us to mitigate the attackers targeting the eCommerce industry and prevent critical attacks such as Magecart web skimming.

Jscrambler is offering a free website inventory report. This report has helped major airlines and retailers uncover key client-side security threats and minimize their exposure to web supply chain attacks.

Embrace this chance to gain increased client-side visibility!