


Category: Client-Side Security

Introduction to State Management with Vuex

Explore Vuex actions, composing actions, and modules with this complete tutorial.

Any Vue app that has more than a few components is going to have a shared state. Without any state management system, we can only share the state between parent and child components.

This is useful, but it is limited. We need to be able to share states regardless of the relationship between the components.

To do this in a Vue app, we can use Vuex. It is the official state management library for Vue apps.

In this article, we look at how to share the state with Vuex.

Getting Started

To get Vuex into our Vue app, we have to include the Vuex library. Then, we create a Vuex store with the initial state, mutations, and getters.

For example, we can create a simple store for our Vuex to store the count state and use it in our app as follows:

index.js:

const store = new Vuex.Store({
  state: {
    result: {}
  },
  mutations: {
    fetch(state, payload) {
      state.result = payload;
    }
  },
  getters: {
    result: state => state.result
  }
});

new Vue({
  el: "#app",
  store,
  methods: {
    async fetch() {
      const res = await fetch("https://api.agify.io/?name=michael");
      const result = await res.json();
      this.$store.commit("fetch", result);
    }
  },
  computed: {
    ...Vuex.mapGetters(["result"])
  }
});


index.html:

<!DOCTYPE html>
<html lang="en">
  <head>
    <title>App</title>
    <script src="https://cdn.jsdelivr.net/npm/vue/dist/vue.js"></script>
    <script src="https://unpkg.com/vuex"></script>
  </head>
  <body>
    <div id="app">
      <button @click="fetch">Fetch</button>
      <p>{{result.name}}</p>
    </div>
    <script src="./index.js"></script>
  </body>
</html>


In the code above, we added the script tags for Vue and Vuex in index.html.

Then, we create a div with ID app to house our Vue app. Inside the div, we add the button to call a method to increment the count state.

Then, we show the count in the p tag.

In index.js, we write the code for the Vuex store by writing:

const store = new Vuex.Store({
  state: {
    result: {}
  },
  mutations: {
    fetch(state, payload) {
      state.result = payload;
    }
  },
  getters: {
    result: state => state.result
  }
});


The code above gives us a simple store that stores the result state initially set to an empty object.

Then, we added our fetch mutation in the mutations section, which takes the state object that has the Vuex state. We then get the data from the payload and parameter and set the state.result to the payload each time the fetch action is dispatched.

Also, we added a getter for the result, which is a function that takes the state of the store and then returns the count from it.

After we create the store, we use it in our Vue app by adding the store property to the object we passed into the Vue constructor.

Additionally, we get the resulting state in our Vue app by using the mapGetters method, which maps our getter to the result computed property in our Vue app.

Then, we wrote a fetch method, which references the $store instance and calls commit with the mutation name passed in.

We passed in the ’fetch’ string to commit the increment mutation.

Finally, our button has the @click prop and it’s set to the fetch method.

In the end, when we click on the Fetch button, we should see ‘Michael’ displayed from the store’s data as the API data is fetched.

We can also pass in the action type and payload as objects into the commit method as follows:

const store = new Vuex.Store({
  state: {
    count: 0
  },
  mutations: {
    increment(state, payload) {
      state.count += payload.amount;
    }
  },
  getters: {
    count: state => state.count
  }
});

new Vue({
  el: "#app",
  store,
  methods: {
    increment() {
      this.$store.commit({
        type: "increment",
        amount: 2
      });
    }
  },
  computed: {
    ...Vuex.mapGetters(["count"])
  }
});


In the code above, we changed mutations to:

mutations: {
    increment(state, payload) {
        state.count += payload.amount;
    }
},


Then the increment method is changed to:

increment() {
    this.$store.commit({
        type: "increment",
        amount: 2
    });
}


Mutations can only run synchronous code. If we want to run something asynchronously, we have to use actions.

Vuex can’t keep track of mutations that are asynchronous since asynchronous code doesn’t run sequentially.

We can also use the mapMutations method, like the mapGetters method, to map mutations.

To use the mapMutations method, we can write the following code:

index.js:

const store = new Vuex.Store({
  state: {
    count: 0
  },
  mutations: {
    increment(state, payload) {
      state.count += payload;
    }
  },
  getters: {
    count: state => state.count
  }
});

new Vue({
  el: "#app",
  store,
  methods: {
    ...Vuex.mapMutations({
      increment: "increment"
    })
  },
  computed: {
    ...Vuex.mapGetters(["count"])
  }
});


In the code above, we mapped the increment mutation to the increment method in our Vue app with the following code:

...Vuex.mapMutations({
    increment: "increment"
})


It takes an argument for the payload as we can see in the @click listener of the Increment button.

Actions

Actions can commit one or more mutations in any way we like.

We can add a simple action to our store and use it as follows:

index.js:

const store = new Vuex.Store({
  state: {
    count: 0
  },
  mutations: {
    increment(state, payload) {
      state.count += payload;
    }
  },
  getters: {
    count: state => state.count
  },
  actions: {
    increment({ commit }, payload) {
      commit("increment", payload);
    }
  }
});

new Vue({
  el: "#app",
  store,
  methods: {
    ...Vuex.mapActions(["increment"])
  },
  computed: {
    ...Vuex.mapGetters(["count"])
  }
});

In the code above, we defined the increment action in the Vuex store as follows:

actions: {
    increment({ commit }, payload) {
        commit("increment", payload);
    }
}


Then we called mapActions in our Vue app as follows:

methods: {
    ...Vuex.mapActions(["increment"])
},


The increment method, which is now mapped to the increment action, still takes the payload that we pass in, so we can pass the payload to the commit function call in our increment action, which is then passed into the increment mutation.

We can also write an asynchronous action by returning a promise as follows:

index.js:

const store = new Vuex.Store({
  state: {
    count: 0
  },
  mutations: {
    increment(state, payload) {
      state.count += payload;
    }
  },
  getters: {
    count: state => state.count
  },
  actions: {
    increment({ commit }, payload) {
      return new Promise((resolve, reject) => {
        setTimeout(() => {
          commit("increment", payload);
          resolve();
        }, 1000);
      });
    }
  }
});

new Vue({
  el: "#app",
  store,
  methods: {
    ...Vuex.mapActions(["increment"])
  },
  computed: {
    ...Vuex.mapGetters(["count"])
  }
});


In the code above, we have:

actions: {
    increment({ commit }, payload) {
      return new Promise((resolve, reject) => {
        setTimeout(() => {
          commit("increment", payload);
          resolve();
        }, 1000);
      });
    }
}


which returns a promise that commits the increment mutation after a second.

Composing Actions

We can compose multiple actions into one action. For example, we can create an action that dispatches multiple actions as follows:

index.js

const store = new Vuex.Store({
  state: {
    dog: {},
    breeds: { message: {} }
  },
  mutations: {
    setDog(state, payload) {
      state.dog = payload;
    },
    setBreeds(state, payload) {
      state.breeds = payload;
    }
  },
  getters: {
    dog: state => state.dog,
    breeds: state => state.breeds
  },
  actions: {
    async getBreeds({ commit }) {
      const response = await fetch("https://dog.ceo/api/breeds/list/all");
      const breeds = await response.json();
      commit("setBreeds", breeds);
    },
    async getDog({ commit }) {
      const response = await fetch("https://dog.ceo/api/breeds/image/random");
      const dog = await response.json();
      commit("setDog", dog);
    },
    async getBreedsAndDog({ dispatch }) {
      await dispatch("getBreeds");
      await dispatch("getDog");
    }
  }
});

new Vue({
  el: "#app",
  store,
  methods: {
    ...Vuex.mapActions(["getBreedsAndDog"])
  },
  computed: {
    ...Vuex.mapGetters(["breeds", "dog"])
  }
});


index.html:

<!DOCTYPE html>
<html lang="en">
  <head>
    <title>App</title>
    <script src="https://cdn.jsdelivr.net/npm/vue/dist/vue.js"></script>
    <script src="https://unpkg.com/vuex"></script>
  </head>
  <body>
    <div id="app">
      <button @click="getBreedsAndDog">Get Breeds and Dog</button>
      <p>{{Object.keys(breeds.message).slice(0, 3).join(',')}}</p>
      <img :src="dog.message" />
    </div>
    <script src="./index.js"></script>
  </body>
</html>


In the code above, we have the getBreeds and getDog actions, which are actions with one mutation committed to the store.

Then we have getBreedsAndDog which is an action that dispatches the above two actions.

In index.html, we display all the states that are stored in the store.

We should retrieve the first 3 breed names and also the dog image that we got from the getBreed and getDog actions that were called by the getBreedsAndDog action.

The getBreedsAndDog action is mapped to the getBreedsAndDog method, so we can just call it to dispatch the action.

Modules

We can divide our store into modules to segregate actions, mutations, and getters.

For example, we can write two modules and use them as follows:

index.js:

const dogModule = {
  namespaced: true,
  state: {
    dog: {}
  },
  mutations: {
    setDog(state, payload) {
      state.dog = payload;
    }
  },
  getters: {
    dog: state => state.dog
  },
  actions: {
    async getDog({ commit }) {
      const response = await fetch("https://dog.ceo/api/breeds/image/random");
      const dog = await response.json();
      commit("setDog", dog);
    }
  }
};

const countModule = {
  namespaced: true,
  state: {
    count: 0
  },
  mutations: {
    increment(state) {
      state.count++;
    }
  },
  getters: {
    count: state => state.count
  }
};

const store = new Vuex.Store({
  modules: {
    dogModule,
    countModule
  }
});

new Vue({
  el: "#app",
  store,
  methods: {
    ...Vuex.mapActions("dogModule", ["getDog"]),
    ...Vuex.mapMutations("countModule", ["increment"])
  },
  computed: {
    ...Vuex.mapState({
      count: state => state.countModule.count,
      dog: state => state.dogModule.dog
    })
  }
});


index.html:

<!DOCTYPE html>
<html lang="en">
  <head>
    <title>App</title>
    <script src="https://cdn.jsdelivr.net/npm/vue/dist/vue.js"></script>
    <script src="https://unpkg.com/vuex"></script>
  </head>
  <body>
    <div id="app">
      <button @click="getDog">Get Dog</button>
      <button @click="increment">Increment</button>
      <p>{{count}}</p>
      <img :src="dog.message" />
    </div>
    <script src="./index.js"></script>
  </body>
</html>


In the code above, we defined the dogModule and countModule, which have the state, mutations, getters, and actions as before.

Then, to create our store, we write:

const store = new Vuex.Store({
  modules: {
    dogModule,
    countModule
  }
});


Then, when we map our actions and mutations, we have to specify the module as follows:

methods: {
    ...Vuex.mapActions("dogModule", ["getDog"]),
    ...Vuex.mapMutations("countModule", ["increment"])
},


Then, when we map getters, we have to write functions to get them from the right module as follows:

computed: {
    ...Vuex.mapState({
      count: state => state.countModule.count,
      dog: state => state.dogModule.dog
    })
}

Conclusion

We can store shared states in Vue apps with Vuex.

It has states to store the states, getters to get data from states, mutations to change data, and actions to run one or more mutations or other actions and also run them asynchronously.

We can map states into computed properties with mapGetters and also map mutations and actions with mapMutations and mapActions methods respectively.

Finally, we can divide our store into modules to segregate them into smaller pieces.

Before deploying your commercial or enterprise Vue apps to production, make sure you are protecting their code against reverse-engineering, abuse, and tampering.


Security in OTT Media Delivery [White Paper]

As we enter the 2020s, we will see a segment of businesses take the entertainment industry by storm: over-the-top (OTT) media services.

Recent studies estimate that the OTT market will generate revenue of $332.5 billion in 2025, growing at a CAGR of 15% from 2017. Streaming services have amassed millions of customers thanks to continuous innovation and exclusive, high-quality content.

As we witness this impressive growth, we find a business threat that is also growing: piracy. The illegal re-distribution of video content cost the industry $9.1 billion in 2019, with analysts estimating it will reach $12.5 billion by 2024.

Besides piracy, a threat to business sustainability comes from the surge in competition.

With several new providers betting on OTT media and releasing their subscription-based services, market share is set for significant fragmentation.

Providers are betting on two main strategic vectors to retain subscribers: exclusive content and customer-centered innovation.

For OTT providers, sustainability in the coming decade will be defined by decisive action for piracy prevention and customer retention.

Preventing Piracy in OTT

Piracy, a problem as old as digital media itself, is a top-of-mind concern for OTT providers. Recent technological advancements have brought forward solutions to incisively tackle piracy.

A widely adopted solution is Digital Rights Management (DRM). This licensing system allows content owners to define how and by whom their content can be accessed. Whenever the user wants to access the content, the DRM system comes into play with a series of permission and security checks that allow or deny access to (encrypted) content and the corresponding access keys.

Even though DRM is still the go-to choice to securely deliver content and avoid piracy, the fact remains that it is often not enough. Motivated attackers often find ways of leaking content. When that happens, the goal of OTT providers is to find the culprit as quickly as possible and block the respective account. The answer to this is forensic watermarking.

Forensic watermarking adds an imperceptible, unique watermark to video content. When OTT providers find the content being illegally distributed in the wild, they can read the watermark to retrieve actionable information about the leaker, such as the user ID, device ID, and IP. This enables providers to quickly block the account and contain the leak.

As watermarking solutions increasingly move to a client-side approach, a move that has serious benefits to OTT providers, such as better player performance, they are now being placed in an adversarial environment.

If this client-side watermarking agent is not properly secured, an attacker can easily tamper with the agent and ultimately bypass it, namely by reverse-engineering the agent’s exposed JavaScript code or by tampering with the DOM. This bypass means that leaked content will not be traceable, and providers may take too long to stop the leak.

Here is a solution to secure the client-side watermarking player and prevent any type of bypass or tampering: Jscrambler.

By protecting the agent’s source code and monitoring the DOM to detect and/or block modifications to the watermark, Jscrambler minimizes OTT providers’ exposure to piracy.

With a combination of DRM, client-side watermarking, and Jscrambler’s protection, OTT providers can deliver content on the Web while maximizing performance, users’ experience, and security.

Ensuring Customer Retention in OTT

Customer behavior analyses show that a top reason why users cancel their streaming subscriptions is the actual experience of using the player. Especially at a time when competition among video subscription services is surging, major providers seek to retain customers through innovation that uplifts the customer experience.

We’ve seen providers come up with disruptive solutions to handle buffering, analytics, and the user interface.

As a result of this innovation, providers go the extra mile to ensure that their proprietary logic remains protected against the prying eyes of competitors. Seeing how the majority of modern players rely on JavaScript and HTML5, the most suitable approach is JavaScript protection.

Jscrambler secures the web players of OTT providers with a combination of cutting-edge layers. These layers are deployed intelligently by the Jscrambler engine.

This tailor-made protection, which includes polymorphic obfuscation, anti-debugging, and anti-tampering features, mitigates attempts to uncover proprietary algorithms, keeping the intellectual property safe.

Looking Ahead

This enthralling peek at the OTT media delivery industry is a prime example of how Web Application Security becomes a key competitive advantage.

Piracy and customer retention are only two of the many challenges that providers in this space must consider. Another lurking threat is that of Magecart-like data breaches, especially considering that most OTT providers handle payments on their web platforms.

Still, providers in this space have a decade of growth to look forward to. As we see management understand these key security threats and identify their major role in business sustainability, providers that put security first will surely thrive.

For an in-depth analysis of this topic of security in OTT media delivery, explore our free white paper, a must-read if your company delivers media on the Web.

Jscrambler Recognized As One Of Europe’s Top Scale-ups

Today, it was announced by TNW and Adyen that Jscrambler is now part of Tech5, a community of the fastest-growing scale-ups in Europe.

This announcement follows the growing adoption of Jscrambler’s technology for JavaScript Protection and Webpage Monitoring, which is employed by some of the top 20 global banks and the top 5 OTT video providers.

Tech-Driven Growth

Code Integrity, Jscrambler’s answer to secure JavaScript-based applications, has seen immense growth during the past few years, a direct result of over a decade of continuous R&D.

Today, Jscrambler Code Integrity offers the largest and most powerful set of JavaScript code transformations, many of which are unique, like Jscrambler’s Control Flow Flattening and Self-Healing.

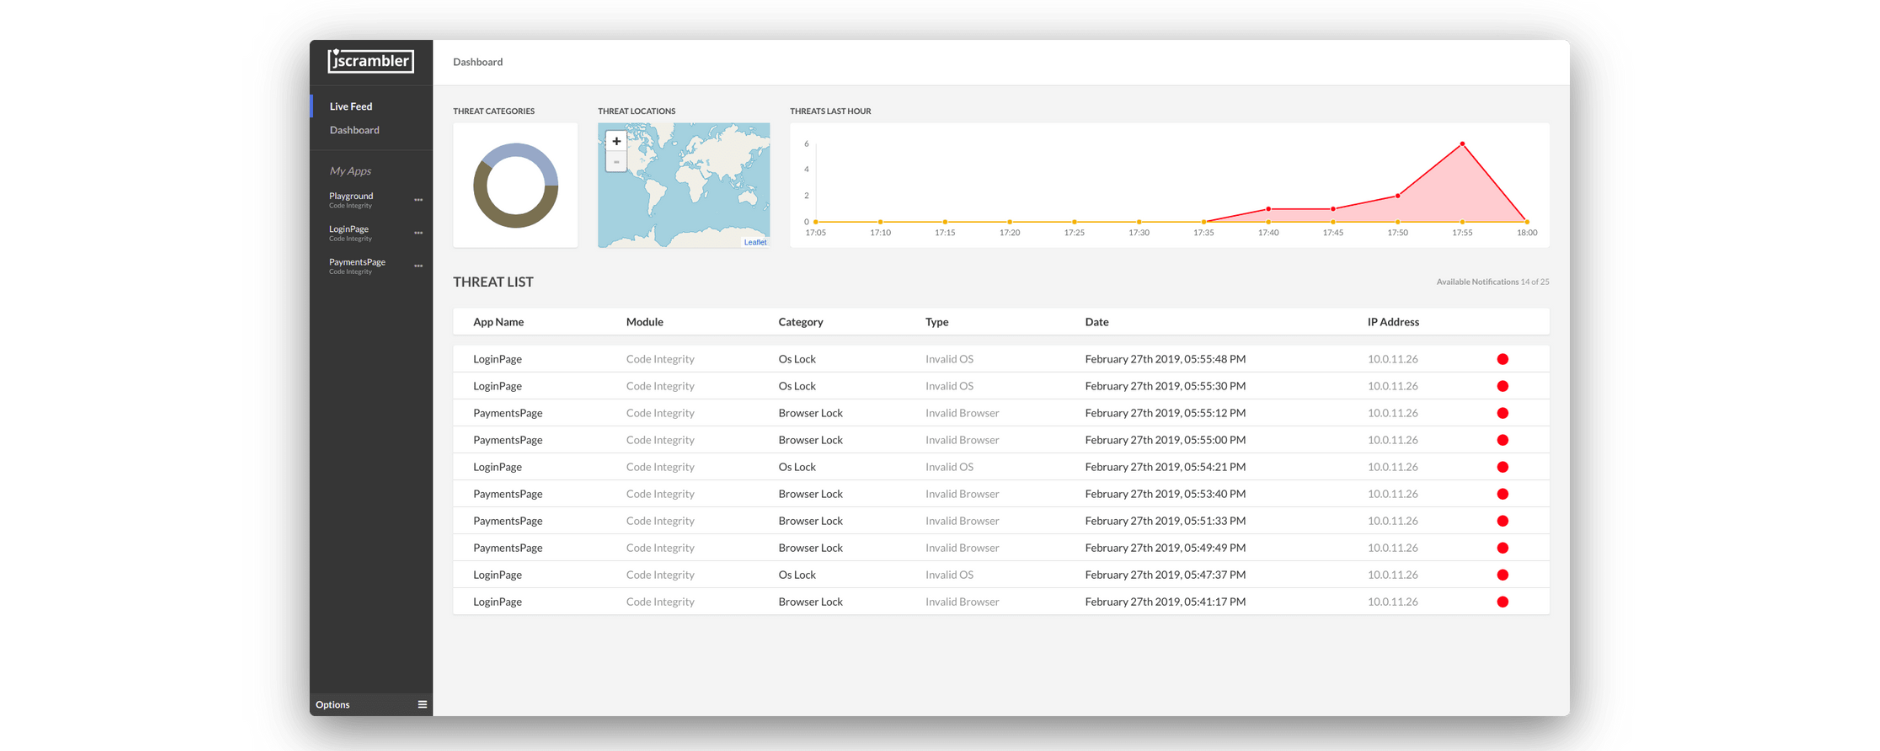
In 2019, Jscrambler introduced JavaScript Threat Monitoring, a groundbreaking feature that actively monitors and reports every attempt to tamper with protected code.
javascript-threat-monitoring-dashboard-code-integrity-product

The company’s growth has also been fueled by Webpage Integrity, a disruptive approach to stopping web supply chain attacks like Magecart.

Unlike any other solution on the market, this Webpage Monitoring approach is helping major retailers detect Magecart-like attacks in real-time and block them at their inception.

Note: If you want to learn more about stopping Magecart attacks, schedule a meeting with one of our Security Experts.

As web-based attacks grow, holistic security solutions like Jscrambler give businesses a much-needed head start in fighting attackers.

In highly regulated sectors like Banking, Jscrambler enables maximizing compliance with regulations like PSD2, GDPR, and NIST 800-53, among others.

To get started with Jscrambler, kick off your free trial or request a demo.

Best Practices for Secure Session Management in Node

Today, we will explore the best practices for secure session management in Node. Why?

In a web application, data is transferred from a browser to a server over HTTP. In modern applications, we use the HTTPS protocol, which is HTTP over TLS or SSL (secure connection), to transfer data securely.

We often encounter situations where we need to retain user state and information. However, HTTP is a stateless protocol. Sessions are used to store user information between HTTP requests.

We can use sessions to store users’ settings when they are not authenticated. Post-authentication sessions are used to identify authenticated users. Sessions fulfill a relevant role in user authentication and authorization.

Exploring Sessions

Traditionally, sessions are identifiers sent from the server and stored on the client-side. On the next request, the client sends the session token to the server. Using the identifier, the server can associate a request with a user.

Session identifiers can be stored in cookies, localStorage, and sessionStorage.

Session identifiers can be sent back to the server via cookies, URL parameters, hidden form fields, or a custom header.

Additionally, a server can accept session identifiers by multiple means. This is usually the case when a back-end is used for websites and mobile applications.

Session Identifiers

A session identifier is a token stored on the client-side. The data associated with a session identifier lies on the server.

Generally speaking, a session identifier is:

  1. Must be random;

  2. Should be stored in a cookie.


The recommended session ID must have a length of 128 bits or 16 bytes. A good pseudorandom number generator (PNRG) is recommended to generate entropy, usually 50% of ID length.

Cookies are ideal because they are sent with every request and can be secured easily. LocalStorage doesn’t have an expiration attribute, so it persists.

On the other hand, SessionStorage doesn’t persist across multiple tabs or windows and is cleared when a tab is closed. Extra client code is required to be written to handle LocalStorage or SessionStorage. Additionally, both are APIs, so theoretically, they are vulnerable to XSS.

Usually, communication between client and server should be over HTTPS.

Session identifiers should not be shared among the protocols. Sessions should be refreshed if the request is redirected.

Also, if the redirect is to HTTPS, the cookie should be set after the redirect. In cases where multiple cookies are set, the back-end should verify all cookies.

Cookies can be secured using the following attributes:

  • The Secure attribute instructs the browser to set cookies over HTTPS only. This attribute prevents MITM attacks since the transfer is over TLS.

  • The HttpOnly attribute blocks the ability to use the document.cookie object. This prevents XSS attacks from stealing the session identifier.

  • The SameSite attribute blocks the ability to send a cookie in a cross-origin request. This provides limited protection against CSRF attacks.

  • Setting Domain and Path attributes can limit the exposure of a cookie. By default, Domain should not be set, and Path should be restricted.

  • Expire and Max-Age allow us to set the persistence of a cookie.


Typically, a session library should be able to generate a unique session, refresh an existing session and revoke sessions. We will be exploring the express-session library ahead.

Enforcing Best Practices Using express-session

In Node.js apps using Express, express-session is the de facto library for managing sessions. This library offers:

  • Cookie-based Session management

  • Multiple modules for managing session stores.

  • An API to generate, regenerate, destroy, and update sessions.

  • Settings to secure cookies (Secure, HttpOnly, Expire SameSite, Max Age, Expires, Domain, Path)


We can generate a session using the following command:

app.use(session({
  secret: 'veryimportantsecret',  
}))


The secret is used to sign the cookie using the cookie-signature library. Cookies are signed using Hmac-sha256 and converted to a base64 string.

We can have multiple secrets in an array. The first secret will be used to sign the cookie. The rest will be used for verification.

app.use(session({
  secret: ['veryimportantsecret','notsoimportantsecret','highlyprobablysecret'],
}))


To use a custom session ID generator, we can use the grid parameter.

By default, uid-safe is used to generate session IDs with a byte length of 24. It’s recommended to stick to the default implementation unless there is a specific requirement to harden uuid.

app.use(session({
    secret: 'veryimportantsecret', 
    genid: function(req) {
      return genuuid() // use UUIDs for session IDs
     }
}))


The default name of the cookie is connect.sid. We can change the name using the name parameter. It’s advisable to change the name to avoid fingerprinting.

app.use(session({
  secret: ['veryimportantsecret','notsoimportantsecret','highlyprobablysecret'], 
  name: "secretname" 
}))


By default, the cookies are set to:

{ path: '/', httpOnly: true, secure: false, maxAge: null }


To harden our session cookies, we can assign the following options:

app.use(session({
  secret: ['veryimportantsecret','notsoimportantsecret','highlyprobablysecret'],  
   name: "secretname",
  cookie: {
      httpOnly: true,
      secure: true,
      sameSite: true,
      maxAge: 600000 // Time is in miliseconds
  }
}))


The caveats here are:

  • sameSite: true blocks CORS requests on cookies. This will affect the workflow of API calls and mobile applications.

  • Secure connections require HTTPS. Also, if the Node app is behind a proxy (like Nginx), we must set the proxy to true, as shown below.

app.set('trust proxy', 1)


By default, the sessions are stored in MemoryStore. This is not recommended for production use. Instead, it’s advisable to use alternative session stores for production. We have multiple options to store the data, like:

  • Databases like MySQL and MongoDB.

  • Memory stores like Redis.

  • ORM libraries like Sequelize


We will be using Redis as an example here.

npm install redis connect-redis 
const redis = require('redis');
const session = require('express-session');
let RedisStore = require('connect-redis')(session);
let redisClient = redis.createClient();

app.use(
  session({
    secret: ['veryimportantsecret','notsoimportantsecret','highlyprobablysecret'], 
     name: "secretname", 
     cookie: {
      httpOnly: true,
      secure: true,
      sameSite: true,
      maxAge: 600000 // Time is in miliseconds
  },
    store: new RedisStore({ client: redisClient ,ttl: 86400}),   
    resave: false
  })
)


The TTL (time to live) parameter is used to create an expiration date. If the Expire attribute is set on the cookie, it will override the ttl. By default, TTL is one day.

We have also set resave to false. This parameter forces the session to be saved to the session store. This parameter should be set after checking the store documentation.

The session object is associated with all routes and can be accessed on all requests.

router.get('/', function(req, res, next) {
  req.session.value = "somevalue";  
  res.render('index', { title: 'Express' });
});


Sessions should be regenerated after logins and privilege escalations. This prevents session fixation attacks. To regenerate a session, we will use the following:

req.session.regenerate(function(err) {
  // will have a new session here
})


Sessions should expire when the user logs out or times out. To destroy a session, we can use:

req.session.destroy(function(err) {
  // cannot access session here
})


While this article focuses on back-end security, you should protect your front-end as well.

Introduction to Vue Router

In this article, discover how to use the Vue Router in our Vue.js app.

To create a single-page app with Vue.js, we must add a router library to route URLs to our components. Vue.js has a Vue Router routing library to handle this routing.

Getting Started with Vue Router

We can start by including Vue and Vue Router scripts on our app’s page. Then, we have to add a div to house our Vue app. Also, we have to include the router-view component to view the route’s content.

To add links, we add router-link components with the path we want to go to. To do all that, we write the following:

index.html:

<!DOCTYPE html>
<html lang="en">
  <head>
    <title>App</title>
    <script src="https://unpkg.com/vue/dist/vue.js"></script>
    <script src="https://unpkg.com/vue-router/dist/vue-router.js"></script>
  </head>
  <body>
    <div id="app">
      <router-link to="/foo">Foo</router-link>
      <router-link to="/bar">Bar</router-link>
      <div>
        <router-view></router-view>
      </div>
    </div>
    <script src="./index.js"></script>
  </body>
</html>


In the code above, we find the script tags for Vue and Vue Router in the head tag. Then, we have the div with the ID app to house the Vue app.

The router-view shows our content.

In the div, we have the router-link components with the to prop to pass in the path we want the links to go to.

Router-Link is a component that comes with the Vue Router.

Finally, we have our index.js script file. In there, we’ll add our code for the route components and do the routing.

In index.js, we have:

const Foo = { template: "<div>foo</div>" };
const Bar = { template: "<div>bar</div>" };
const routes = [
  { path: "/foo", component: Foo },
  { path: "/bar", component: Bar }
];

const router = new VueRouter({
  routes
});

const app = new Vue({
  router,
  el: "#app"
});


In the code above, we have the Foo and Bar routes to show Foo and Bar, respectively.

Then, we use the routes array to map the components to the paths to which we want to map the routes.

Next, we created a new instance of VueRouter with an object that had our routes in it.

Then, we created a new Vue instance with the router object and an el property with the #app div we added to house our app.

Once we do all that, we should have links at the top of the page that show Foo and Bar links, respectively. When we click them, we’ll see Foo and Bar, respectively.

Dynamic Route Matching

To map routes to a dynamic URL parameter, we can add a placeholder for it by creating a name and adding a colon before it.

Then, in our Vue instance, we can watch the $route object for changes in the parameter and run code accordingly.

For instance, we can write the following code to use route parameters in our routes:

index.js:

const User = {
  template: "<div>User {{id}}</div>",
  data() {
    return {
      id: undefined
    };
  },
  watch: {
    $route(to, from) {
      this.id = to.params.id;
    }
  }
};

const routes = [
    { path: "/user/:id", component: User }
];

const router = new VueRouter({
  routes
});

const app = new Vue({
  router,
  el: "#app"
});


index.html:

<!DOCTYPE html>
<html lang="en">
  <head>
    <title>App</title>
    <script src="https://unpkg.com/vue/dist/vue.js"></script>
    <script src="https://unpkg.com/vue-router/dist/vue-router.js"></script>
  </head>
  <body>
    <div id="app">
      <router-link to="/user/1">User 1</router-link>
      <router-link to="/user/2">User 2</router-link>
      <router-view></router-view>
    </div>
    <script src="./index.js"></script>
  </body>
</html>


In the code above, we have:

watch: {
    $route(to, from) {
      this.id = to.params.id;
    }
 }


to watch for URL parameter changes. We get the :id route parameter by using to.params.id.

Then, we set that to this.id so that we can use it in our template, which is:

<div>User {{id}}</div>


To define the routes, we have:

const routes = [
    { path: "/user/:id", component: User }
];


The :id part of the string is the URL parameter placeholder.

In index.html, we have two router-link components:

<router-link to="/user/1">User 1</router-link>
<router-link to="/user/2">User 2</router-link>


When we click them, we should see the ID in our template update as the :id route parameter is changing.

Catch-all/404 Not Found Route

We can use the * sign as a wildcard character.

To use it, we can write:

index.html

<!DOCTYPE html>
<html lang="en">
  <head>
    <title>App</title>
    <script src="https://unpkg.com/vue/dist/vue.js"></script>
    <script src="https://unpkg.com/vue-router/dist/vue-router.js"></script>
  </head>
  <body>
    <div id="app">
      <router-view></router-view>
    </div>
    <script src="./index.js"></script>
  </body>
</html>


index.js

const NotFound = {
  template: "<div>not found</div>"
};

const routes = [{ path: "*", component: NotFound }];

const router = new VueRouter({
  routes
});

const app = new Vue({
  router,
  el: "#app"
});


In the code above, we have the NotFound component, which is the component for our catch-all route since we have:

{ path: "*", component: NotFound }


in the routes array.

Therefore, when we go to any URL, we’ll see ‘not found’ displayed.

Nested Routes

We can nest routes by adding a children’s property to our route entries with our child routes.

For example, we can write the following to create our nested routes:

index.js:

const User = {
  template: `<div>
    User {{id}}
    <router-view></router-view>
  </div>`,
  data() {
    return {
      id: undefined
    };
  },
  watch: {
    $route(to, from) {
      this.id = to.params.id;
    }
  }
};

const Profile = {
  template: `<div>Profile</div>`
};

const routes = [
  {
    path: "/user/:id",
    component: User,
    children: [
      {
        path: "profile",
        component: Profile
      }
    ]
  }
];

const router = new VueRouter({
  routes
});

const app = new Vue({
  router,
  el: "#app"
});


index.html:

<!DOCTYPE html>
<html lang="en">
  <head>
    <title>App</title>
    <script src="https://unpkg.com/vue/dist/vue.js"></script>
    <script src="https://unpkg.com/vue-router/dist/vue-router.js"></script>
  </head>
  <body>
    <div id="app">
      <router-link to="/user/1">User</router-link>
      <router-link to="/user/1/profile">Profile</router-link>
      <router-view></router-view>
    </div>
    <script src="./index.js"></script>
  </body>
</html>


The difference between the nested route example above and the earlier examples is that we have the following route definition:

const routes = [
  {
    path: "/user/:id",
    component: User,
    children: [
      {
        path: "profile",
        component: Profile
      }
    ]
  }
];


The children’s property is used to nest our child routes.

In the template for the User component, we have the router-view added as follows to display items in child routes:

<div>
   User {{id}}
   <router-view></router-view>
</div>


We also have the following router-link components:

<router-link to="/user/1">User</router-link>
<router-link to="/user/1/profile">Profile</router-link>

Multiple Router Views

To have multiple router-view components in the same app, we have to name them.

We can define our routes as follows and put them in their own router-view:

index.js:

const Foo = {
  template: `<div>foo</div>`
};

const Bar = {
  template: `<div>bar</div>`
};

const Baz = {
  template: `<div>baz</div>`
};

const router = new VueRouter({
  routes: [
    {
      path: "/",
      components: {
        default: Foo,
        a: Bar,
        b: Baz
      }
    }
  ]
});

const app = new Vue({
  router,
  el: "#app"
});


index.html:

<!DOCTYPE html>
<html lang="en">
  <head>
    <title>App</title>
    <script src="https://unpkg.com/vue/dist/vue.js"></script>
    <script src="https://unpkg.com/vue-router/dist/vue-router.js"></script>
  </head>
  <body>
    <div id="app">
      <router-view></router-view>
      <router-view name="a"></router-view>
      <router-view name="b"></router-view>
    </div>
    <script src="./index.js"></script>
  </body>
</html>

In the code above, we have the router-view named a and the router-view named b defined as in index.html:

<router-view></router-view>
<router-view name="a"></router-view>
<router-view name="b"></router-view>


Then, in our route definition in index.js, we have:

components: {
    default: Foo,
    a: Bar,
    b: Baz
}


To map the router-view with no name to the Foo component, the router-view to the Bar component, and the b router-view to the Baz component.

Then we should see:

foo
bar
baz


displayed on the screen.

From the official Vue Router documents:

Navigation guards provided by vue-router are primarily used to guard navigations, either by redirecting them or canceling them.

As such, we can add navigation guards to our routes to watch for route changes and do something before it’s complete.

Enter/leave navigation guards won’t trigger during params or query changes.

We can define a global before guard by attaching a route change listener to our router.

To add a global navigation guard, we can write the following:

index.js:

const Foo = {
  template: `<div>foo</div>`
};

const Bar = {
  template: `<div>bar</div>`
};

const Login = {
  template: `<div>login</div>`
};

const router = new VueRouter({
  routes: [
    {
      path: "/foo",
      component: Foo
    },
    {
      path: "/bar",
      component: Bar
    },
    {
      path: "/login",
      component: Login
    }
  ]
});

router.beforeEach((to, from, next) => {
  if (!localStorage.getItem("authToken") && to.path !== "/login") {
    return next("/login");
  }
  next();
});

const app = new Vue({
  router,
  el: "#app"
});


index.html:

<!DOCTYPE html>
<html lang="en">
  <head>
    <title>App</title>
    <script src="https://unpkg.com/vue/dist/vue.js"></script>
    <script src="https://unpkg.com/vue-router/dist/vue-router.js"></script>
  </head>
  <body>
    <div id="app">
      <router-link to="/foo">Foo</router-link>
      <router-link to="/bar">Bar</router-link>
      <router-view></router-view>
    </div>
    <script src="./index.js"></script>
  </body>
</html>


In the code above, we have:

router.beforeEach((to, from, next) => {
  if (!localStorage.getItem("authToken") && to.path !== "/login") {
    return next("/login");
  }
  next();
});


which is our global navigation guard that runs before navigation begins, as indicated by the beforeEach call.

We check that the path that we’re going to isn’t /login with:

to.path !== "/login"


Then, if localStorage.getItem(“authToken”) is false, we go to the /login route by calling next(‘./login). Otherwise, we proceed by calling next().

Per-Route Guard

In a similar way, we can define per-route guards as follows:

const router = new VueRouter({
  routes: [
    {
      path: '/foo',
      component: Foo,
      beforeEnter: (to, from, next) => {
        // ...
      }
    }
  ]
})


These are called before navigation is done and only run when we try to go to the /foo route.

In-Component Guards

We can define in-components in our component as follows:

const Foo = {
  template: `...`,
  beforeRouteEnter (to, from, next) {
    //...
  },
  beforeRouteUpdate (to, from, next) {
    //...
  },
  beforeRouteLeave (to, from, next) {
    //...
  }
}


We have three guards. They are:

  1. beforeRouteEnter: It’s called before the route renders the component

  2. beforeRouteUpdate: is called when a route that renders the component has changed, including parameter changes.

  3. *beforeRouteLeave: is called when the rendered route is about to be navigated away from.

Transitions

We can add transition components like any other component to add transitions to router-view.

To add transitions to a Vue app, we can use the transition component and some simple CSS:

styles.css:

.fade-enter-active,
.fade-leave-active {
  transition: opacity 0.9s;
}
.fade-enter,
.fade-leave-to {
  opacity: 0;
}


index.js:

const Foo = {
  template: `<div>foo</div>`
};

const Bar = {
  template: `<div>bar</div>`
};

const router = new VueRouter({
  routes: [
    {
      path: "/foo",
      component: Foo
    },
    {
      path: "/bar",
      component: Bar
    }
  ]
});

const app = new Vue({
  router,
  el: "#app"
});


index.html:

<!DOCTYPE html>
<html lang="en">
  <head>
    <title>App</title>
    <script src="https://unpkg.com/vue/dist/vue.js"></script>
    <script src="https://unpkg.com/vue-router/dist/vue-router.js"></script>
    <link rel="stylesheet" href="./styles.css" />
  </head>
  <body>
    <div id="app">
      <router-link to="/foo">Foo</router-link>
      <router-link to="/bar">Bar</router-link>
      <transition name="fade">
        <router-view></router-view>
      </transition>
    </div>
    <script src="./index.js"></script>
  </body>
</html>


In the code above, we added the styles in styles.css to create our CSS route transition effects. We just changed the opacity for a short moment to add the fade effect.

Then, we added the transition component with the name attribute set to fade so that we could use the classes with the fade-prefix in styles.css to style the transition effects.

In the end, when we click on the router-link, we’ll see the fade effect.

Conclusion

We can use Vue Router to map URL paths to components.

To get route parameters, we watch the $route object in our components.

We can also add nested routes by adding a child property with nested routes. Also, we can add a components property to our route and name our router-view to add multiple router-view.

To intercept navigation and do something, we can add navigation guards for various stages of navigation.

Finally, we can use the transition component with some CSS to create route transition effects.

Before deploying your commercial or enterprise Vue apps to production, make sure you are protecting their code against reverse-engineering, abuse, and tampering.
Svelte vs. React: Differences When Building the Same Web App

Svelte vs. React: React is a popular JavaScript library for building user interfaces, while Svelte.js is a relatively new library for achieving the same things but with a different approach.

Svelte borrows some ideas from React and Vue.js but brings a specific approach to efficiency and performance. It gained momentum following the 2019 State of JavaScript survey, which awarded Svelte the Prediction Award.

Svelte is more of a compiler than a library. It runs at build time, compiling your components into plain JavaScript-efficient code.

In this article, we will build a simple example step-by-step using both tools.

Prerequisites

Start with the prerequisites needed for working with both React and Svelte.

  • Both libraries are based on JavaScript, so familiarity with the language is required alongside HTML and CSS.

  • You need to have both Node 8+ and npm installed on your machine. You can use nvm (macOS or Linux) or nvm-windows to install and switch between Node versions on your system.

Step 1: Installing React and Svelte

Let’s install the create-react-app tool and degit for initializing React and Svelte projects.

Open a terminal and run the following commands:

npm install -g create-react-app
npm install -g degit


At the time of this writing, this will install create-react-app v3.3.0 and degit v2.2.2.

As we see, both React and Svelte have easy-to-install tools for quickly scaffolding new projects without the hassle of configuring any underlying build systems or tools.

Step 2: Initializing React and Svelte Projects

Next, we’ll proceed by initializing both the React and Svelte projects.

Head back to your terminal and initialize a React project using the following command:

create-react-app reactnewsapp


Next, navigate to your project’s folder and serve it using the following commands:

cd reactnewsapp
npm start


Your app will be available at http://localhost:3000/.

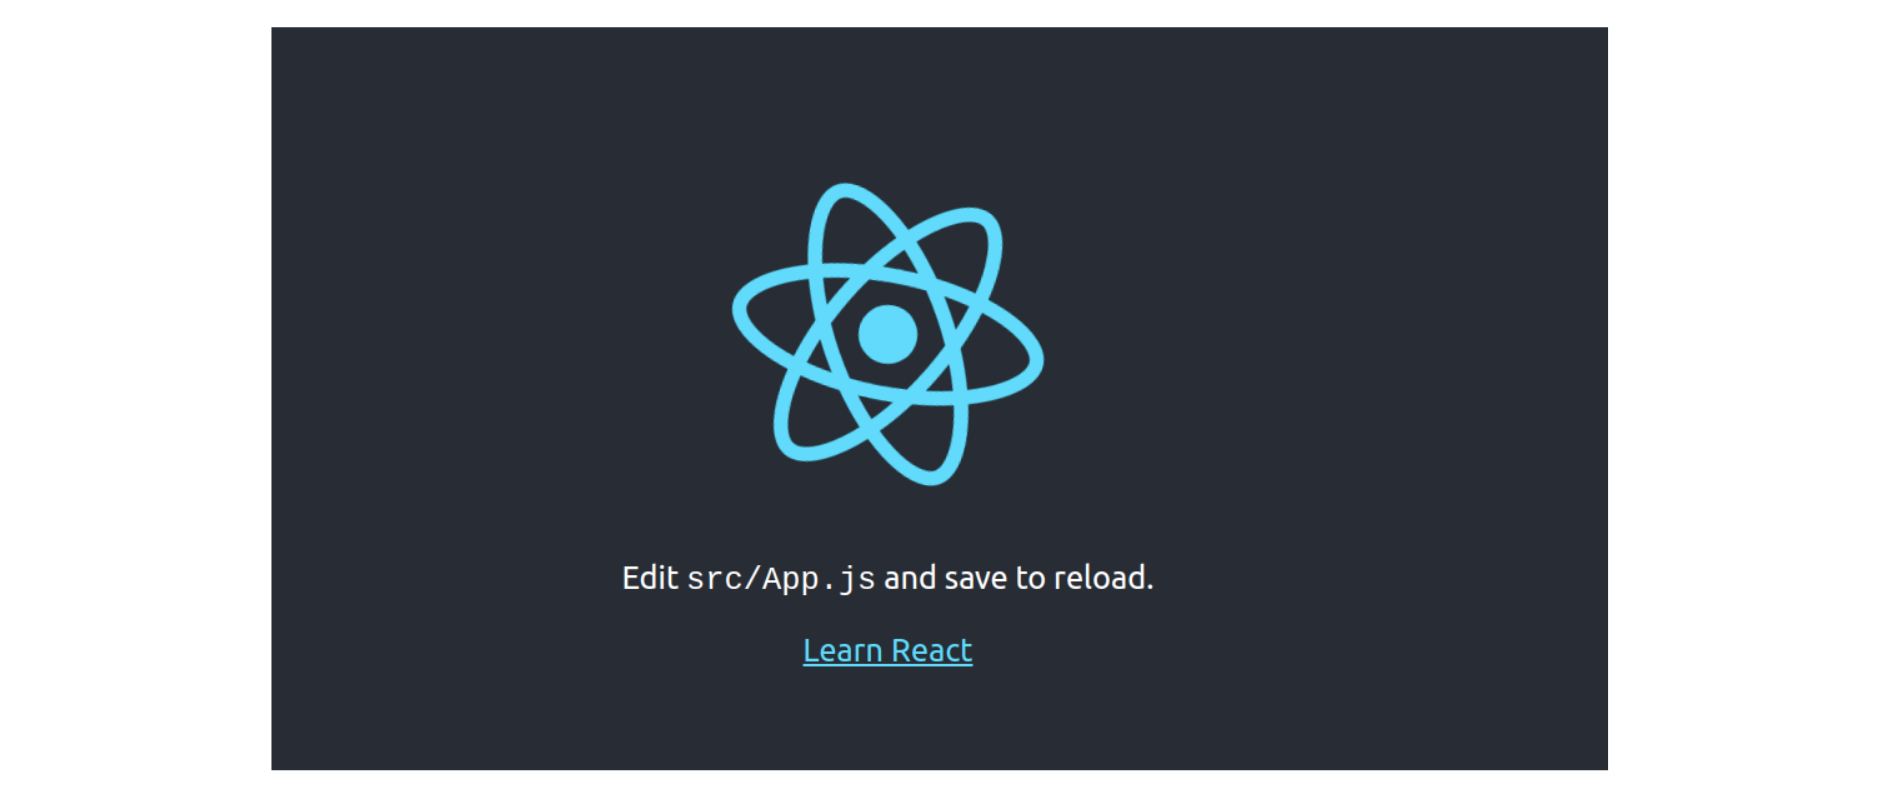
This is a screenshot of what the app should look like right now:
jscrambler-blog-svelte-vs-react-create-react-app

Next, let’s initialize a Svelte app using the following command:

npx degit sveltejs/template sveltenewsapp


Next, navigate to your project’s folder, install the dependencies, and run the development server as follows:

cd sveltenewsapp
npm install
npm run dev 


You can access your app from http://localhost:5000/, and it should look like this:
jscrambler-blog-svelte-vs-react-svelte-app-hello-world-message

Step 3: Understanding and Using Components

In modern front-end web development, a component refers to a reusable piece of code that controls a part of the app’s user interface.

In terms of code, it’s made of a JavaScript class or function, HTML (optionally) for rendering the view, and CSS for styling the view.

Components are the building blocks of both React and Svelte applications.

In React, you create a component by declaring a class that extends React.Component, inside a typical JS file, that provides features for life-cycle events and states.

You can also use functions to create components and hooks to access state and replace life-cycle events in functional components.

In Svelte, you create a component by creating .svelte files, which contain a <script> tag, a <style> tag, and some markup, but all three sections are optional. They are more similar to .vue files in Vue.js.

Go to the Svelte project and open the src/App.svelte file, which has the following code:

<script>
	export let name;
</script>

<main>
	<h1>Hello {name}!</h1>
	<p>Visit the <a href="https://svelte.dev/tutorial">Svelte tutorial</a> to learn how to build Svelte apps.</p>
</main>

<style>
	main {
		text-align: center;
		padding: 1em;
		max-width: 240px;
		margin: 0 auto;
	}

	h1 {
		color: #ff3e00;
		text-transform: uppercase;
		font-size: 4em;
		font-weight: 100;
	}

	@media (min-width: 640px) {
		main {
			max-width: none;
		}
	}
</style>


You can also see that the component exports a name variable with the export keyword. This is how Svelte declares properties used to pass data from one component to its children.

Note: This is not how export works in JavaScript modules. This syntax is specific to Svelte.

Since our app is small, let’s keep it simple and use the existing components to implement our functionality.

Step 4: Fetching and Displaying Data

Next, we’ll see how to fetch and iterate over data in both React and Svelte.js.

Let’s start with React. go to the src/App.js file and update it as follows:

import React from 'react';
import logo from './logo.svg';
import './App.css';

function App() {
  const apiKEY = "<YOUR-API-KEY>";
  const dataUrl = `https://newsapi.org/v2/everything?q=javascript&sortBy=publishedAt&apiKey=${apiKEY}`;
  
  const [items, setItems] = React.useState([]);

  const fetchData = async () => {

    
    	const response = await fetch(dataUrl);
    	const data = await response.json();
		  console.log(data);
      setItems(data["articles"]);
      
	
  };

  
  React.useEffect(() => {

    fetchData();

  }, []);


  return (
  <>
    <h1>
      Daily News
    </h1>
    <div className="container">
      
          {
            items.map(item => {
              
              return (
                			<div className="card">
                      <img src= { item.urlToImage } />
                      <div className="card-body">
                        <h3>{item.title}</h3>
                        <p> {item.description} </p>
                        <a href= { item.url } >Read</a>
                      </div>
                    </div>
              );
            })
          }
    </div>
    </>
  );
}

export default App;

If you’re following this tutorial, don’t forget to get your own API key from the News API website.

Open src/App.css and add the following CSS styles:

h1 {
	color: purple;
	font-family: 'kalam';
}
.container {
	display: grid;
	grid-template-columns: repeat(auto-fill, minmax(305px, 1fr));
	grid-gap: 15px;
}
.container > .card img {
	max-width: 100%;
}


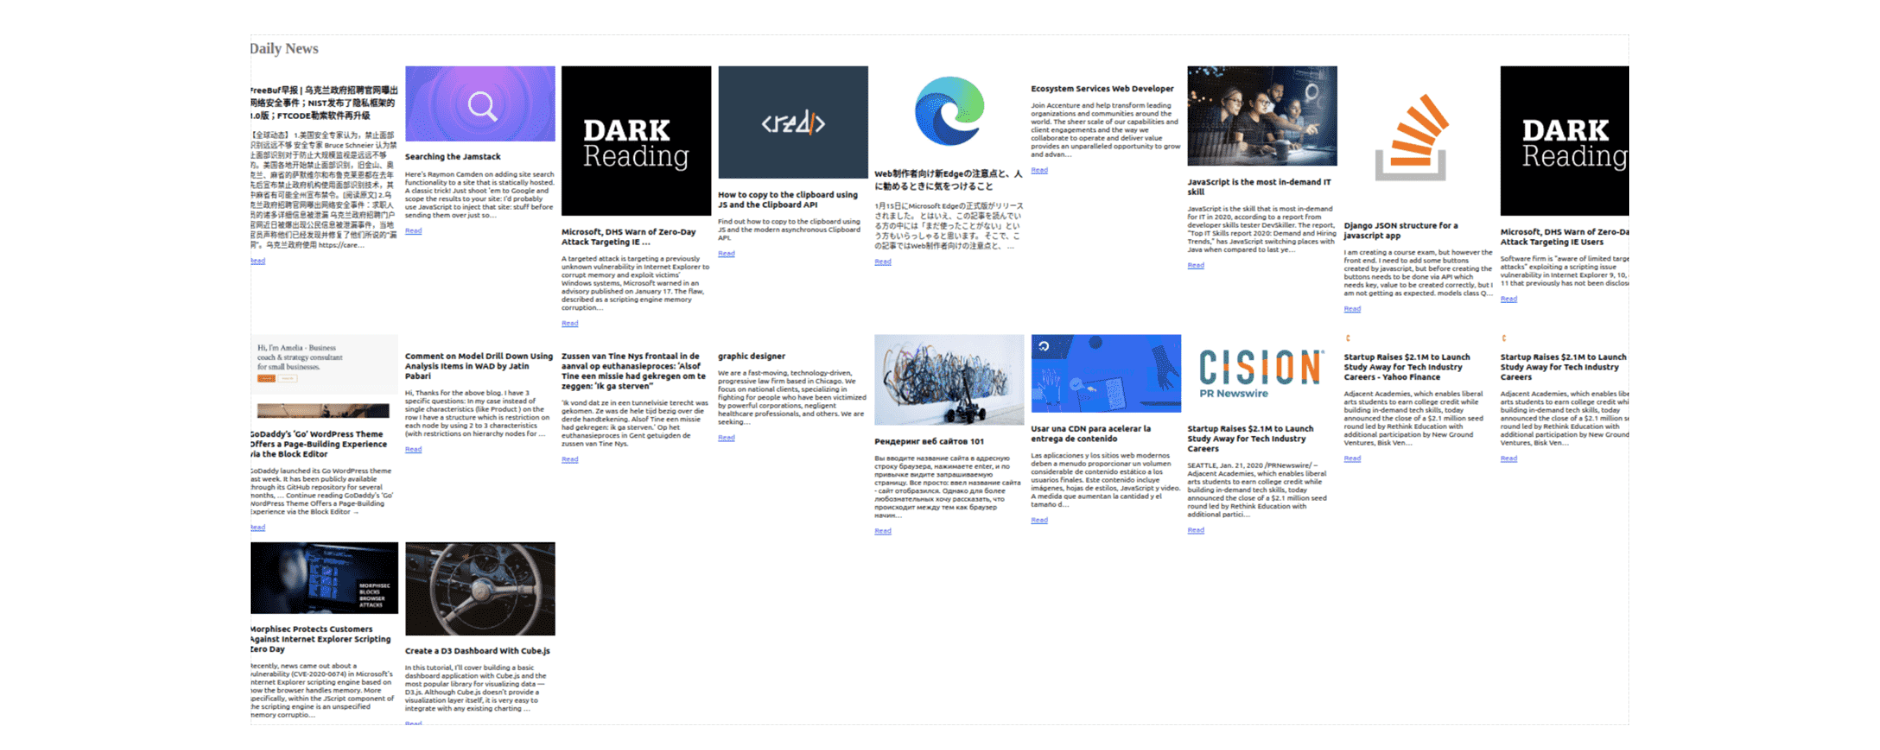
Returning to your web browser, you should see an interface similar to this:
jscrambler-blog-svelte-vs-react-news-app-example

Now, let’s build the same interface with Svelte. Open the src/App.svelte file.

Next, in the <script> tag, import the onMount() method from “svelte” and define the apiKEY, items, and dataUrl variables, which will hold the news API key, the fetched news articles, and the endpoint that provides data:

<script>
	import { onMount } from "svelte";
    
	const apiKEY = "<YOUR-API-KEY>";
	const dataUrl = `https://newsapi.org/v2/everything?q=javascript&sortBy=publishedAt&apiKey=${apiKEY}`;
    let items = [];
	const fetchData = async () => {

    
    	const response = await fetch(dataUrl);
    	const data = await response.json();
		console.log(data);
    	items = data["articles"];
    };
    
	onMount(fetchData());
</script>


Next, add the following markup just below the closing </script> tag:

<h1>
Daily News
</h1>

<div class="container">

		{#each items as item}
			<div class="card">
				<img src="{item.urlToImage}">
				<div class="card-body">
					<h3>{item.title}</h3>
					<p> {item.description} </p>
					<a href="{item.url}">Read</a>
				</div>
			</div>
		{/each}

</div>


Finally, add the styles below:

<style>
h1 {
	color: purple;
	font-family: 'kalam';
}
.container {
	display: grid;
	grid-template-columns: repeat(auto-fill, minmax(305px, 1fr));
	grid-gap: 15px;
}
.container > .card img {
	max-width: 100%;
}
</style>


In both React and Svelte, we declared the apiKEY and dataUrl variables to hold the API key and the URL of our API.

Next, in React, we created an item’s state variable using the useState hook, but in Svelte, we simply defined the state variable using the typical JS let keyword because, in Svelte, variables are reactive states by default.

In both libraries, when the state changes, the component will re-render itself, except that in Svelte we don’t need to use any special method to create a reactive state.

Next, in both examples, we defined an async fetchData() method that simply invokes the JavaScript Fetch API to fetch data from the third-party endpoint. When we receive that, in React, we need to use the setItems() method returned from the useState() hook to assign the data to the items array. But in the case of Svelte, we simply used the assignment operator in JavaScript.

Next, In React, we used the useEffect() hook to call our fetchData() method, which is used to perform any side effects in our components. Equivalently, we used the onMount() life-cycle method in Svelte to call the method when the component is mounted.

Next, we displayed the data in React using the built-in JS map() method inside the JSX syntax, which is a syntax extension to JavaScript used to describe the UI in React.

This is how React allows you to use the display markup written in HTML inside the same JS file holding the component code.

In Svelte, we use the same file, but the HTML code and JS code are more separate, and we can also access the variables defined in the JS code inside the HTML code.

We use each block to iterate over a list/array of data in Svelte.

You can learn about everything that Svelte can do on the official documents.

Step 5: Building Both Apps for Production

You can build your React and Svelte apps for production in easy steps.

Simply go to your terminal and run the following command for React:

npm run build


This will create a build folder with static content that you can host on your server.

Next, run the same command in your Svelte app, which will create a public/build folder with your static files.

And that’s it! We’ve just created the same Web App with React and Svelte.

Conclusion

We have seen that both React and Svelte use the concept of components with states, life-cycle methods, and props, but in slightly different ways. And both libraries provide useful tools to quickly scaffold and work on projects.

However, keep in mind that behind the scenes they use different approaches: Svelte is actually a build-time compiler, while React is a library and run-time that make use of a virtual DOM.

Regardless of the library/framework you’re using to develop web apps, don’t forget that you should always protect their source code when you’re building enterprise or commercial apps.

Check out our guide for protecting React apps and our tutorial on how to use the CLI to integrate Jscrambler.

Introduction to Vue

What is Vue?

Vue is a progressive front-end framework that can be easily added to an existing app. We can also make a single-page app from it. This means we can use it to add new functionality to existing apps or to create new ones.

It’s a component-based framework, meaning we build apps with Vue by nesting components and passing data between them.

Getting Started

Let’s start with a script tag to add the Vue.js framework to our code.

There’s a development version of the framework, which we can add by writing:

<script src="https://cdn.jsdelivr.net/npm/vue/dist/vue.js"></script>


The development version isn’t minified. Thus, it shouldn’t be used in production.

Add the production version by writing:

<script src="https://cdn.jsdelivr.net/npm/vue"></script>

Creating our First Vue App

We can begin by creating a project folder. Then, add an index.html and an index.js file to hold our HTML and JavaScript code, respectively.

Then, in index.js, we have to create a new Vue instance, which is the entry point for our Vue app.

To do this, we can write the following code in index.js:

new Vue({
  el: "#app",
  data: {
    message: "Hello"
  }
});


In the code above, we create a new instance of Vue by passing in an object with various options.

The el property tells Vue to put our app inside a div element with the ID app.

The data property has the initial data, which we can use in templates.

Then, in index.html, we write the following code:

<!DOCTYPE html>
<html lang="en">
  <head>
    <script src="https://cdn.jsdelivr.net/npm/vue/dist/vue.js"></script>
    <title>App</title>
  </head>
  <body>
    <div id="app">
      {{message}}
    </div>
    <script src="index.js"></script>
  </body>
</html>


The HTML code above has the script tags for the Vue framework located at the top and another script tag for our code located at the bottom.

In the div element with the ID app, we added the double curly braces to display the string ‘hello’ from data.message in index.js.

The automatic updating of the template’s data from the Vue instance is called data binding.

Data can also go from the template back to the Vue instance, as we will see later.

At this point, we should see the following on the screen when we load the browser:

Hello


In Vue.js, any valid JavaScript expression can be placed between the double curly braces.

Some examples of this are:

Example 1

{{ num + 1 }}


Example 2

{{ messages.reverse() }}

Conditional Rendering

We can conditionally render items on the screen by using the v-if directive. Directives are Vue codes we can apply to make an element do something.

For example, we can write the following code:

index.js:

new Vue({
  el: "#app",
  data: {
    message: "Hello"
  }
});


index.html:

<p v-if="Math.random() > 0.5">
  {{message}}
</p>
<p v-else>
  No Message
</p>


Then, when we load the browser or refresh it, we see that Hello will be displayed sometimes since it’s only displayed when Math.random() returns something bigger than 0.5.

The v-else directive is for displaying something if the condition in v-if is false. In the code above, if Math.random() returns some number less than 0.5, we will see No Message.

Accepting Inputs

A Vue app can take input via the v-model directive. This directive accepts a variable as the value.

The v-model gets the input and sets it to the data in the Vue instance. It’ll also get the data from the Vue instance and display it on the template. We call this 2-way binding since the data is automatically set, and the data already set is also passed back to the template.

For example, if we have the following code:

index.js:

new Vue({
  el: "#app",
  data: {
    message: "Hello"
  }
});
<input v-model="message" />
<p>{{message}}</p>


When the page loads, we see the word ‘Hello’ in the input element. This happens because the value of data.message is sent from the Vue instance to the input by the v-model directive.

Then, when we type something in the input, it’ll be displayed in the p element below it. This is because the data typed into the input element is sent to the Vue instance that we created in index.js

The data we typed in is set in data.message in the object that we passed into the new Vue.

Handling Events

JavaScript events must be handled for the app to properly react when the user acts.

Vue makes this easy by providing the v-on directive. @ is shorthand for v-on. For example, v-on:click is the same as @click. To handle user click events, we can use v-on:click=”onClick”. This calls the onClick method in the object that we passed into the Vue instance when the user clicks whatever has this directive applied.

The click in v-on:click is called an argument. This is because we can replace click with other event names that we define or are built into the browser.

Using this knowledge, we can create a button that pops up a message as follows:

index.js:

new Vue({
  el: "#app",
  methods: {
    onClick() {
      alert("Hello");
    }
  }
});
<div id="app">
    <button v-on:click="onClick">Click Me</button>
</div>


When we click the Click Me button, our code calls the onClick method because we have v-on:click=”onClick” in the template. Anything in the object can be called from the template.

Therefore, we should see an alert box that says ‘Hello’ pop up when we click the Click Me button.

Displaying Collections of Data

We can display collections of data easily with the v-for directive. It works with arrays and objects.

For example, it enables us to display items from an array as a list as follows:

index.js:

new Vue({
  el: "#app",
  data: {
    persons: [{ name: "Mary" }, { name: "Phil" }, { name: "Jane" }]
  }
});


index.html:

<div id="app">
    <ul>
        <li v-for="person of persons">{{person.name}}</li>
    </ul>
</div>


The code v-for=”person of persons” will loop through the data.persons array in index.js and display all the items by getting each entry’s name property and then displaying the item in a li element. This is because we added v-for=”person of persons” in a li element.

Also, v-for=”person of persons” and v-for=”person in persons” are the same.

In the end, we should see:

Mary
Phil
Jane


We can also use v-for to display the key-value pairs of an object as follows:

index.js:

new Vue({
  el: "#app",
  data: {
    obj: {
      foo: "a",
      bar: "b",
      baz: "c"
    }
  }
});


index.html:

<div id="app">
    <ul>
        <li v-for="(value, name) in obj">{{name}} - {{value}}</li>
    </ul>
</div>


The key-value pairs from the data.obj are displayed in li elements:

So we get:

foo - a
bar - b
baz - c

Creating Components

Vue is useful because it lets us divide up our app into components.

To create a simple component, we can use the Vue. component method as follows:

index.js:

Vue.component("custom-input", {
  data() {
    return {
      message: "foo"
    };
  },
  methods: {
    submit() {
      alert(this.message);
    }
  },
  template: `
    <div>
      <input v-model='message'>
      <p>{{message}}</p>
    </div>
  `
});
new Vue({
  el: "#app"
});


index.html:

<div id="app">
    <custom-input></custom-input>
</div>


In the code above, we created a component that’s available everywhere by calling the Vue.component method with the name of the component as the first argument.

The second argument is the options object for creating the component. It’s slightly different from what we have in the object that we passed in to create the Vue instance.

The data property is a function instead of an object. This way, the state won’t be exposed to the outside.

Methods and templates are the same as the ones we set in the object that we use to create the Vue instance.

In index.html, we reference our custom-input component by writing:

<div id="app">
  <custom-input></custom-input>
</div>


Note that we can only reference components inside the element that we render our Vue app in. In this case, it would be the div with the ID app. We can also reference components in another component’s template or recursively in its own template.

Conclusion

Vue is a component-based framework that we can use to create front-end apps in a clean and expressive way.

It has built-in directives for model binding, conditional rendering, and rendering list of items.

Hopefully, this tutorial has helped you quickly understand the basic aspects of Vue and motivated you to start building something unique.

Before deploying your commercial or enterprise Vue apps to production, make sure you are protecting their code against reverse engineering, abuse, and tampering.

How To Protect Your Vue.js Application With Jscrambler

Vue.js is a progressive framework for building user interfaces whose core functionality revolves around the view layer, making it easy to integrate into existing projects. Thanks to modern tools and extensive library support, Vue can power advanced applications and is one of the top three JavaScript front-end frameworks.

In our previous blog posts, we have shown several examples of building apps with Vue, namely a file-sharing service and a CRUD app.

One thing that all JavaScript apps have in common, regardless of the framework they use, is that JavaScript code is exposed to attacks by default.

See how to protect a Vue.js application with Jscrambler by integrating it with your build process. The two most common tools used to build Vue.js apps are the Vue CLI and webpack. Therefore, we will explore how to integrate Jscrambler into each case.

Configuring Jscrambler

Regardless of which build tool you use in your Vue project, a common step is configuring Jscrambler properly.

If you haven’t created a Jscrambler account yet, be sure to do so before moving forward.

All of Jscrambler’s configurations will reside inside a single file:.jscramblerrc. We will create this file to specify which transformations we wish to use.

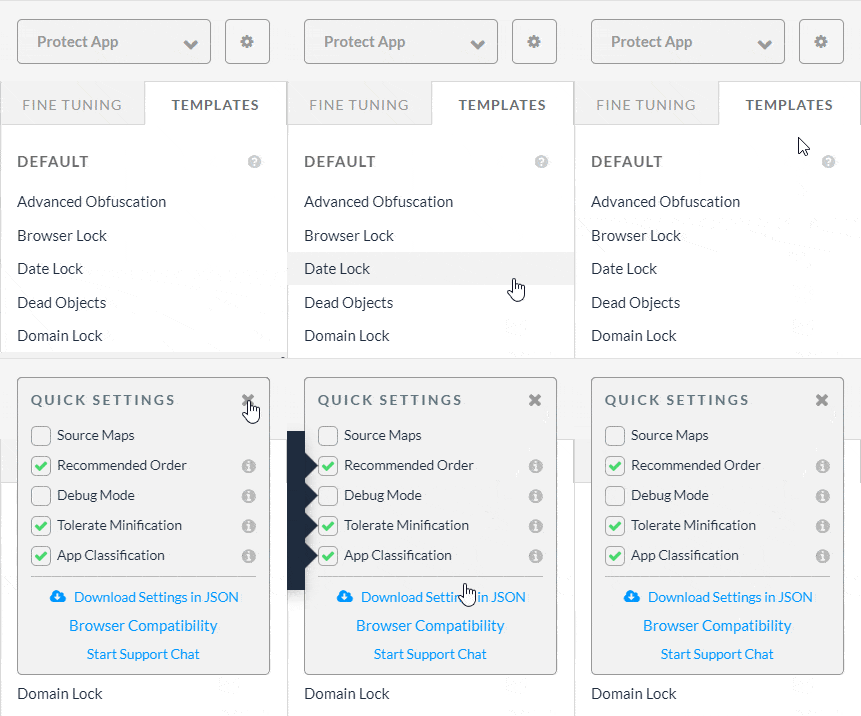
The quickest way to achieve this is via the Jscrambler Web App. Once there, create a new app.

In the Application Modes tab, select the Language Specifications and application type. Next, select the transformations you want (check the Templates and Fine-Tuning tabs). In this tutorial, we’ll be selecting the Obfuscation template. If you need help with these steps, please refer to our guide on how to use the CLI.

Now, download a JSON file with all these configurations, which will be used only for quickly getting the required settings.

Download Jscrambler JSON

Create a new file named .jscramblerrc. Open the jscrambler.json file you downloaded and copy all its contents to the .jscramblerrc file.

You will find that the fields accessKey, secretKey, and applicationId are already filled since we generated the file on the Jscrambler Web App. If you wish to retrieve them manually, refer to our guide about making your first protection request.

The params section of .jscramblerrc specifies the transformations that will be used to protect your Vue app. These transformations can be hand-picked by you by selecting them in the Web App or setting them manually.

We will go back to this file later on; we will place it in the root folder of our Vue projects, and it will be configured differently depending on whether you’re using vue-cli or webpack to build your app.

Integrating Jscrambler with vue-cli

Setting Up an Example App

To demonstrate this integration, we’ll use an example Vue app, vue-realworld-example-app, and protect it using Jscrambler.

Clone the app from GitHub:

git clone https://github.com/JscramblerBlog/vue-realworld-example-app.git


Now, install the required dependencies:

cd vue-realworld-example-app
npm i


And we’re ready to run our cloned app to check if everything looks right:

npm run serve


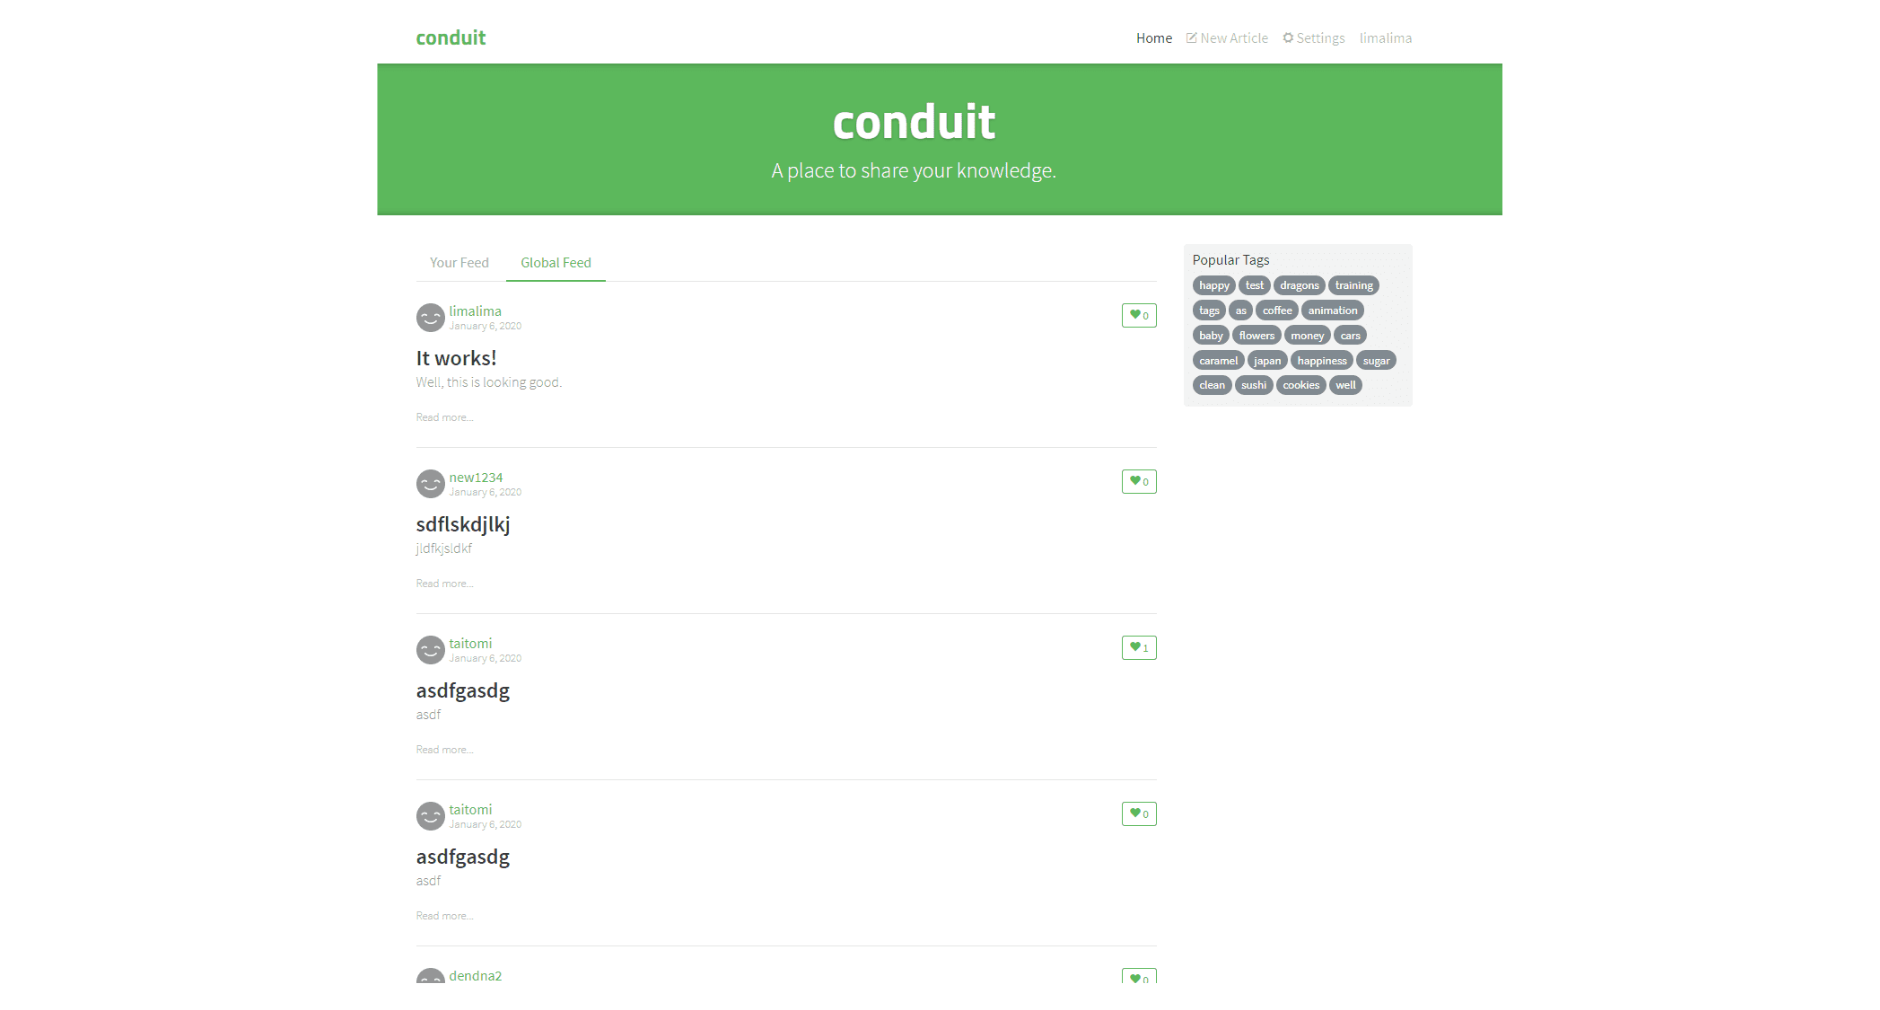
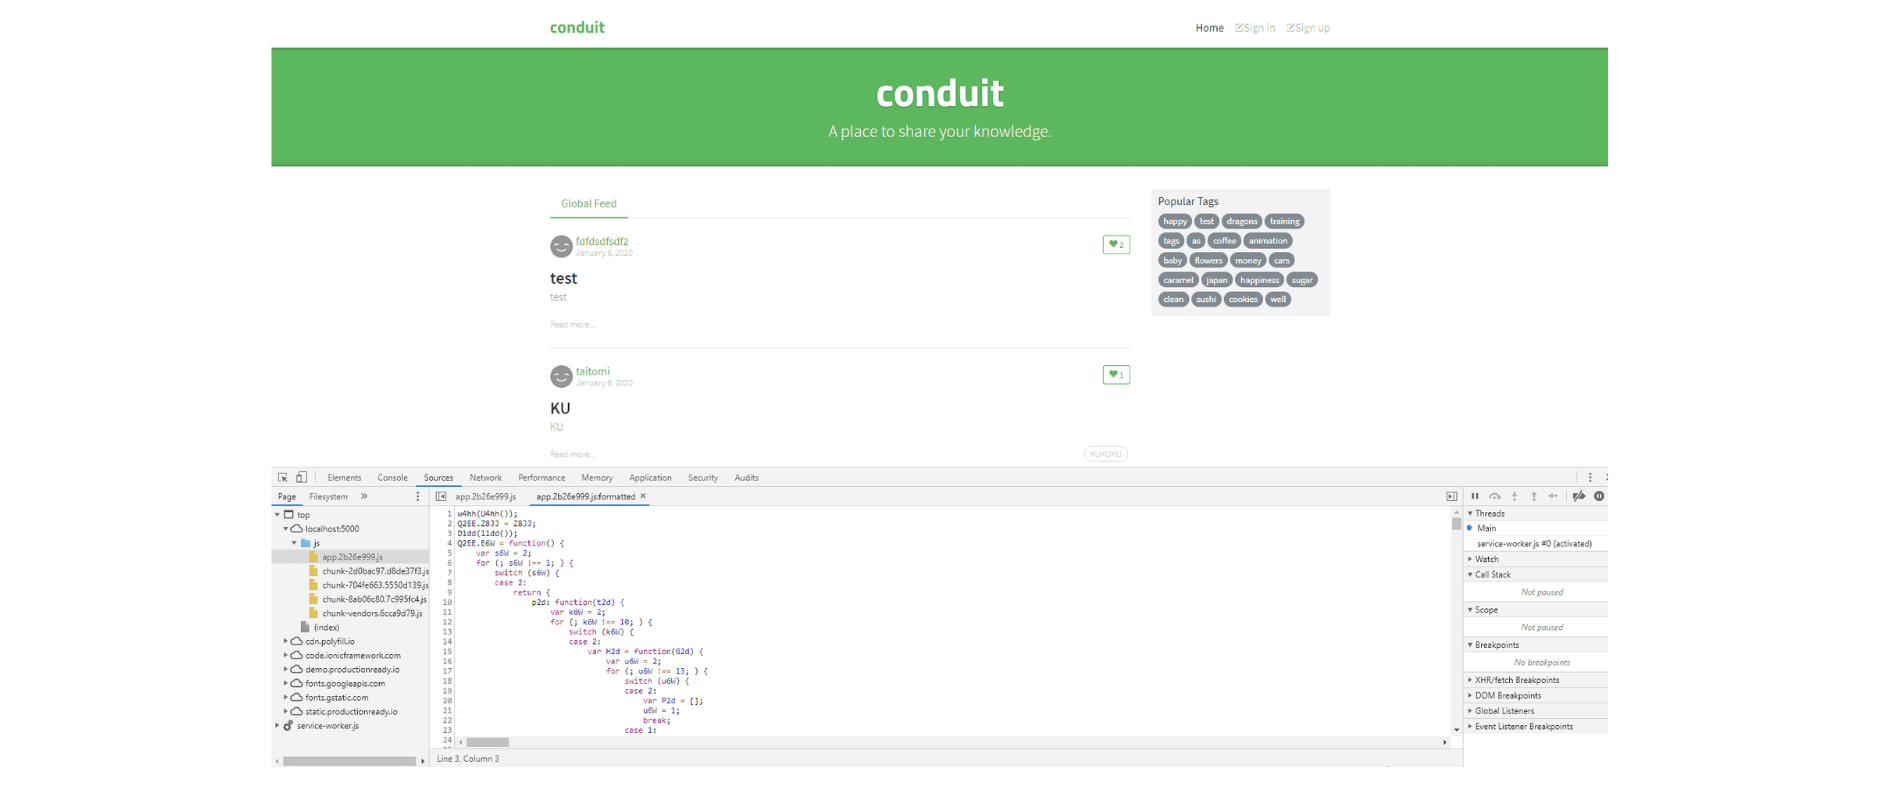
A development build of the app will start, and you can access it on localhost:8080. You should see the “Conduit” app running.
jscrambler-blog-protect-vue-app-conduit-example

Under the hood, our Vue application has this structure:

vue-realworld-example-app/
|-- babel.config.json
|-- jest.config.json
|-- package-lock.json
|-- package.json
|-- postcss.config.js
|-- yarn.lock
|-- dist/
|-- node_modules/
|-- public/
|-- src/
|-- static/
|-- tests/
  • Package.json contains all the configurations related to npm, such as dependencies, versions, and scripts.

  • The src directory features all the source code of the application. The sources are then built and packed into the dist directory. This is where our protected HTML and JavaScript files will be placed after the build.

Integrating Jscrambler with the Vue CLI

The first step of our integration is installing the Jscrambler API Client. Run:

npm i jscrambler --save-dev


To integrate Jscrambler in our application’s build process via the CLI, we need to create a CLI hook and jscrambler in the scripts section of package.json. The section should look like this:

"scripts": {
  "build": "cross-env BABEL_ENV=dev vue-cli-service build && jscrambler",
  "lint": "vue-cli-service lint",
  "serve": "cross-env BABEL_ENV=dev vue-cli-service serve",
  "test": "cross-env BABEL_ENV=test jest --coverage"
},


The specific “build”: “cross-env BABEL_ENV=dev vue-cli-service build && jscrambler” hook will trigger the jscrambler command after the build process is finished.

Earlier, we generated a .jscramblerrc settings file. Now, place it in the project’s root folder.

To integrate it with vue-cli, we need to add two new fields: filesSrc and filesDest (see below). Your final .jscramblerrc file should look like this:

{
 "keys": {
   "accessKey": <ACCESS_KEY_HERE>,
   "secretKey": <SECRET_KEY_HERE>
 },
 "applicationId": <APP_ID_HERE>,
 "filesSrc": [
   "./dist/**/*.html",
   "./dist/**/*.js"
 ],
 "filesDest": "./",
 "params": [
   {
     "name": "whitespaceRemoval"
   },
   {
     "name": "identifiersRenaming",
     "options": {
       "mode": "SAFEST"
     }
   },
   {
     "name": "dotToBracketNotation"
   },
   {
     "name": "deadCodeInjection"
   },
   {
     "name": "stringConcealing"
   },
   {
     "name": "functionReordering"
   },
   {
     "options": {
       "freq": 1,
       "features": [
         "opaqueFunctions"
       ]
     },
     "name": "functionOutlining"
   },
   {
     "name": "propertyKeysObfuscation"
   },
   {
     "name": "regexObfuscation"
   },
   {
     "name": "booleanToAnything"
   }
 ],
 "areSubscribersOrdered": false,
 "applicationTypes": {
   "webBrowserApp": true,
   "desktopApp": false,
   "serverApp": false,
   "hybridMobileApp": false,
   "javascriptNativeApp": false,
   "html5GameApp": false
 },
 "languageSpecifications": {
   "es5": true,
   "es6": false,
   "es7": false
 },
 "useRecommendedOrder": true,
 "jscramblerVersion": "6.<X>"
}


You can also change filesSrc to match the files you need or want to protect. We recommend protecting the .html and .js files. With a better understanding of the project, you may identify what is critical and essential to protect.

By using filesDest: ‘./’, the files we send to protect will be overwritten by their protected version.

We are ready to protect our code and build our application via the CLI.

npm run build


This will create the protected production files in the dist folder.

All your HTML and JavaScript files are protected with Jscrambler against code theft and reverse engineering.

Feel free to jump to the Testing the Protected Vue App section below, where we will run the protected app and inspect our source code.

webpack

Setting Up an Example App

Due to the popularity of webpack among developers, your Vue project may be using webpack to bundle the application files. With that in mind, let’s quickly set up a Vue app with webpack using npm:

npm install -g vue-cli
vue init webpack my-project
cd my-project
npm install
npm run dev


Using the last command, you should see the newly created boilerplate app running on localhost:8080, as shown below:
jscrambler-blog-protect-vue-app-vue-webpack-boilerplate

Integrating Jscrambler with webpack

We can integrate Jscrambler using Jscrambler’s webpack plugin.

This plugin will use the configurations you specified earlier in the .jscramblerrc file. As such, we first need to place it in the project’s root folder. Your file should look like this:

{
 "keys": {
   "accessKey": <ACCESS_KEY_HERE>,
   "secretKey": <SECRET_KEY_HERE>
 },
 "applicationId": <APP_ID_HERE>,
 "params": [
   {
     "name": "whitespaceRemoval"
   },
   {
     "name": "identifiersRenaming",
     "options": {
       "mode": "SAFEST"
     }
   },
   {
     "name": "dotToBracketNotation"
   },
   {
     "name": "deadCodeInjection"
   },
   {
     "name": "stringConcealing"
   },
   {
     "name": "functionReordering"
   },
   {
     "options": {
       "freq": 1,
       "features": [
         "opaqueFunctions"
       ]
     },
     "name": "functionOutlining"
   },
   {
     "name": "propertyKeysObfuscation"
   },
   {
     "name": "regexObfuscation"
   },
   {
     "name": "booleanToAnything"
   }
 ],
 "areSubscribersOrdered": false,
 "applicationTypes": {
   "webBrowserApp": true,
   "desktopApp": false,
   "serverApp": false,
   "hybridMobileApp": false,
   "javascriptNativeApp": false,
   "html5GameApp": false
 },
 "languageSpecifications": {
   "es5": true,
   "es6": false,
   "es7": false
 },
 "useRecommendedOrder": true,
 "jscramblerVersion": "6.<X>"
}


Now, let’s install Jscrambler’s webpack plugin as a dev dependency:

npm i --save-dev jscrambler-webpack-plugin


To integrate Jscrambler into our Vue application’s build process via Webpack, we need to add it to the webpack.prod.conf.js file, which is inside the build directory. First, by adding this line:

const JscramblerWebpack = require('jscrambler-webpack-plugin');


And then by adding the Jscrambler webpack plugin at the end of the plugin array, it looks like this:

plugins: [
    // other plugins
    new JscramblerWebpack({
      enable: true, // optional, defaults to true
      chunks: ['app'] // protect just our app.js file
    })
  ]


Now we run our production build:

npm run build


Our protected app files are at /dist/static/js/app.<HASH>.js.

Testing the Protected Vue App

As a final step, let’s check if our Vue app is running successfully with the newly-protected source code. Start by installing the required dependencies:

npm i -g serve


Next, deploy the app build files to a local server:

serve -s dist


Now, as you should be able to see on the terminal, you can run this server on localhost:5000.

You can now check what your protected files look like. This can be achieved simply by opening the browser’s debugger and opening the files from the “Sources” tab. The protected code should look like this:
jscrambler-blog-protect-vue-app-protected

Final Remarks

Vue is a simple, fast, and effective framework for creating dynamic user interfaces and is also a great way of leveraging component-based applications.

Integrating Jscrambler into Vue’s build process is straightforward and allows you to ensure that your JavaScript code is always protected in production against reverse engineering or tampering.

In this tutorial, we only showed a simpler protection template (Obfuscation); however, you can achieve higher levels of security, namely by using the Self-Defending template and by fine-tuning the protection to match your specific use case.

Don’t forget that Jscrambler comes with premium support, so be sure to contact us if you have any questions!

The Data Processing Holy Grail? Row vs. Columnar Databases

Columnar databases process large amounts of data quickly. Explore how they perform when compared with row DBs like Mongo and PSQL.

Data has become the #1 resource in the world, dethroning oil as the most valuable asset. However, it may only reach its full potential if well processed. That is, extracted, stored, and analyzed dynamically and productively.

Throughout this blog post, we will cover the fundamentals for you to build efficient data processing mechanisms, emphasizing analytical solutions. Let’s look at the two main data processing systems to kick things off: Row and Columnar databases.

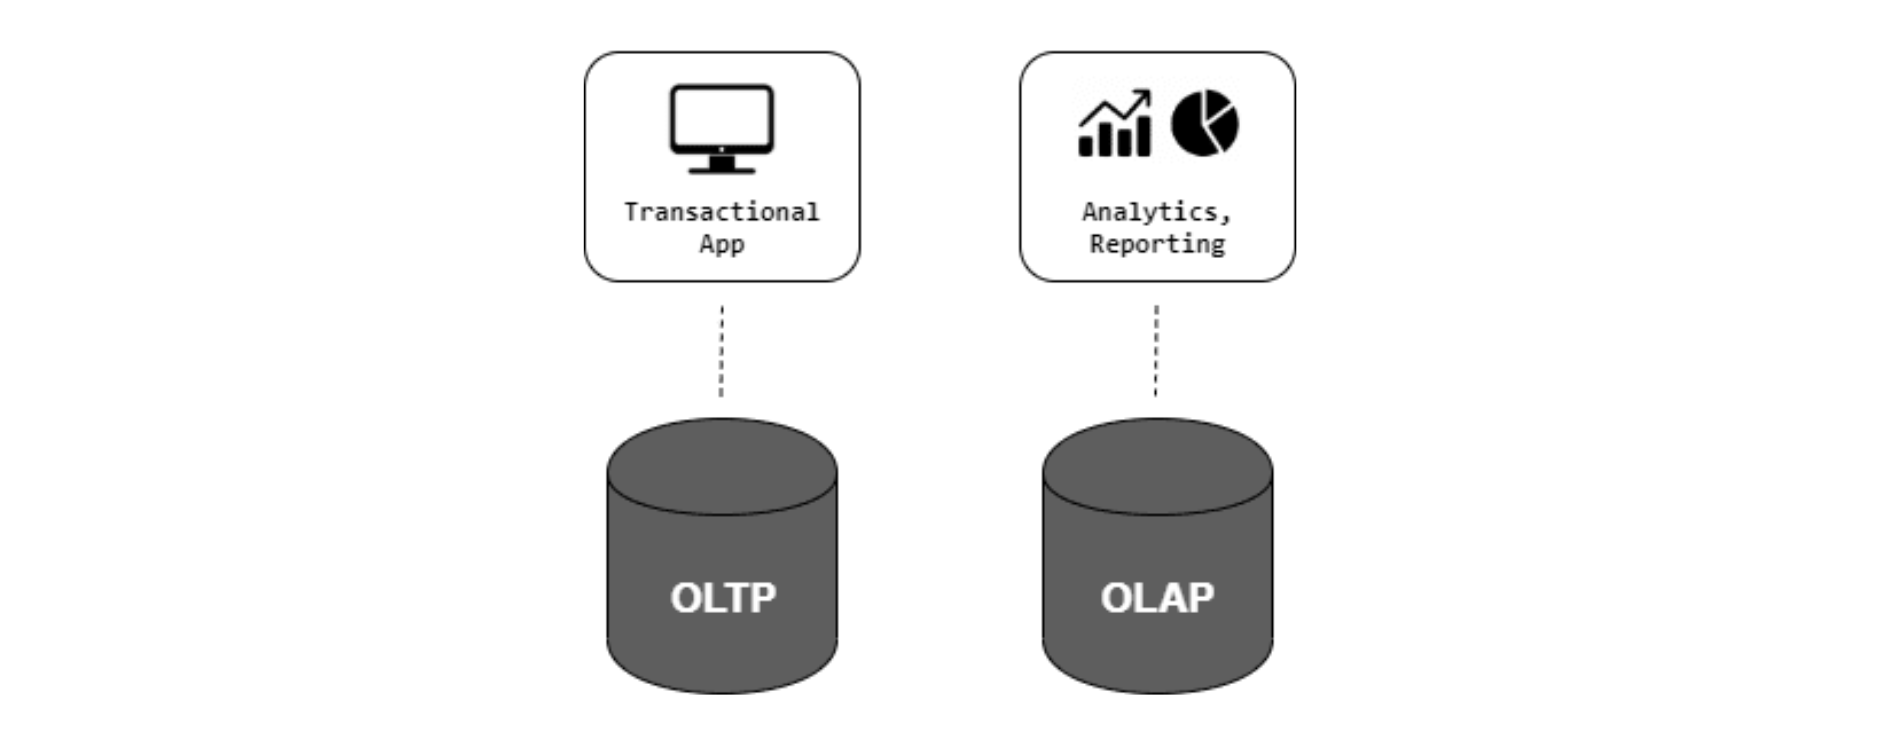
OLTP vs. OLAP

OLTP

OLTP, or online transaction processing, is the most traditional processing system.

It can manage transaction-oriented applications and is characterized by many short, atomic database operations, such as inserts, updates, and deletes, which are common in your day-to-day application.

Common examples include online banking and e-commerce applications.

OLAP

OLAP, or online analytical processing, manages historical or archival data. It is characterized by a relatively low volume of transactions.

OLAP systems are typically used for analytical purposes to extract insights and knowledge from bulk data merged from multiple sources.

Unlike OLTP, OLAP systems aim to have a limited number of transactions, each consisting of bulk reads and writes.

Data warehouses are the typical infrastructure to maintain these systems.

OLTP and OLAP: pros and cons

OLTP

OLAP

Low volume of data

A high volume of data

A high volume of transactions

Low volume of transactions

Typically normalized data

Denormalized data

ACID compliance

Not necessarily ACID-compliant

Require high availability 

Don’t usually require high availability


A small explanation below:
olap-schematics-example
Hopefully, by vnow, you can distinguish both data processing systems easily.

OLTP and OLAP systems have been around for quite some time, but recently, with the boom of data mining and machine learning techniques, the demand for OLAP systems has increased.

Choosing a suitable technological infrastructure to host either system is crucial to ensuring your system or application delivers the best performance for your needs.

Row vs. Columnar Databases

You might have never heard of the terms row and columnar associated with databases, but you have seen them before.

Row-oriented databases are your typical transactional ones, able to handle huge transactions, whereas column-oriented databases usually have fewer transactions and a higher volume of data.

By now, you have probably already guessed which type of database is more suitable for each processing system.

Row-oriented DBs are commonly used in OLTP systems, whereas columnar ones are more suitable for OLAP. Some examples include:

Row-oriented

Columnar

MySQL

Amazon Redshift

PostgreSQL

MariaDB

Oracle

ClickHouse

What makes row and columnar databases different internally?

The difference between both data stores is how they are physically stored on disk.

HDDs are organized in blocks and rely on expensive head-seek operations; thus, sequential reads and writes tend to be much faster than random accesses.

Row-oriented databases store the whole row in the same block, if possible. Columnar databases store columns in subsequent blocks.

But what does this mean in practice?

Amazon Redshift provides a simple and concise explanation highlighting the differences between both databases.

The figure below consists of row-wise database storage, where each row is stored in a sequential disk block.

Picking the ideal block size is essential to achieving optimal performance since having a block size that’s too small or too big results in inefficient use of disk space.

amazon-redshift-jscrambler-example

The figure below portrays columnar database storage, where each disk block stores the values of a single column for multiple rows.

In this example, columnar storage requires one-third of the I/O disk operations to extract the columns’ values, compared to a row-wise database.

Redshift-figure-database

Performance Example

Let’s look at a simple example to understand the differences between both databases.

Consider a database storing 100GB of data, with 100 million rows and 100 columns (1GB per column).

For simplification purposes, consider that the database administrator is a rookie and hasn’t implemented any indexes, partitioning, or other optimization processes on the database. With this in mind, for the analytical query:

What is the average age of males?

We would have these possibilities:

Row-wise DB: Has to read all the data in the database (100) – 100GB to read.
Columnar DB: Has to read only the columns age and gender – 2GB to read.

This is an extreme example. Hardly any database will completely lack indexes or other optimization processes, but the goal is to give you an overview of columnar databases’ true potential for analytical purposes.

Row and Columnar Databases Wrap-up

Now that you have an overview of row-oriented and columnar databases, as well as the main differences between them, highlighting their advantages (green) and disadvantages (red) shouldn’t be too hard:

Row-oriented DB: for OLTP

Columnar DB: for OLAP

Performs fast multiple read, write, update, and delete operations

Performs slowly if required to perform multiple read, write, update, and delete operations

Bulk operations (read and write) aren’t fast

Performs fast bulk operations (mostly read and write)

ACID compliance

No ACID compliance

Typically inefficient data compression

Improved data compression: Columns are individually compressed, and each one is of the same type

High storage size (indexes, etc.)

Low storage size

Typically require multiple indexes, depending on queries

Relies on a single index per column (self-indexing)

It is easy to add a single row (1 insert operation)

It is hard to add a single row (multi-column insert operation)

It is hard to add a single column (multi-row insert operation)

It is easy to add a single column (1 insert operation)

Benchmarks

Everyone loves theoretical concepts (well, at least let’s suppose so), but why not put them into practice?

With this in mind, we set up an experiment to compare their performance in a real-world scenario. We used different technologies to compare their performance on OLTP and OLAP systems. The technologies selected were:

OLTP

  • MongoDB is a NoSQL database widely used in several applications. Excels at delivering fast and dynamic transactions, made possible by its schema-free, document-oriented mechanism.

  • PostgreSQL is a free and open-source database that is widely dynamic and extensible. Uses range from small applications to data warehouses.

  • Citus is a “worry-free Postgre built to scale out”. It is a PostgreSQL extension that distributes data and queries across several nodes.

OLAP

  • Cstore_fdw is an open-source Postgres extension developed by Citus Data. It transforms the original row-oriented Postgres database into a columnar database.

  • ClickHouse is a recent, open-source columnar database developed by Yandex. It claims to be capable of delivering real-time analytical data reports using a SQL-like syntax.

Queries Performance

To conduct the benchmark, we used a database with approximately 135 million records of web event logs distributed across four different tables.

All the technologies were used on-premise, on a local machine with an i5-9600k processor clocked at 3.70 GHz coupled with 32GB of RAM.

We made a set of queries typically considered analytical (i.e., focus on columns rather than rows). To make the process as homogeneous as possible, for each query we ran, we flushed the respective storage engine’s cache and restarted the machine each time we switched technology.

For the row-wise databases, we built the most efficient indexes for the queries we created. We built no indexes for the columnar storage other than the ones created by default upon populating these databases. The results are displayed in the table below.

Queries (s)

Mongo DB

PSQL

Citus

PSQL cstore_fdw

Click House

Q1: Total events

1

92

46

3

< 1

Q2: Total events of type ‘A’

207

94

46

3

< 1

Q3: Daily events distribution

462

87

51

18

3

Q4: Events distribution by operation

357

96

15

8

< 1

Q5: Top 10 events distribution by operation

288

91

26

5

< 1

Q6: # of events containing images

266

99

97

216

4

Q7: # of events containing scripts

270

276

143

456

14


By looking at the data above, it is no surprise that columnar databases (i.e., PostgreSQL cstore_fdw and ClickHouse) have considerably shorter running times when compared to the other technologies. However, cstore_fdw is under-optimized for queries that require joining tables (e.g., left join) and performing a text search, as denoted by the running times for queries Q6 and Q7.

ClickHouse, on the other hand, outperforms every single technology by far, especially when it comes to cstore_fdw’s caveats: joins combined with text search.

While ClickHouse doesn’t inherently support joining tables. This issue can be bypassed by using subqueries.

The image below displays a comparative view of all the technologies and their performance on the analytical queries (lower is better).

clickhouse-comparative-technologies

Storage Size

As you might recall from our first comparison table, columnar storage has improved compression mechanisms over row-wise databases. This happens because each column, compressed as a single file, has a unique data type.

Besides, these databases don’t have indexes besides the one created by default for the (primary) key.

Such features allow for highly efficient storage space, as shown on the graph below, with ClickHouse taking 10GB of space, followed by the raw data itself with 76GB occupied, and, finally, PostgreSQL, with 78GB of taken storage space. This is a 780% increase over ClickHouse.
data-processing-storage-size-graphNote that for PostgreSQL (and other row-wise databases), besides the space data occupies, indexes also contribute to the substantial increase in storage.

Final Remarks

Columnar databases are rather incredible at what they do: processing massive amounts of data in seconds or even less. There are many examples (Redshift, BigQuery, Snowflake, MonetDB, Greenplum, MemSQL, ClickHouse) with optimal performance for your analytical needs.

However, their underlying architecture introduces a considerable caveat: data ingestion. They offer poor performance for mixed workloads that require real-time high throughput. In other words, they can’t match a transactional database’s real-time data ingestion performance which allows the insertion of data into the system quite fast.

Combining fast ingestion and querying is the holy grail of data processing systems.

Achieving an optimal mixed workload is probably not possible at this point since there is no single do-it-all technology that excels at both. Having a database for each purpose is the typical way to go. However, it limits the performance of the whole system.

Data processing is a complex but interesting technical design area. We firmly believe that scalable real-time high-throughput analytical databases are possible, but they don’t exist.

Yet.

Is the Enterprise on the Brink of a Global Web Supply Chain Attack?

Web supply chain attacks are a real security threat for which the enterprise is vastly unprepared.

The security threats of relying on third-party code are mostly known within the scope of Magecart attacks, which consist of attackers injecting malicious code into third-party scripts to skim the credit card details of E-Commerce shoppers.

While Magecart is still a growing threat and deserves consideration, too little attention is paid to a different type of third-party code: npm packages.

Too many dependencies, too large an attack surface

NPM itself tells us that the average web app today contains over 1,000 code dependencies, with some breaching the 2,000 mark.

Security-wise, each of these pieces of third-party code can serve as an attack vector to inject malicious code into applications. A recent study by Markus Zimmermann et al. provided much-needed insight into just how serious a security threat this practice of reusing code poses to the industry as a whole.

To frame why these threats exist in the first place, this team of researchers pinpoints some characteristics of the npm ecosystem, one of which is the abnormally large incidence of code reuse when compared to other ecosystems, which I mentioned above. Apart from this, two other characteristics play an important role: the emphasis on micropackages and the lack of privilege separation.

The reliance on micropackages is especially relevant because, while they comprise 47% of all packages, they simply contain a few lines of code, usually because they either perform trivial tasks or are used to call other dependencies. However small and innocuous micropackages may appear, individually they carry the same security threat as more complex packages because their dependency chains are just as long.

When we take a deeper look at the JavaScript ecosystem’s dependency chains, we can visualize just how large an attack surface modern JS applications display.

The study by Zimmermann et al. found that, on average, an npm package has 80 dependencies of its own. While simply multiplying this figure by the 1,000 transient dependencies of the average web app is not accurate by itself (different packages often share the same dependencies), we can safely conclude that, just by getting to the second level of the web supply chain, we are already dealing with many thousands of code dependencies.

This brings us to the second and more important characteristic of the NPM ecosystem: the lack of privilege separation. Boiling this down means that all pieces of third-party code have the same privileges as code that is developed internally. Not only does this mean that the security of the average JavaScript application is scattered over thousands of different third parties, but it also means that it only takes a breach in one of them, no matter how small, to potentially launch a web supply chain attack.

When this same team of researchers further analyzed the actual maintainers of these packages, the overall finding was indeed concerning: 20 maintainer accounts can reach more than half of the ecosystem. A breach in one of these can essentially trigger a global supply chain attack.

All of these considerations wouldn’t show much cause for concern if this ecosystem was only used by non-commercial projects or even small companies; what magnifies their importance is that every single Fortune 500 company relies on the NPM ecosystem.

Enterprises whose apps often amass millions of users and handle sensitive data, such as credit card details or protected health information, are paydirt gold for attackers.

We have seen enough examples of web supply chain attacks to know that not enough is being done to mitigate these attacks. Mainstream security measures are still falling short. And the key to a suitable response may come from a change of mindset.

A new security mindset: shifting from prevention to monitoring

There’s no doubt that the NPM ecosystem still has a long road ahead, security-wise.

The study by Zimmermann et al. urges NPM to responsibly audit packages to ensure their source is trustworthy while vetting development accounts. Some progress has been made in this direction recently, namely with the addition of npm-audit to automatically warn developers of known vulnerabilities in each package.

However, when critical enterprise applications could be at stake and when millions of users could have sensitive data (such as financial or health details) stolen through client-side attacks, enterprises can’t afford to wait or trust. And yet, third-party code is here to stay. Solving this conundrum requires a change of mindset; there’s no infallible way of making sure that these third parties aren’t injecting malicious code. The most reasonable fallback, therefore, is to gain complete visibility of client-side threats.

By putting in place a web page monitoring solution, enterprises can react in real-time whenever a rogue third party starts injecting malicious code, automatically triggering security measures to stop the attack.

Third-party code is still breaching companies. Malicious code runs undetected for months and results in significant business damage. It’s high time that the enterprise took concrete action toward minimizing this security threat, using packages from the JavaScript npm ecosystem and monitoring the client side for malicious code.

This article was published on HelpNet Security and was edited to contain additional relevant insights from the study.