Implementing Google reCAPTCHA V2 for Next js Application
March 5th, 2024 | By Jay Raj | 11 min read

In this tutorial, you'll learn how to implement Google reCAPTCHA v2 into your Next.js application.
Google reCAPTCHA v2 into a Next.js application
reCAPTCHA is a service that helps in identifying humans from bots. By using reCAPTCHA, we can reduce spam and bot attacks by a significant number. How does this work? Whenever Google gets suspicious about the visitor, it throws a challenge that can be easily solved by humans but is hard for bots to figure out.
To get started with using Google reCAPTCHA you need to get an API key pair. The key pair contains a site key and a secret. The site key is used to invoke the captcha on the website and create a token and the secret is used on the server side to verify the user response and token.
Now two types of captcha can be used on the client side:
reCAPTCHA v3
reCAPTCHA v2
We'll be using reCAPTCHA v2 and that too an invisible one. A visible captcha asks the user to tick a checkbox and if required it further asks for challenges. An invisible captcha doesn't require any checkbox to be checked and is invoked at the click of a button.
So let's start by registering the website to get the site key and secret.

Setting Up Google Recaptcha
Go to the admin console and register the website with the details as shown.
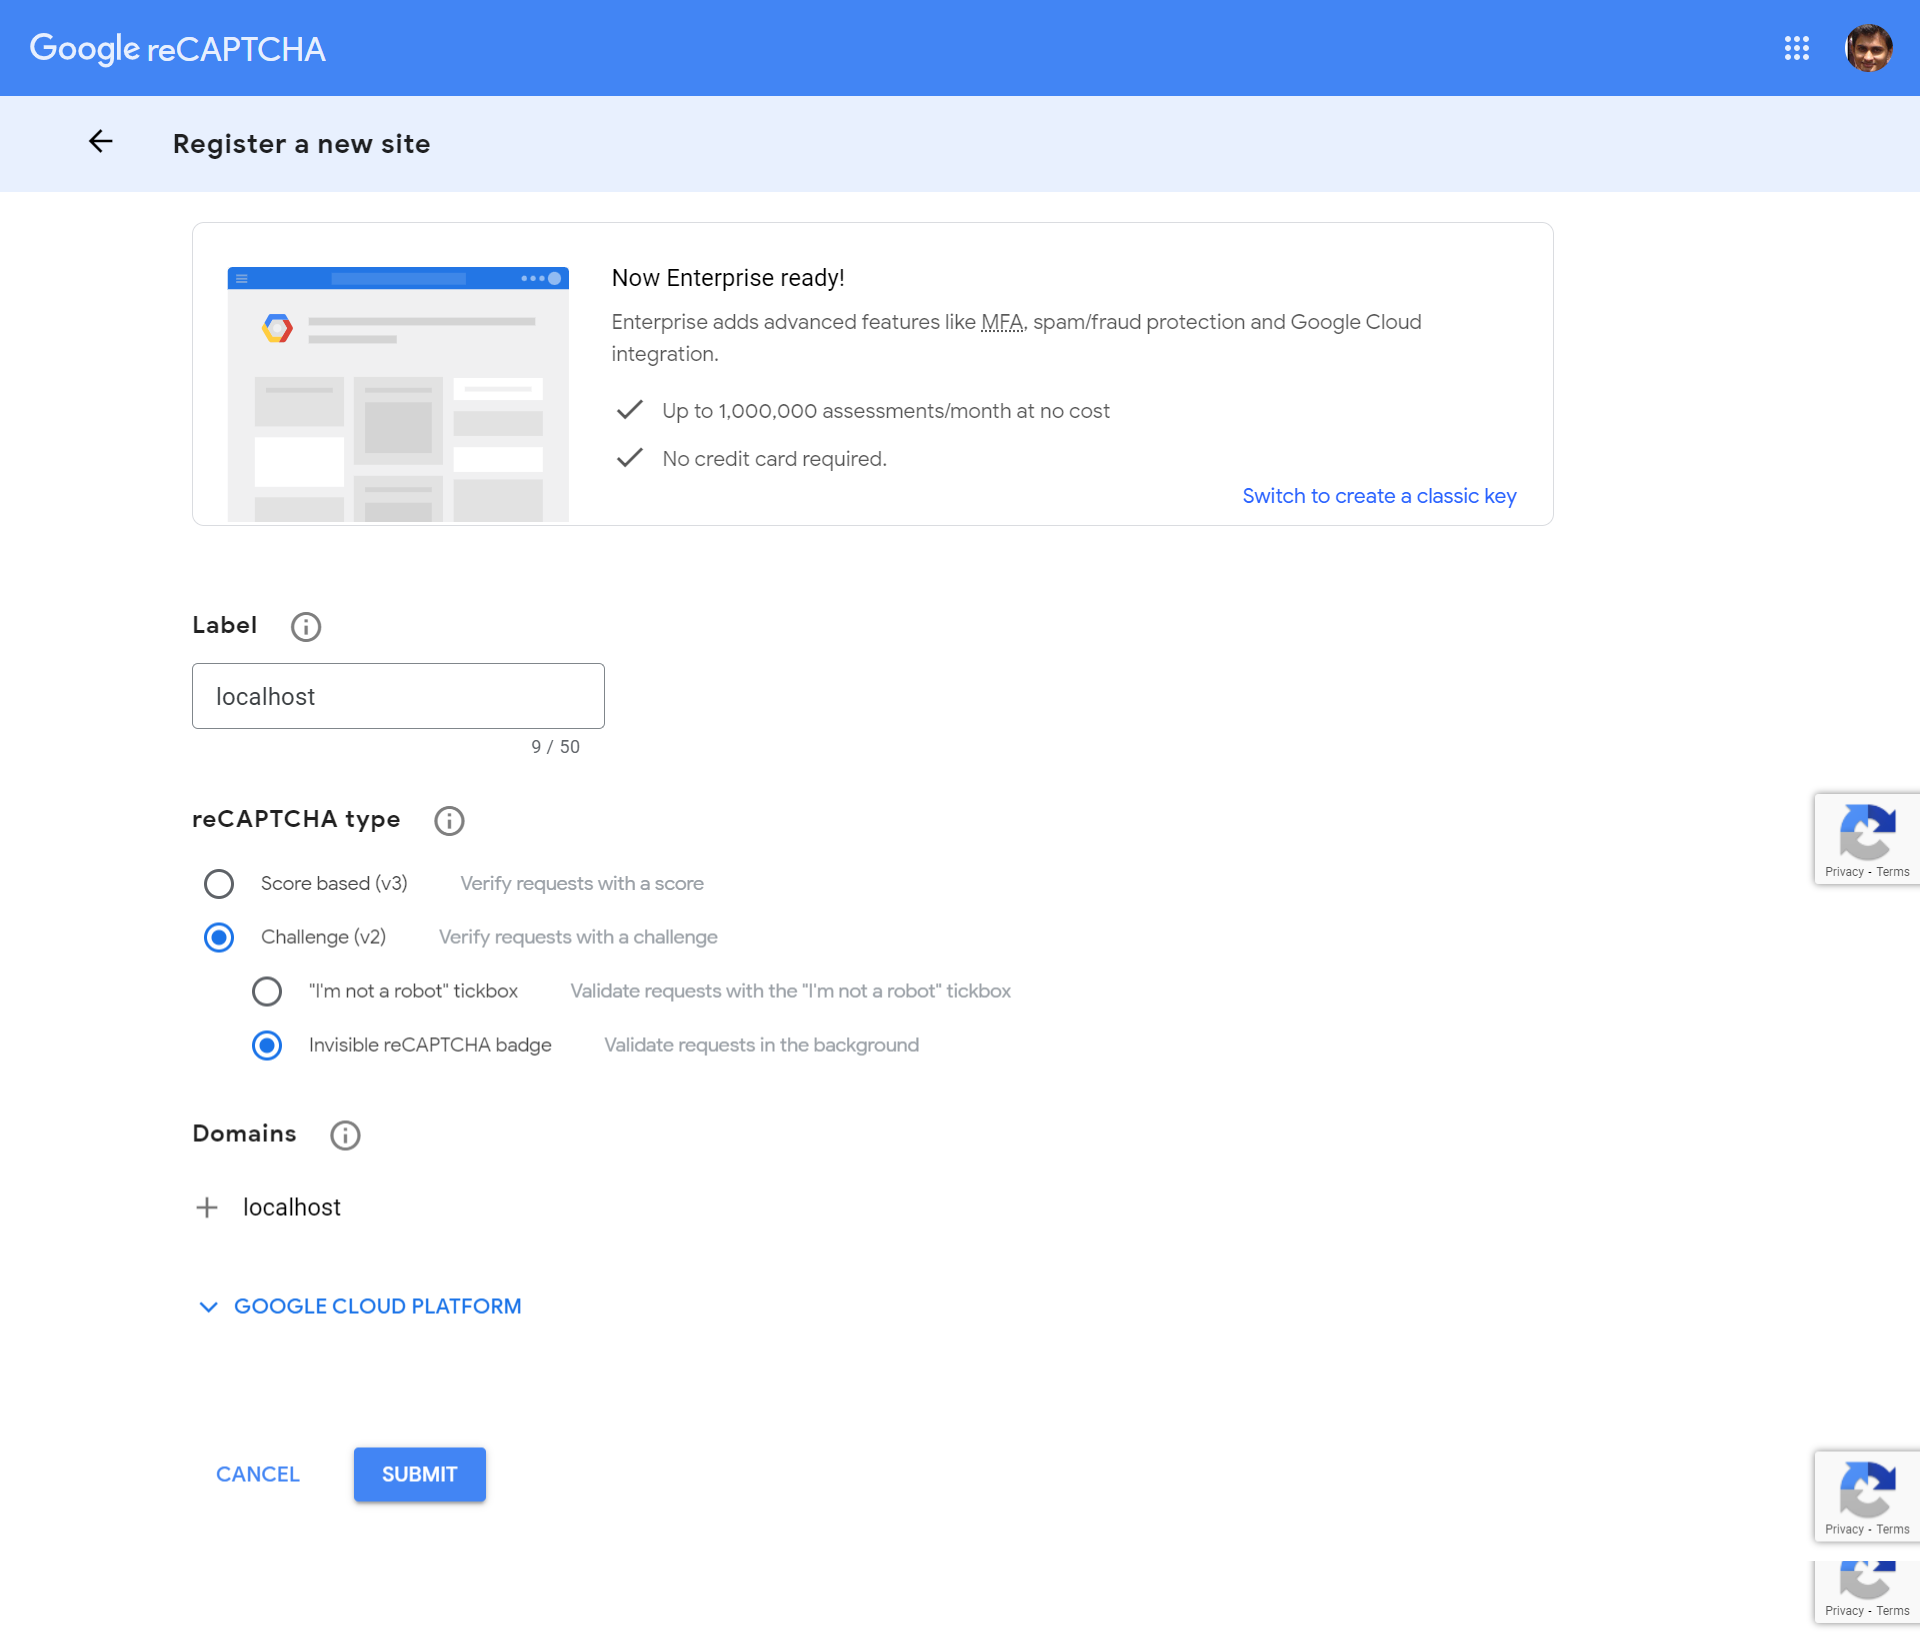
Click submit and you will get the required site key and secret.
Next, let's create the Next.js application.
Creating your Next.js Application
Make sure you have Node.js 16.14 or later installed in your system. We'll be using `create-next-app` to create the Next.js app. Start by installing it using `npx`.
bash
npx create-next-app@latest
The above would prompt you to enter a couple of details,
√ What is your project named? ... nextjs-captcha
√ Would you like to use TypeScript? ... Yes
√ Would you like to use ESLint? ... No
√ Would you like to use Tailwind CSS? ... No
√ Would you like to use `src/` directory? ... Yes
√ Would you like to use App Router? (recommended) ... No
√ Would you like to customize the default import alias (@/*)? ... No
Just make the selection as shown above to create a boilerplate code. Once done you can navigate to the project directory and run the application.
bash
cd nextjs-captcha
npm run dev
And you will have the project running at http://localhost:3000/.
Next, let's see how we can integrate reCAPTCHA into our Next.js app.
[LEARN MORE] How To Protect Next.js Apps with Jscrambler
Integrating Google reCAPTCHA in Next.js
We'll be using the 'react-google-recaptcha' module for integrating reCAPTCHA into our app. Let's start by installing the node module.
npm install react-google-recaptcha --save
npm install @types/react-google-recaptcha --save-dev
Along with the modules we also installed the required types for `react-google-recaptcha`.
Once the required modules are installed, you need to import and add the reCAPTCHA to the app layout.
Inside our `src/pages/_app.tsx` file import the `react-google-recaptcha`.
import ReCAPTCHA from "react-google-recaptcha";
Alongside the `Component` please add the `ReCAPTCHA` component as shown:
<ReCAPTCHA
       ref={recaptchaRef}
        size="invisible"
        sitekey="your site key"
        onChange={onChange}
        asyncScriptOnLoad={asyncScriptOnLoad}
      />
And here is how the entire `_app.tsx` file looks:
jsx
import '@/styles/globals.css'
import type { AppProps } from 'next/app'
import React from 'react';
import ReCAPTCHA from "react-google-recaptcha";

export default function App({ Component, pageProps }: AppProps) {

  const recaptchaRef :any = React.createRef();

  const onChange = () => {
    // on captcha change
  }

  const asyncScriptOnLoad = () => {
    console.log('Google recaptcha loaded just fine')
  }
  return (
    <>
      <Component {...pageProps} />
      <ReCAPTCHA
        ref={recaptchaRef}
        size="invisible"
        sitekey="your site key"
        onChange={onChange}
        asyncScriptOnLoad={asyncScriptOnLoad}
      />
    </>
  )
}
Save the above changes and go to your application. If the reCAPTCHA is loaded fine, you should be able to see the console log in the browser: `Google recaptcha loaded just fine`, and also there will be a Google reCAPTCHA icon on your web page.

Now Google reCAPTCHA is integrated into our Next.js app. Next, we need to see how to trigger the captcha on the form submission.
So, for that, we'll just create a simple form. On the form submit we'll trigger the captcha. If Google suspects anything is wrong, then a challenge would be thrown for the user to clear.
Creating the Form and triggering Captcha
We'll be adding a form inside the `index.tsx` file which is our Home component. Remove the existing code from inside the main block and replace it with the code below.
html
<main className={`${styles.main} ${inter.className}`}>
    <form>
      <input type="text" />
      <button onClick={handleClick}>Click</button>
    </form>
</main>
Here is how the complete `index.tsx` file looks:
jsx
import Head from 'next/head'
import { Inter } from 'next/font/google'
import styles from '@/styles/Home.module.css'
const inter = Inter({ subsets: ['latin'] })

export default function Home({ recaptchaRef }: any) {

  return (
    <>
      <Head>
        <title>Create Next App</title>
        <meta name="description" content="Generated by create next app" />
        <meta name="viewport" content="width=device-width, initial-scale=1" />
        <link rel="icon" href="/favicon.ico" />
      </Head>
      <main className={`${styles.main} ${inter.className}`}>
        <form>
          <input type="text" />
          <button onClick={handleClick}>Click</button>
        </form>
      </main>
    </>
  )
}
Add a click handler to the button inside the form as shown above. This button click with trigger the captcha to generate the token for verification.
Now you need to pass the reference to the captcha element defined in the `_app.tsx` file. So go to the `_app.tsx` file and pass the `recaptchaRef` as prop to the `Component`. Here is how it looks:
typescript
<Component  {...pageProps}  recaptchaRef={recaptchaRef}  />
Once it's passed you can destructure it inside the `index.tsx` file's `Home` component as shown below:
typescript
export default function Home({ recaptchaRef }: any) {
}
With a button click, you can access the `recaptchaRef` and trigger the captcha challenge using the `executeAsync` method to generate the token asynchronously.
typescript
import Head from 'next/head'
import { Inter } from 'next/font/google'
import styles from '@/styles/Home.module.css'
const inter = Inter({ subsets: ['latin'] })

export default function Home({ recaptchaRef }: any) {

  const handleClick = async ($event: any) => {
    $event.preventDefault();
    try {
      recaptchaRef.current.reset();
      const token = await recaptchaRef.current.executeAsync();
      console.log('token is ', token);
      if (token) {
        alert('Form submitted');
      } else {
        alert('Error getting token');
      }
    } catch (error) {
      console.log('error in handleClick ', error);
    }
  }

  return (
    <>
      <Head>
        <title>Create Next App</title>
        <meta name="description" content="Generated by create next app" />
        <meta name="viewport" content="width=device-width, initial-scale=1" />
        <link rel="icon" href="/favicon.ico" />
      </Head>
      <main className={`${styles.main} ${inter.className}`}>
        <form>
          <input type="text" />
          <button onClick={handleClick}>Click</button>
        </form>
      </main>
    </>
  )
}
As seen in the above code's `handleClick` method, we are using the `executeAsync` method to generate the token. If everything is ok, no challenge will be thrown. Now once the challenge is cleared and a token is generated, this token needs to be verified at the server side to confirm the authenticity of the token generated.
Captcha Verification
This section needs to be created on the server end where your APIs are being written. For the sake of this tutorial, I'll create a Next.js endpoint API endpoint where we'll verify the captcha token.
Create a file called `verifyCaptcha.ts` inside `pages/api`. In the `pages/api/verifyCaptcha.ts` create an `async` handler function. This will make an API call to the Google verification service to validate the authenticity of the generated token.
Here is the Google service endpoint that we'll be using to validate the captcha token: /recaptcha/api/siteverify . While making a POST request to the above endpoint you need to pass your client secret and the generated captcha token.
Here is how the `verifyCaptcha.ts` file looks:
typescript
import type { NextApiRequest, NextApiResponse } from 'next'

type Data = {
  success: boolean
}

export default async function handler(
  req: NextApiRequest,
  res: NextApiResponse<Data>
) {
  try{
    const secret = 'xxxxxxxxxxxxxxxxxxxxxxxxxx';
    const {response} = req.query;
    const fetchQuery = await fetch(`/recaptcha/api/siteverify?secret=${secret}&response=${response}`,{
      method: 'POST',
      headers: {
        'Accept': 'application/json',
        'Content-Type': 'application/json'
      },
    })
    const apiResponse = await fetchQuery.json();
    res.status(200).json({ success: apiResponse?.success })
  } catch(error:any){
    res.status(500).json({ success: false })
  }
}
In the above code please replace your secret with the one that you generated from the admin console.
Now on the button click once the token has been generated you need to make an API call to the `verifyCaptcha` API endpoint to check the authenticity of the captcha token.
In your `index.tsx` file modify the `handleClick` method as shown:
typescript
const handleClick = async ($event: any) => {
$event.preventDefault();
try {
recaptchaRef.current.reset();
const token = await recaptchaRef.current.executeAsync();
if (token) {
const apiQuery:any = await fetch(`/api/verifyCaptcha?response=${token}`)
const {success} = await apiQuery.json();
if(success){
alert('Form submitted successfully');
} else {
alert('Form submission failed');
}
} else {
alert('Error getting token');
}
} catch (error) {
console.log('error in handleClick ', error);
}
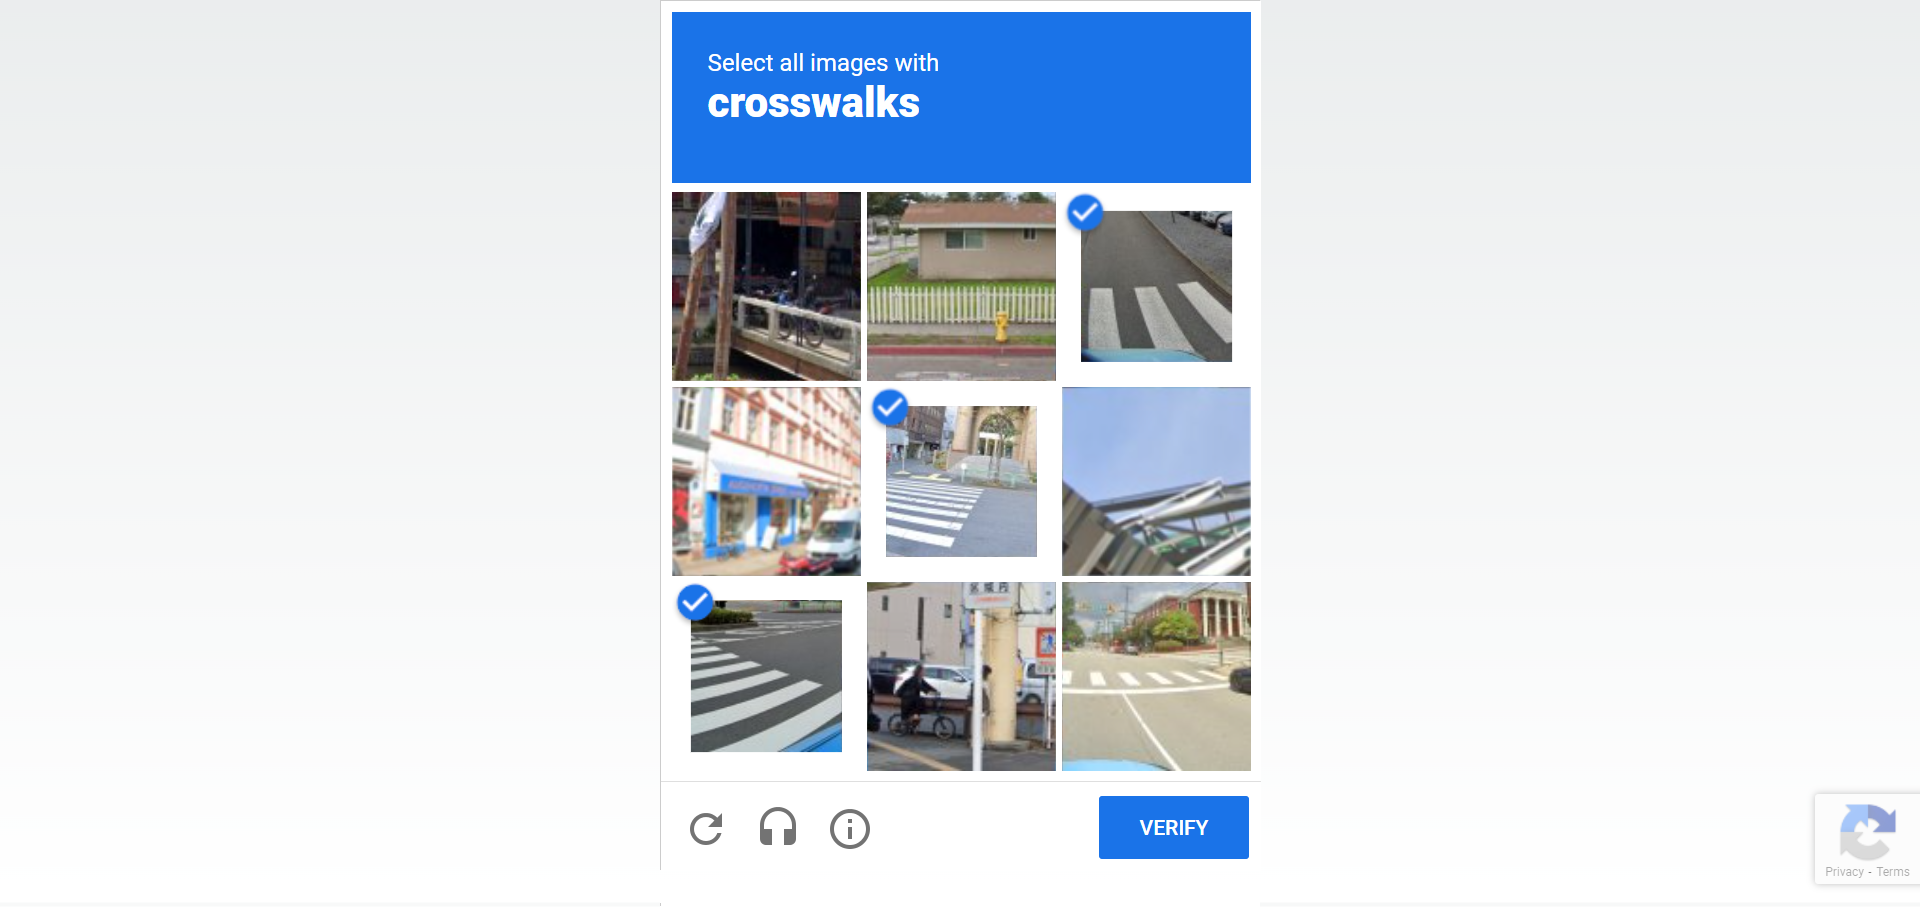
}Save the above changes and your Google invisible captcha is ready for testing. Once you click the button if the generated token is validated correctly, you'll get the form submission message. If the button click is challenged by the captcha you'll be required a pass a challenge like the one shown below,
Wrapping It Up
As we explored in this tutorial, Google reCAPTCHA is a service that we can use to limit bots and spam.
Along with reCAPTCHA v2, Google also provides reCAPTCHA v3 where the user is never interrupted by a challenge or click. However, it generates a score based on which we can decide if it's human or bot.
Jscrambler
The leader in client-side Web security. With Jscrambler, JavaScript applications become self-defensive and capable of detecting and blocking client-side attacks like Magecart.
View All ArticlesMust read next
Creating a Multi-Language Website with Next.js
As the online audience becomes increasingly diverse and global, the ability to communicate effectively in multiple languages has transformed into an essential requirement.
July 1, 2025 | By Ejiro Thankgod | 13 min read
Understanding Data Fetching in Next.js
In this tutorial, you'll learn how to fetch data in your Next.js application during SSR and client-side rendering.
April 11, 2023 | By Jay Raj | 7 min read
